

UNRAVELING THE MYSTERIS OF KNOTS
Clifford W. Ashley was an artist, author and sailor and was born in New Bedford, Massachusetts, in 1881.
Because of his boyhood environment, he took a keen interest in whaling and all things related to the sea. After attending art school in Boston, he found himself under the tutelage of Howard Pyle in Delaware, where he created book frontispieces (illustrations facing the cover page of the book) and illustrated magazine stories. He spent six weeks aboard a whaling ship in order to do research for an article about whaling for Harper’s Monthly magazine in 1904 and later published a series of instructional articles (“The Sailor and His Knots”), which proved to be the prelude to his later opus, The Ashley Book of Knots, a magnificent tome that made him famous in 1944.
“A rope will easily unravel when it’s cut, leaving the exposed ends to eventually fray. To keep this from happening, there are a couple of ways to resecure the strands together again: whipping and fusing.”
In it, Ashley warns: “A knot is either exactly right or it is hopelessly wrong. Make only one change and either an entirely different knot is made or no knot at all may result.”
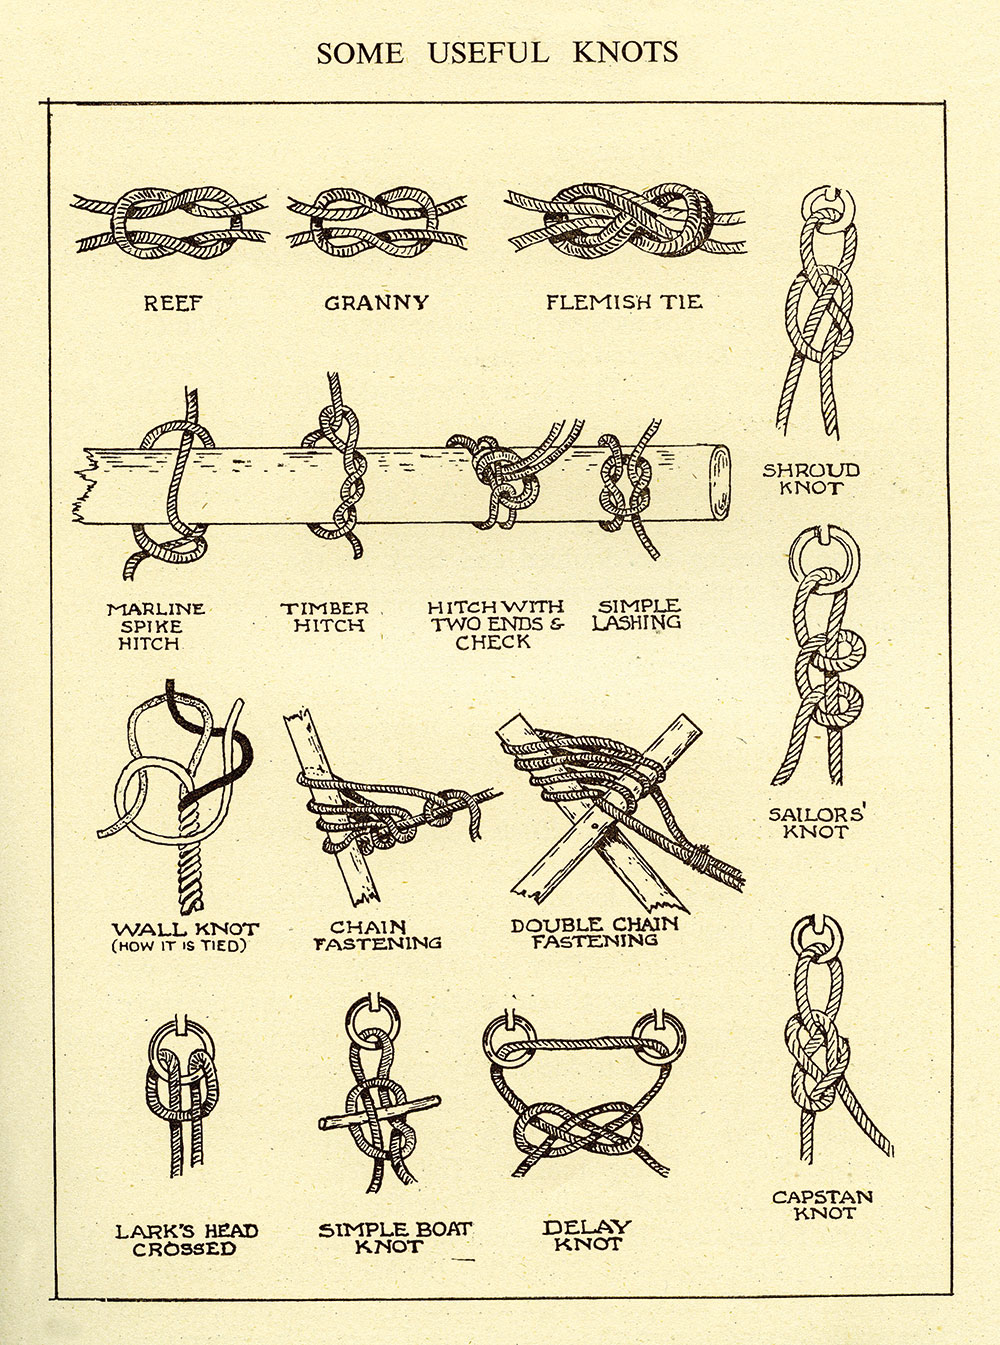
The book contains more than 3,900 knots categorized by type, including knot usage and the instructions for tying them. Nearly 75 years later, it remains the most comprehensive book in print about knots.
Types of Knots
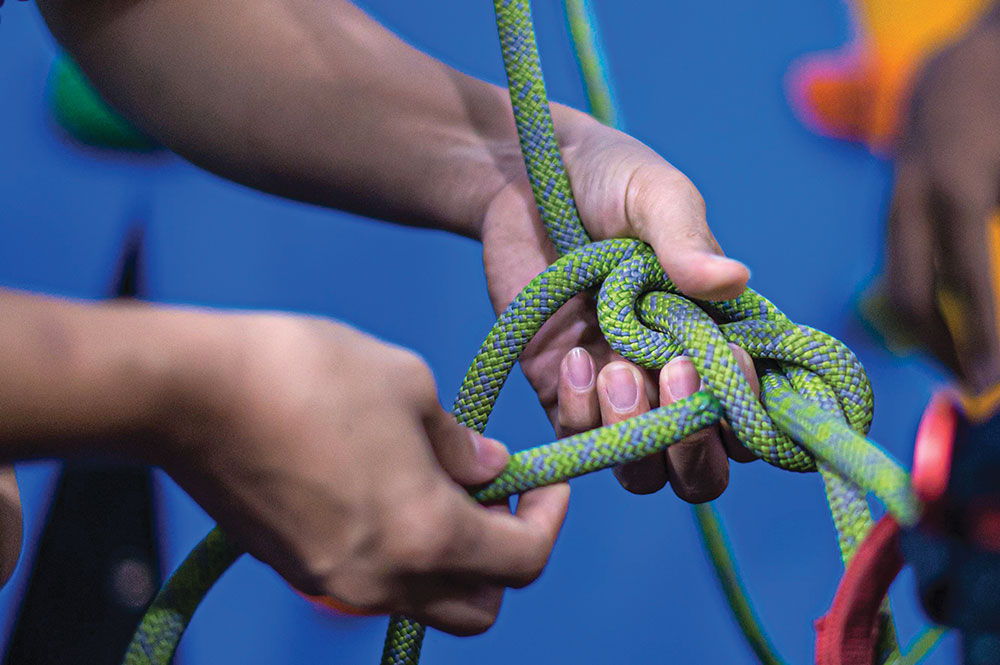
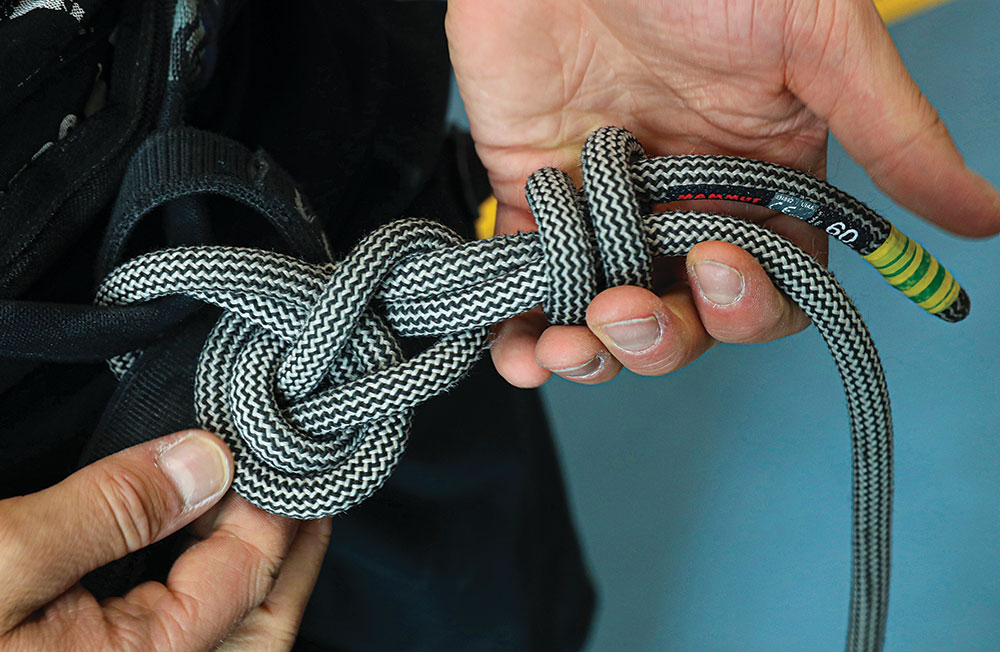
Although the art of tying both functional and fashionable knots has been around since man first needed to lash down his hut or tie off a fishing net to his hollowed-out canoe, knots have been both utilitarian and beautiful—an expression of both personal artwork and pride in workmanship. There are thousands of them; however, generally speaking, knots are used for five main reasons:
- Splicing two ropes together
- Lashing one object to another
- Tightening down or adding tension to a rope
- Making a loop to affix a moving object
- Hauling or hoisting objects
Knot Terms
- Bend: A knot that joins together two ropes or fishing lines.
- Bight: Made by folding a piece of rope so that the two parts lie alongside each other. When they’re tied near the rope’s end, the parts will be the “tail,” laying beside the “standing end” (please refer to additional definitions of these two terms below). A bight can be used to finish many knots, making them easy to untie by just pulling the tail.
- Bitter End: From the term, “bitts” (metal posts used for attaching mooring ropes), this term is applied to the tail end of a mooring line.
- Breaking Strength: The load at which the rope breaks
- Dressing a Knot: Arranging the components of the knot to optimize security and/or strength
- Fake (or Flake) a Rope: Lay out a rope neatly on the deck in a zig-zag pattern, ready for easy use
- Frapping Turns: Additional turns added in another axis to bind a knot
- Hitch: A knot that attaches a rope to something
- Hollow Braid: A loosely woven, single-braid rope that can be spliced
- Lay: The direction in which the strands of a rope twist
- Loop: Made when a rope forms a partial circle with the ends crossing each other
- Racking Turns: Lashing turns that pass between poles to better bind against the pole
- Round Turn: Two passes of a rope around an object to completely encircle it
- Slipped: A knot is slipped when it’s completed using a loop or loops (for example, shoelaces).
- Solid Braid: A tightly woven, single-braid rope that can’t be spliced
- Splice: A knot made using the strands of a rope rather than the whole rope
- Standing End: The long end; the part that isn’t knotted
- Stopper Knot: A knot in the end of a rope used to prevent fraying or to prevent the end from passing through a hole
- Strands: The major components of a rope
- Tail: The short end; the part getting knotted
- Turn: One pass of the rope around or through an object
- Whipping: A binding knot that’s used to prevent a rope’s end from fraying
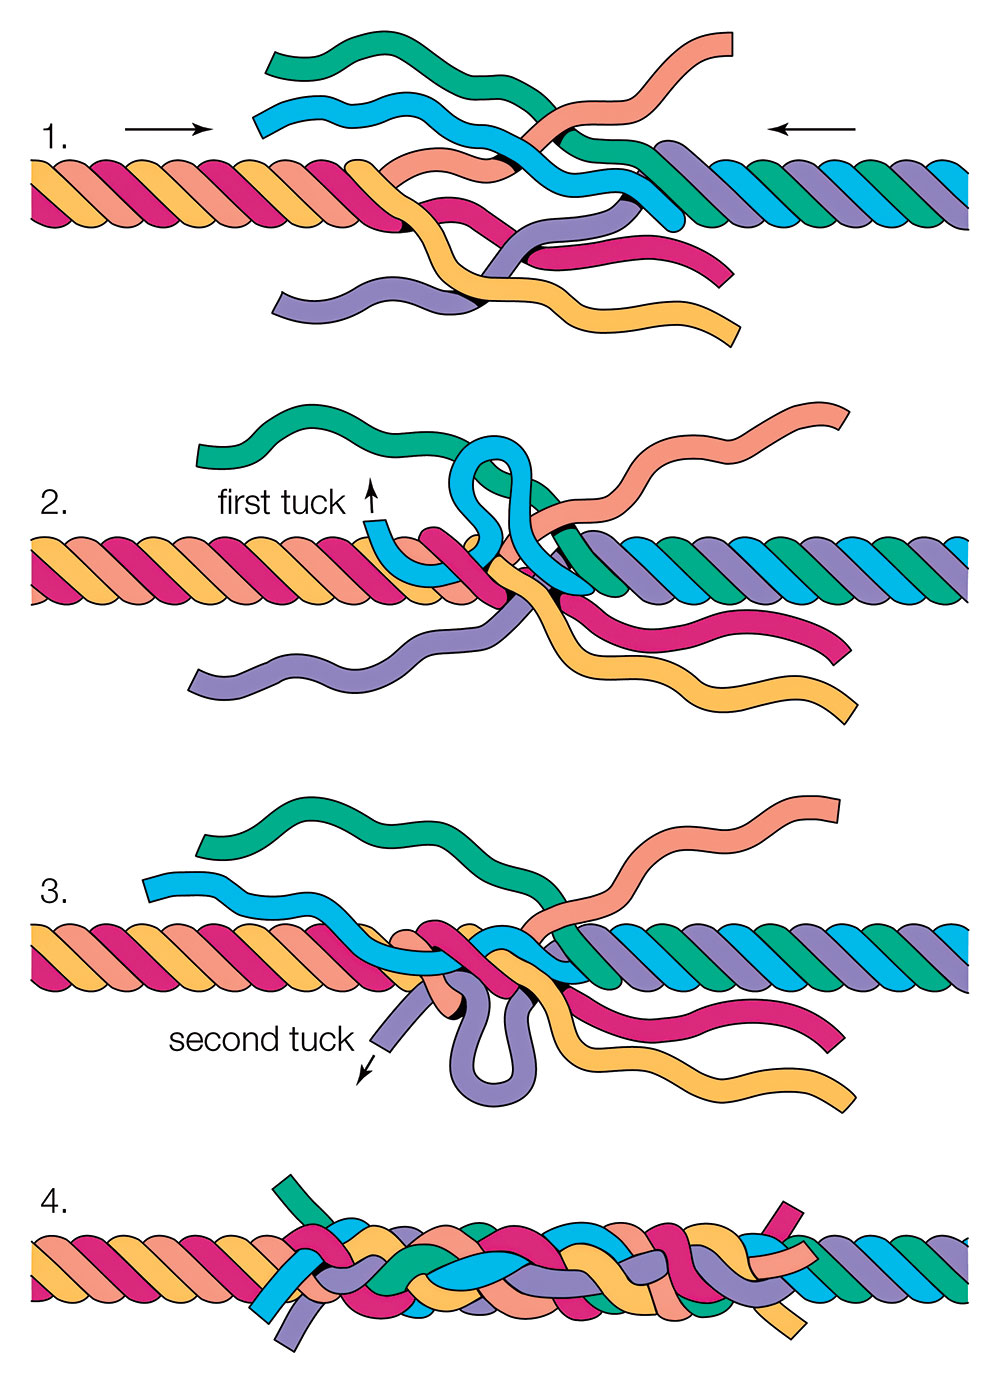
Whipping or Fusing a Rope
Because a rope is generally made by braiding together small strands of rope or fiber, it sometimes has a tendency to return to unbraided form; that is, it unravels, which is frustrating when trying to tie a knot. A rope will easily unravel when it’s cut, leaving the exposed ends to eventually fray. To keep this from happening, there are a couple of ways to resecure the strands together again: whipping and fusing.
“ … knots have been both utilitarian and beautiful—an expression of both personal artwork and pride in workmanship.”
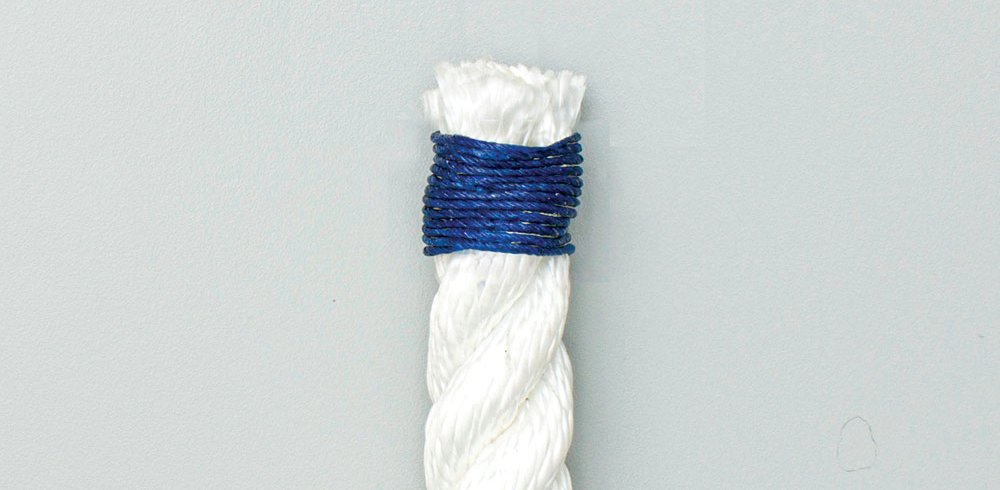
Whipping. Use twine, string, fishing line (or even dental floss) and lay it on the rope to form a loop. Wrap the string around the rope with neat, tight bindings until the length of the whipping is two or three times the diameter of the rope. Pull the working end of string through the loop. Pull hard on the other end of the string to draw it tight under the bindings. Cut off the loose ends.
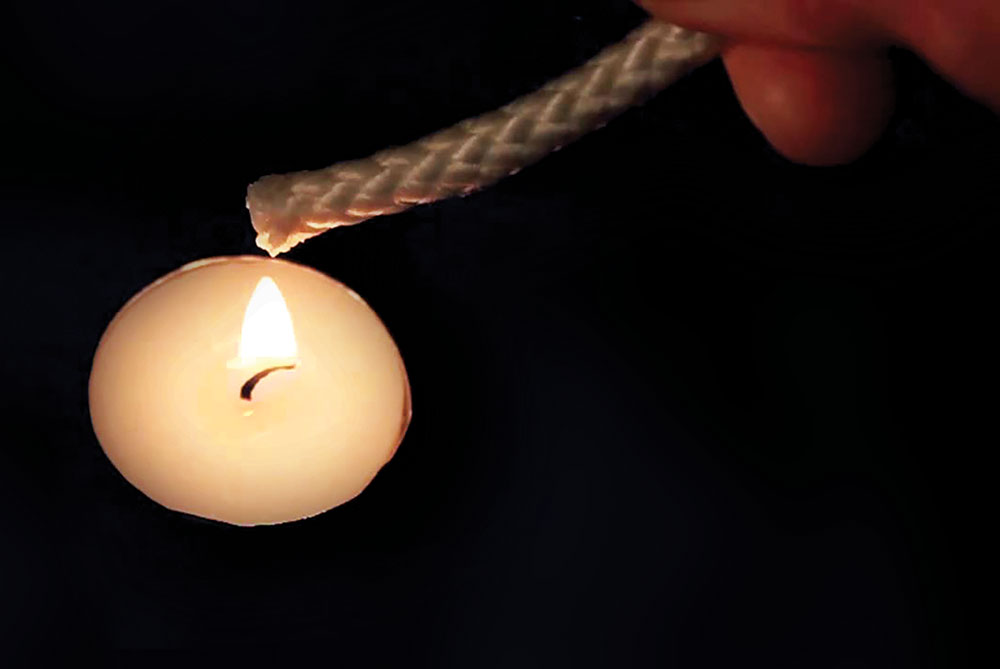
Fusing. For nylon, polyester or polypropylene rope only—not rope made of natural fibers. Tape up the rope around the area to be fused. Cut the rope in the middle of the tape so that the cut end of the rope is intact and smooth. Use a candle, lighter or another heat source to melt the ends of the strands together.
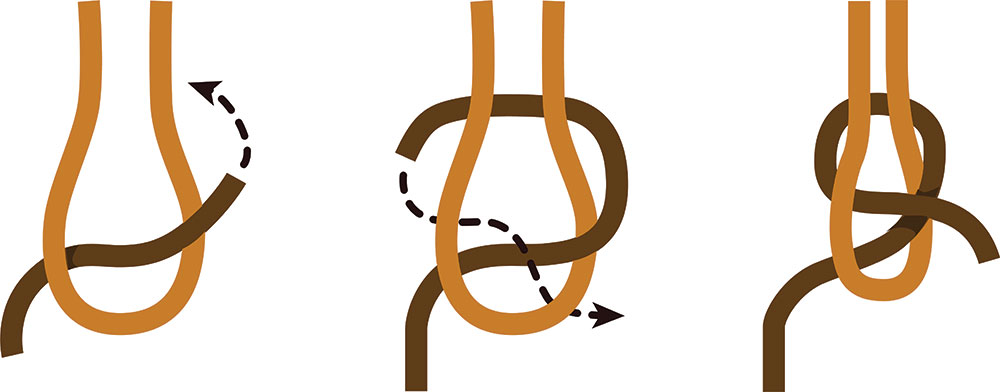
Joining Knots
As this term implies, “joining knots” connect two pieces of rope together (or the opposite ends of each rope). These are usually the easiest knots to master and the most widely used in everyday life.
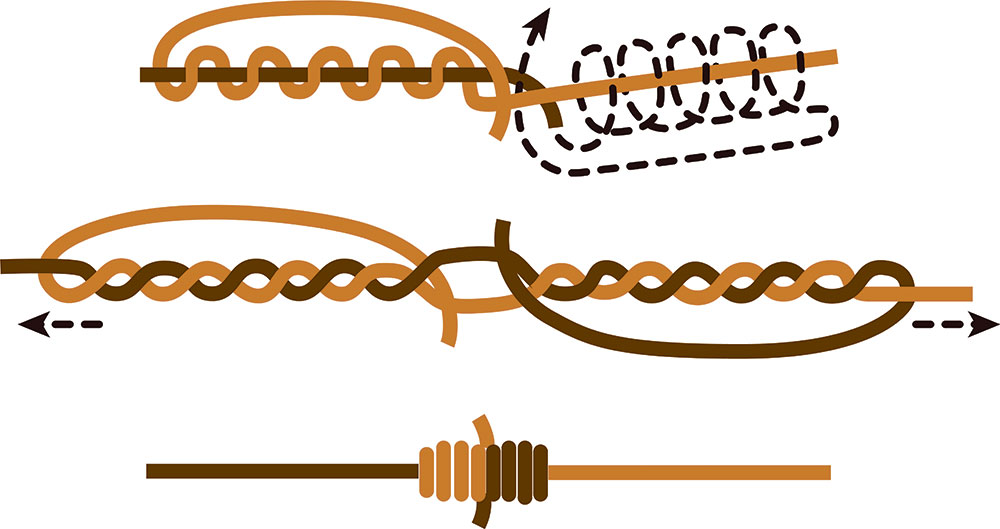
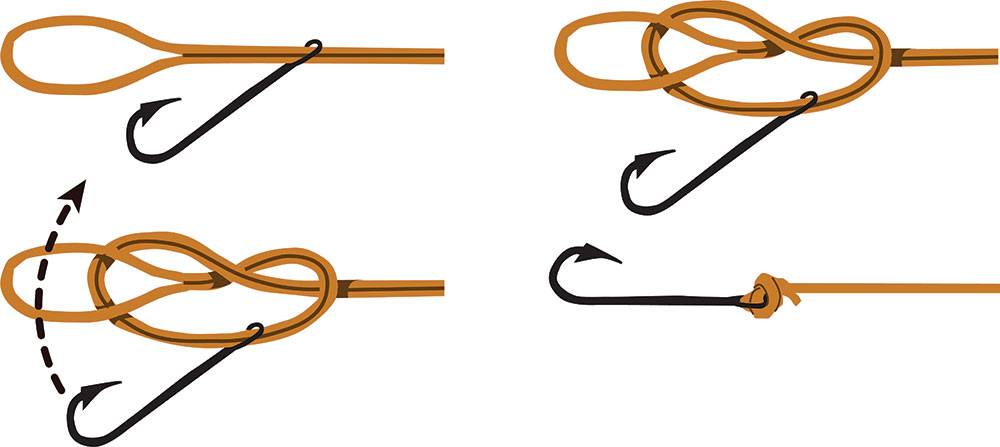
Sheet Bend: A sheet bend is the best knot to use to tie two ropes together, whether they’re the same or different thicknesses.
“’A knot is either exactly right or it is hopelessly wrong. Make only one change and either an entirely different knot is made or no knot at all may result.’”
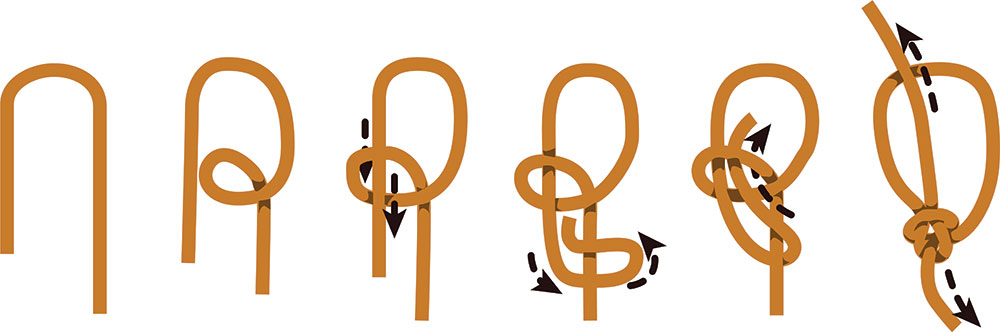
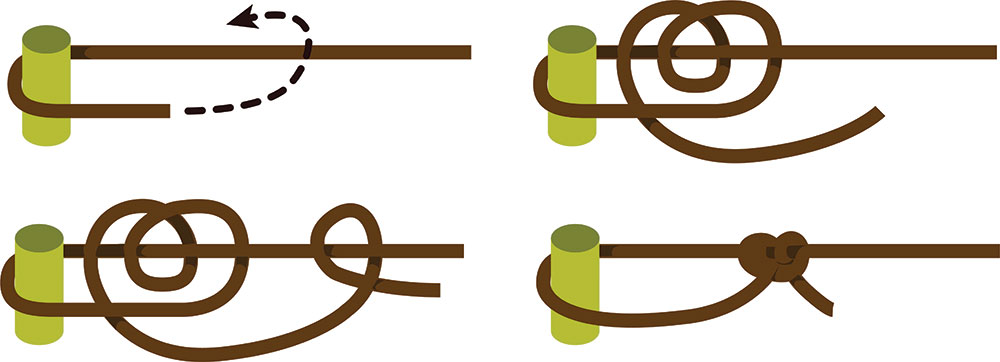
Square Knot: The square knot is a binding knot that’s used for tying two ends of the same rope together to secure something tightly.

Lashing Knots
Sometimes, objects need to be secured down; for example, makeshift tent poles, cargo in a truck bed or a horse to a hitching post.
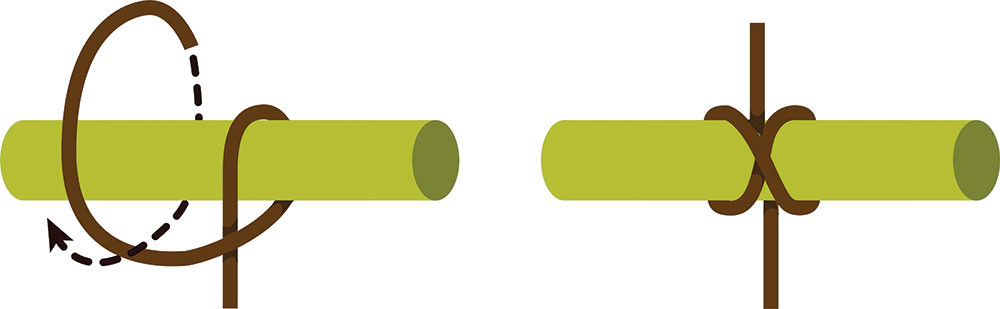
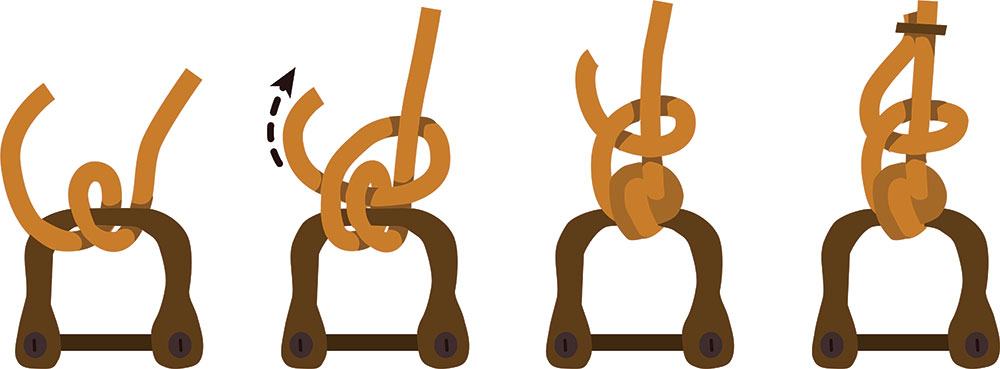
Clove Hitch: The clove hitch is used to attach a rope to a post or rail.
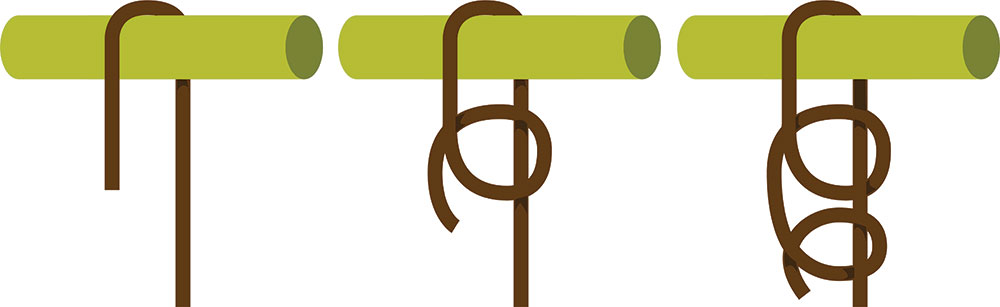
Timber Hitch: The timber hitch is used for moving or dragging heavy cargo.
Tension Knots
When you set up a clothesline or string up a hammock, you need a knot that allows you to tighten the tension being placed on the rope to keep it taut.
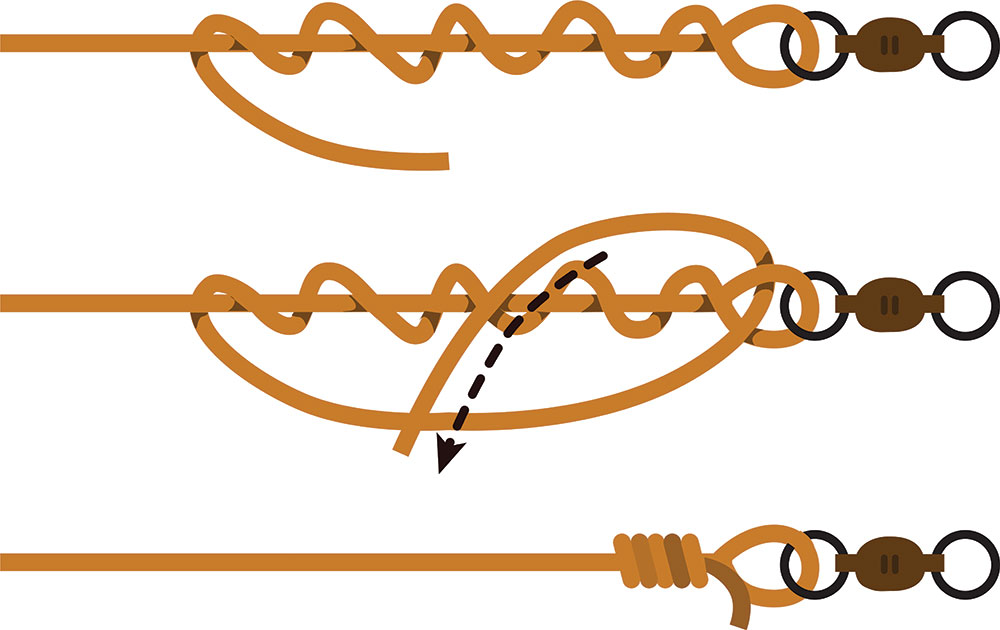
Midshipmen’s Hitch: The midshipmen’s hitch is used when you need a loop that will hold tight when pressure is applied but that you can easily move up or down.
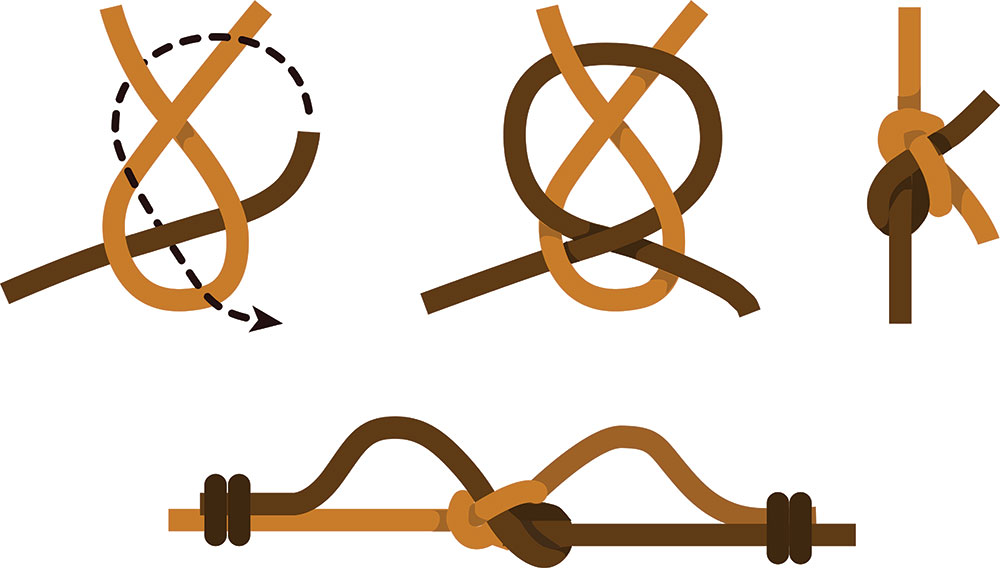
Two Half Hitches: This is one of the simplest knots for tying a rope (such as a clothesline or a boat rope, for instance) to a pole or a ring.
Unless you’re a professional sailor or have the ambitions of Clifford W. Ashley to collect and categorize every possible knot in the world (as well as invent a few of your own), you won’t have a justifiable need to learn to tie 99.9 percent of the 3,900 knots known. However, having a good handle on a reliable core of knots, along with knowing their capabilities, limits, applications and instructions, will serve you well in any outdoor or survival situation.

The Ashley Book of Knots
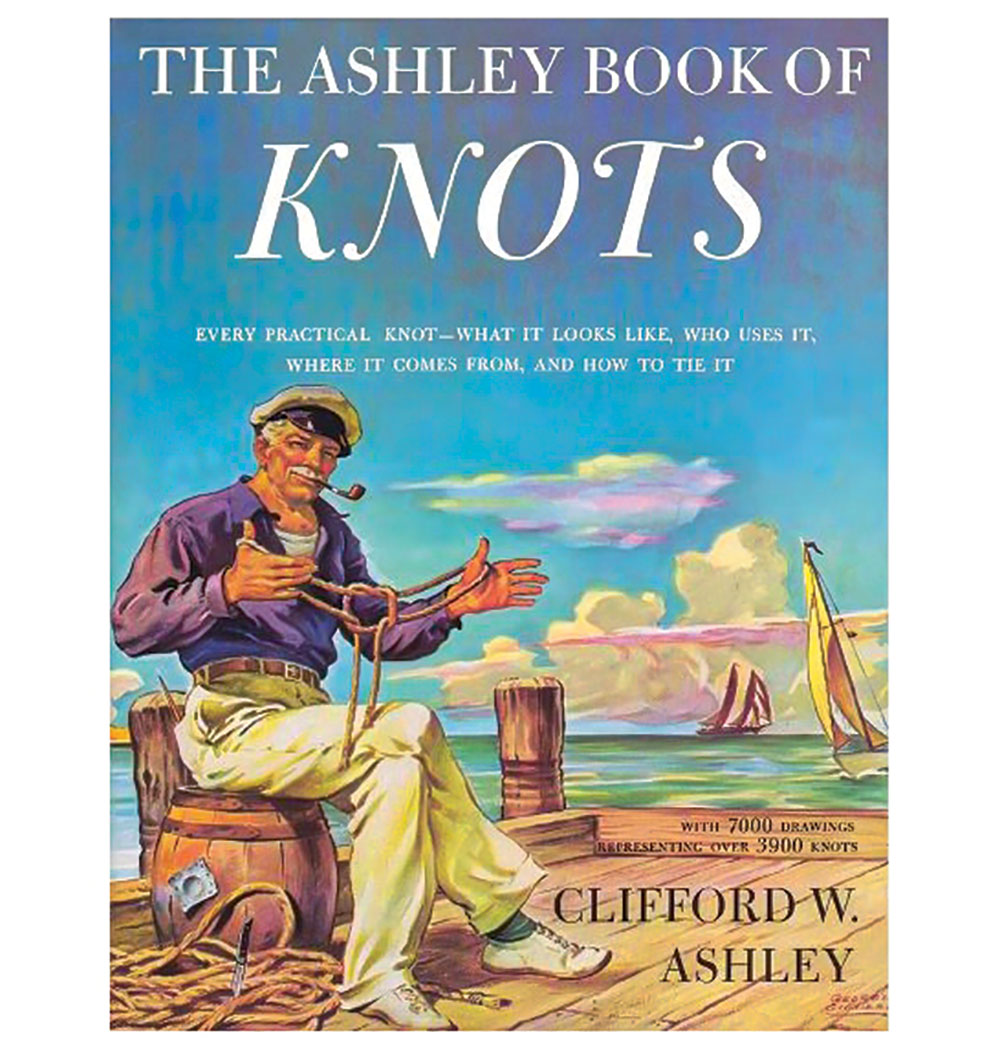
- Author: Clifford W. Ashley
- Doubleday (January 1, 1993)
- More than 3,900 different knots with step-by-step instructions are included
- 7,000 illustrations
- Hardcover; 619 pages
- Dimensions: 8.81×1.53×11.16 inches
MSRP: $85
Amazon.com
A version of this article first appeared in the October 2021 print issue of American Outdoor Guide.