5 Ways to up your camp cuisine game
As stated many times in survival books, manuals and television shows, food is the last in the order of priorities when it comes to survival. To underscore this point, there have been many stories of survivors in the wilderness lasting well over a month without food.
Energy gets low just being at home in the city, but even more calories are burned in an outdoor setting. Activities such as hiking, backpacking, making a camp for survival or even recreational car camping can burn a lot of calories. So, although the lack of food isn’t as detrimental to survival as one might think, it is necessary for overall comfort and sustenance.
One major factor of outdoor survival is making do with useful items that are available in your surroundings. This means man-made items (junk), as well as natural resources, for making shelter and carrying and procuring water. It also includes getting a sustainable fire going for warmth or cooking. Our bodies are machines and need fuel to run correctly, as well as efficiently.
With a little ingenuity and a knife, natural materials—either wild or carried into the wilderness—can easily be used for cooking food. Even food that doesn’t need to be cooked tastes better after spending some time over an open flame or a nice bed of glowing coals.
I’ve spent a lot of time preparing meals with a variety of rudimentary camp “appliances.” Here are some of my favorites.
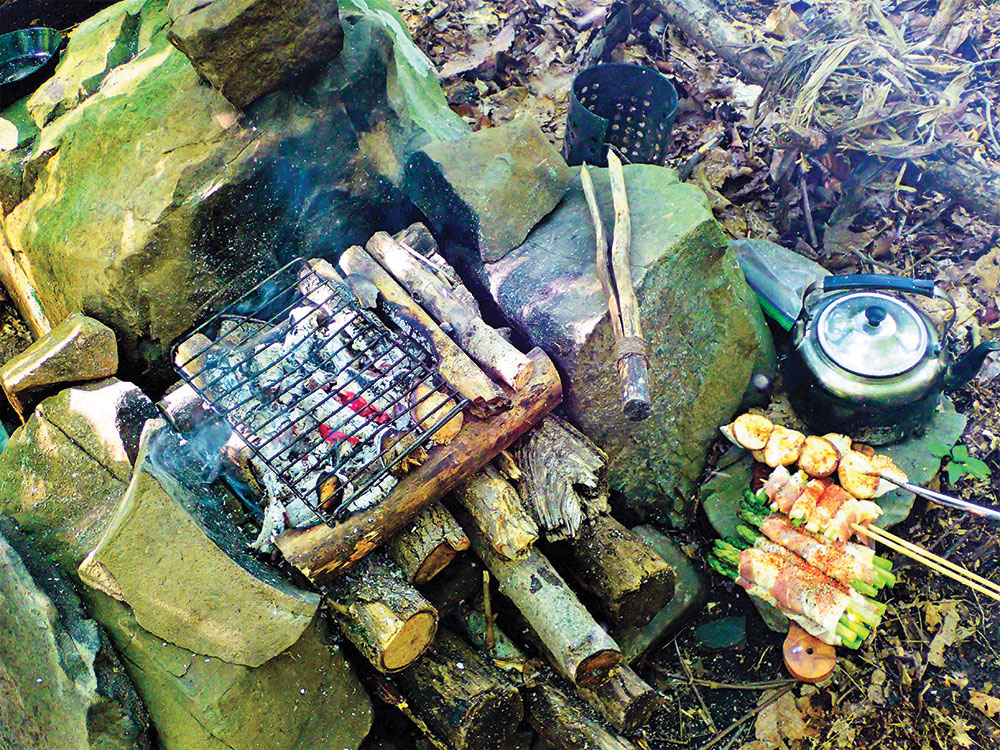
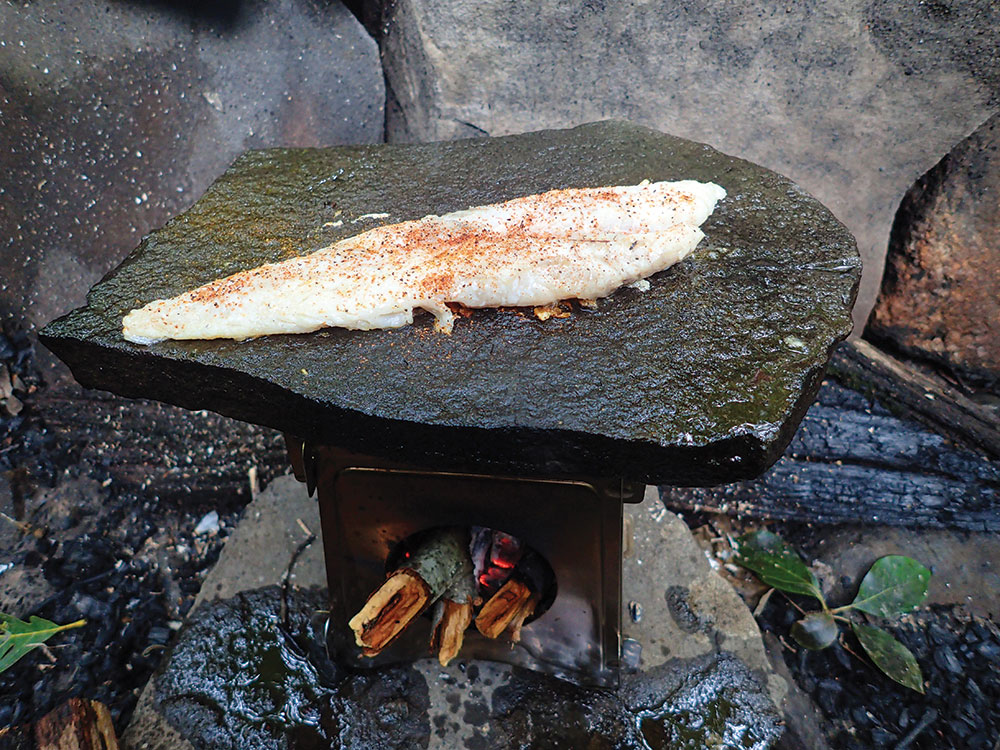
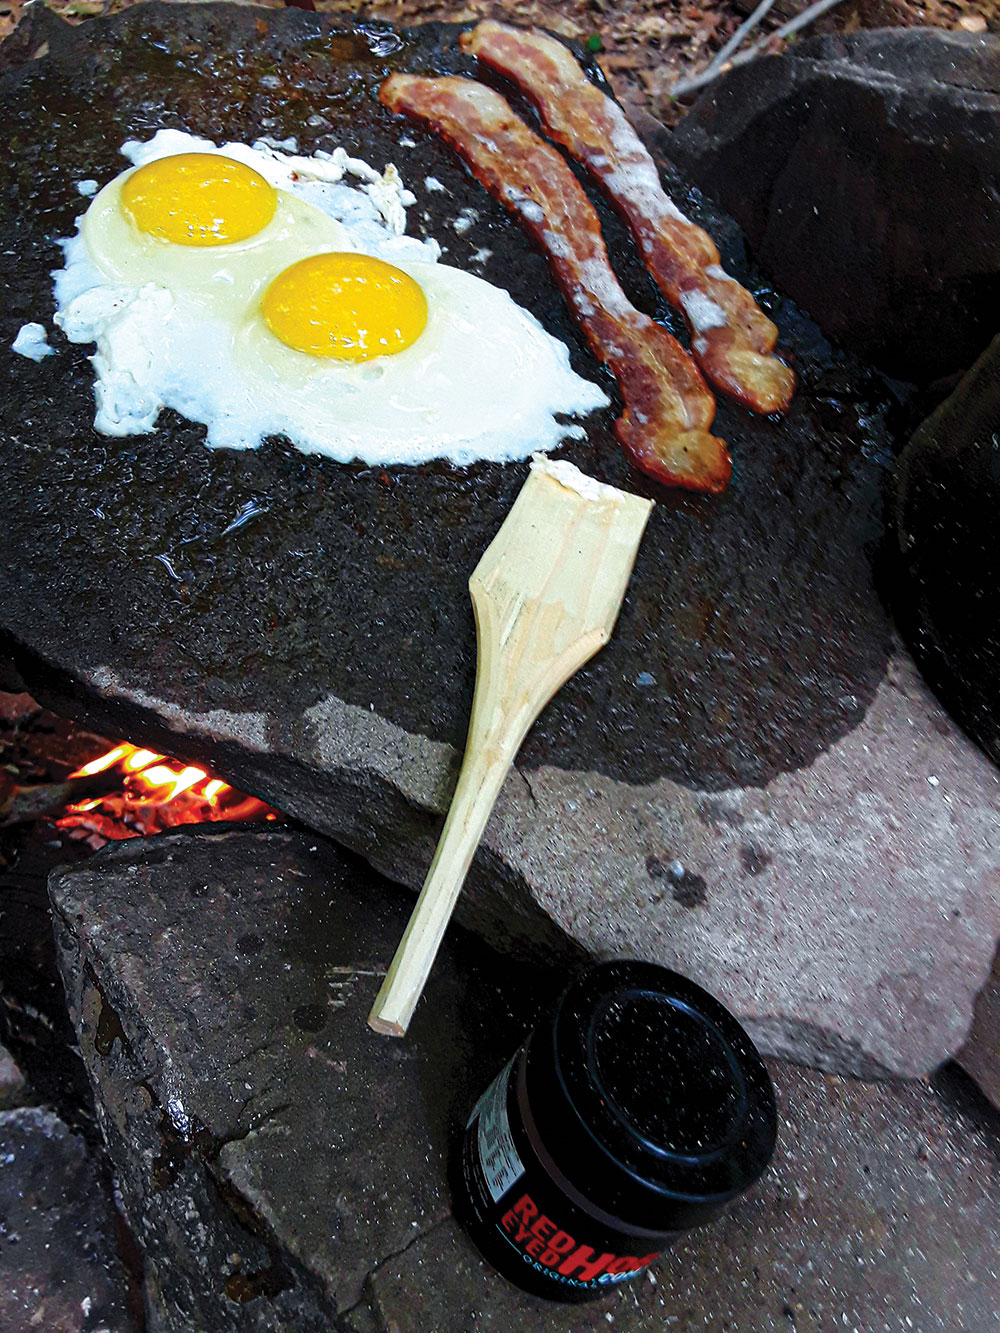
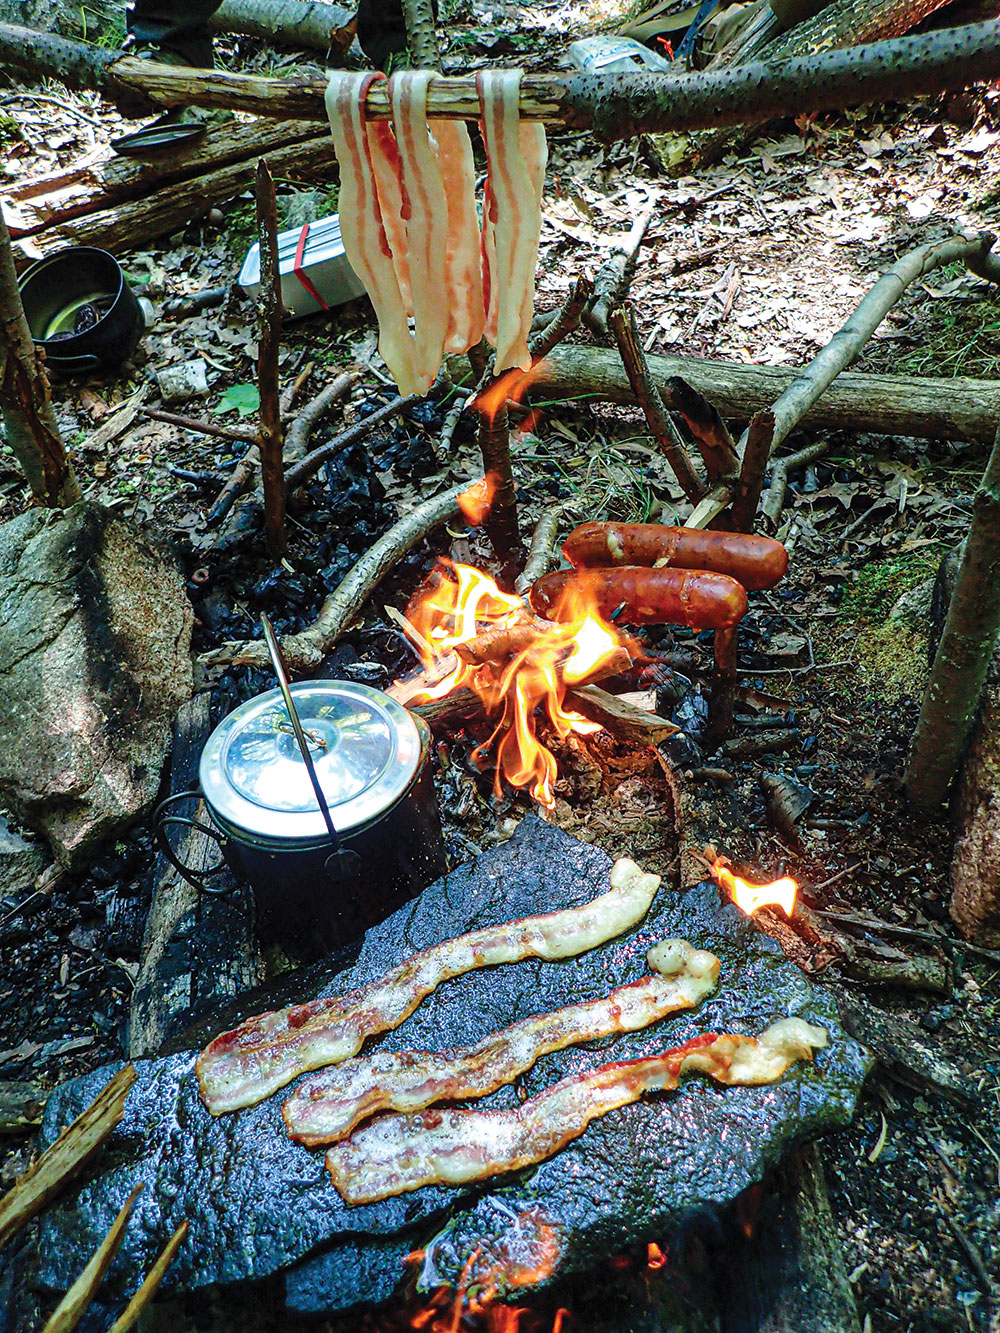
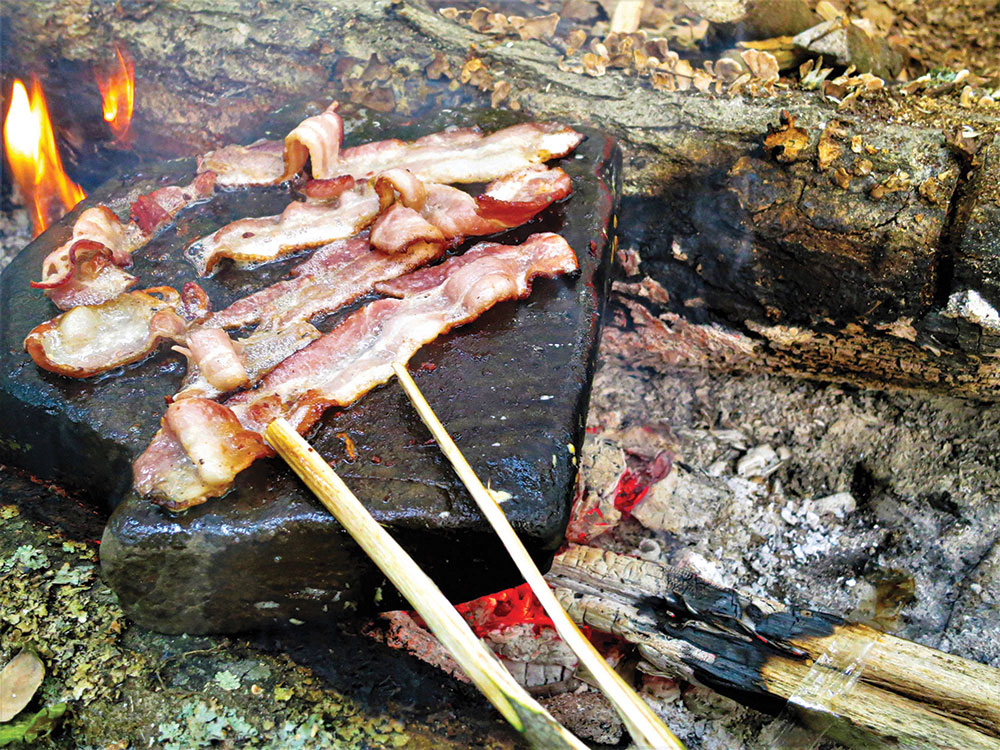
Rock Fryer
My favorite way to cook sausages, pork chops, steak, vegetables and bacon in the North American wilderness is by frying it.
In many parts of the world, a relatively flat, wide flat rock can be located and serve as a frying pan or griddle. Bringing along a skillet or frying pan is ideal for an established camp reached via canoe, kayak, horse or vehicle, but it’s not always practical, because the weight and bulk would be too cumbersome for traveling on foot.
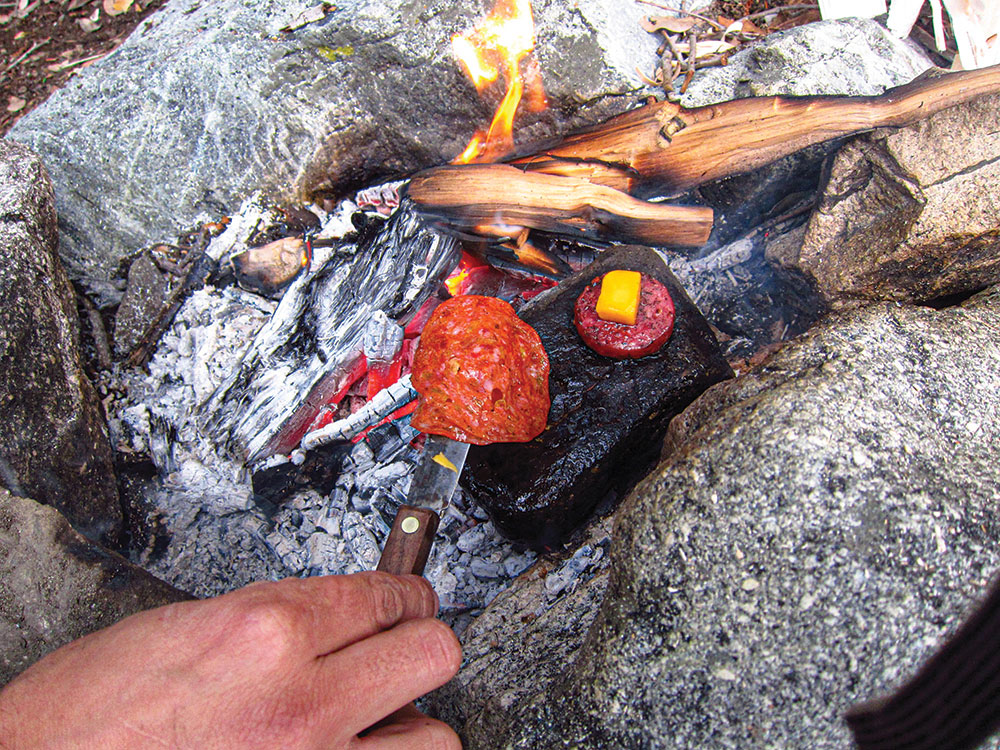

The best way I’ve come to know for cooking on a rock is by creating an oven-like structure with wood or other rocks, raising the frying rock and having it supported by two other, smaller rocks. Sometimes, the whole setup is backed by another flat rock or larger boulder for heat reflection and as a wind blocker. Alternatively, two large logs can act as supports for the main frying rock (however, they’ll eventually burn up). These logs will serve as both support for the frying rock and as fuel.
A fire must be made under the frying rock, warming it up slowly. Wood can be added from the front (if the fire is made against a boulder), allowing some control of the flame. To test if the temperature is right, carefully place your hand a couple of inches above the heated rock and see if you can hold it there for about 4 seconds (or fewer). This is one way to see if the rock is hot enough to start cooking. If your hand can’t stand the heat after 4 seconds, you’re ready to start.
Another way is to splash a few drops of water on the rock. If they sizzle, the rock is hot enough. All types of meat and vegetables can be cooked like this—similar to stir-frying. In fact, I like the taste of veggies and meat cooked on the same slab.
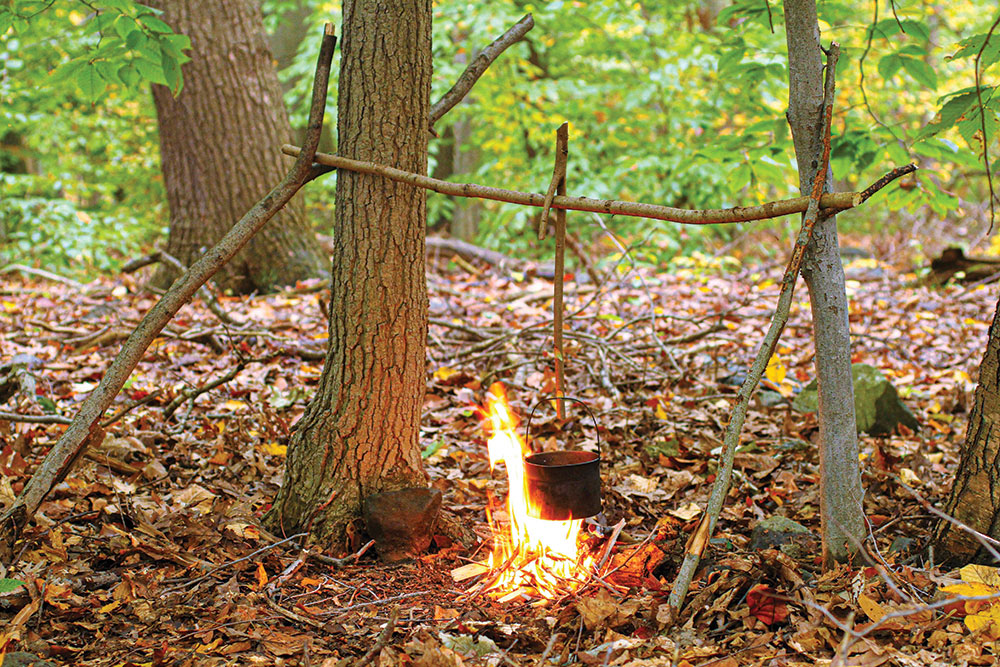
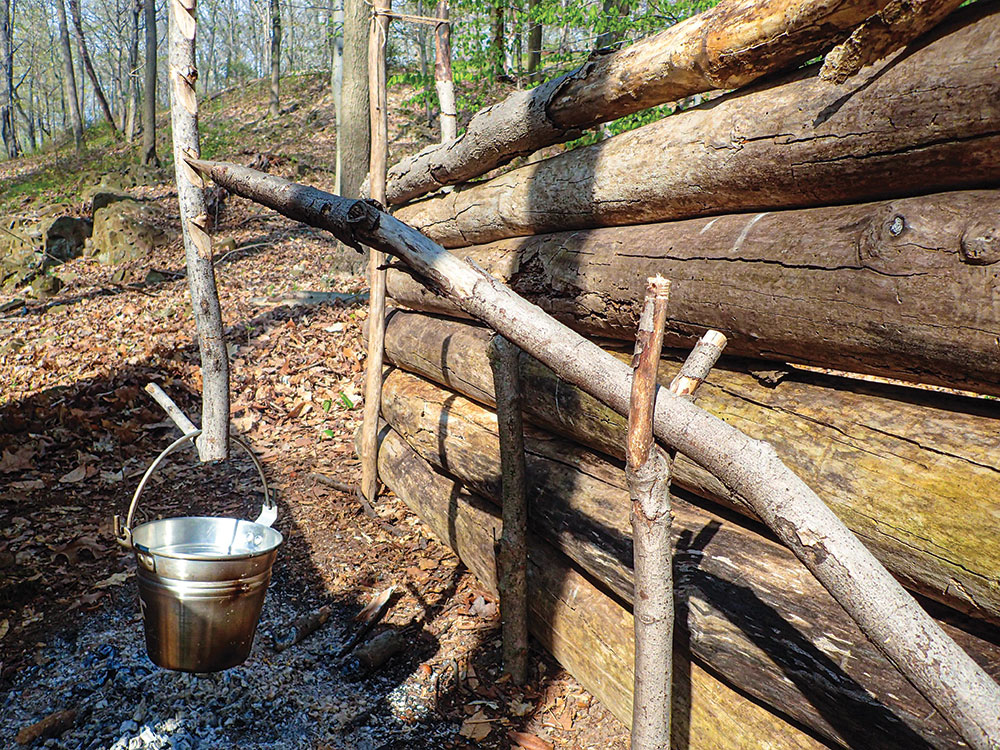
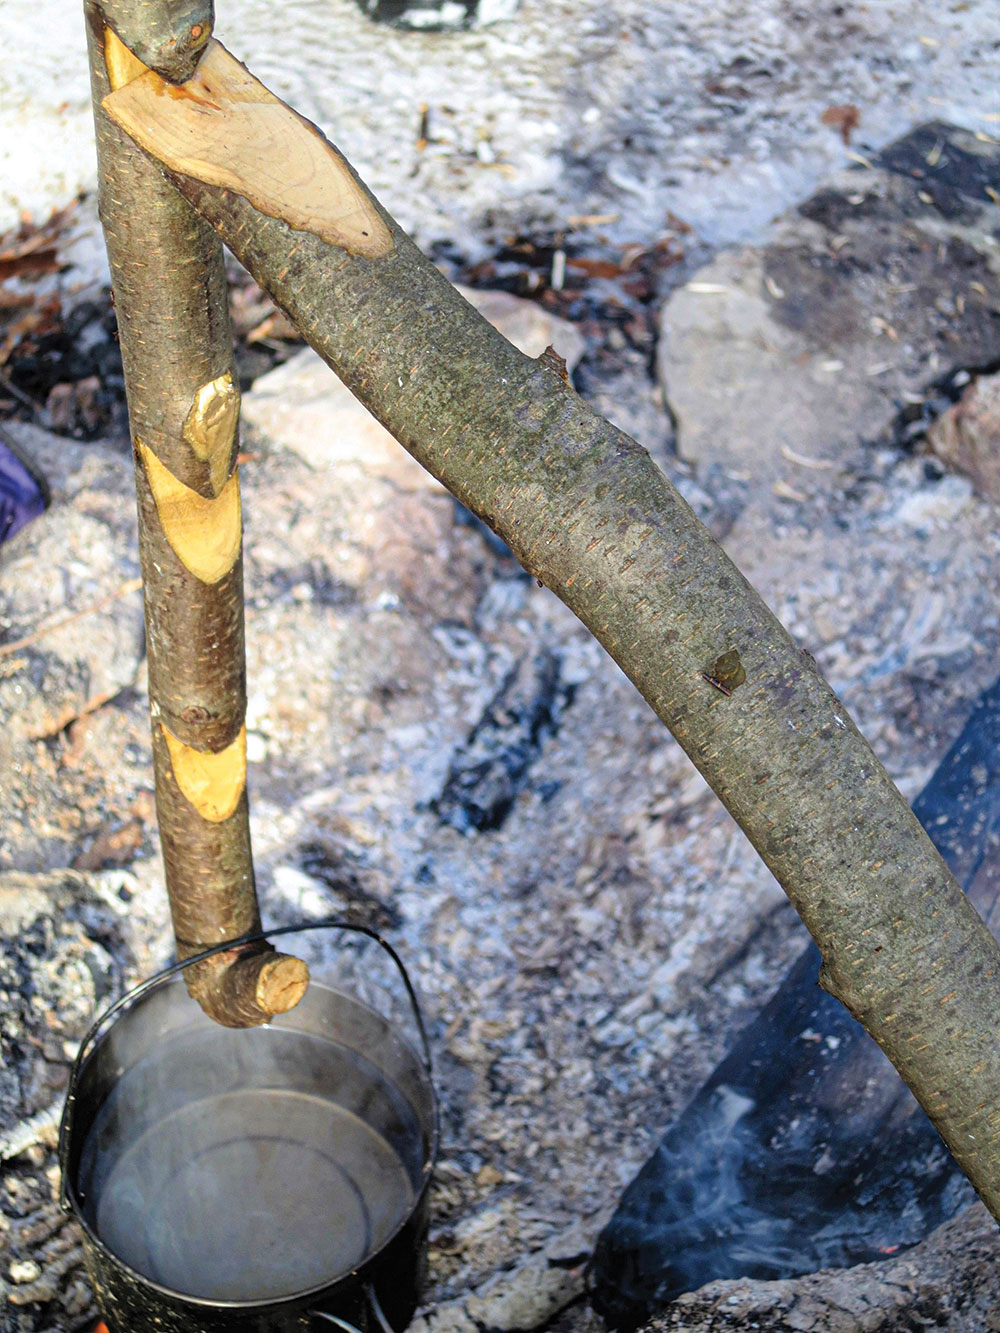
Burtonsville Rig
Suspending a pot or kettle from its wire bale over an open flame is one of the most common illustrations seen in a lot of survival or bushcraft books. There’s a certain mystique to this that screams, “wilderness cooking!” While there are many simple ways to suspend a pot over a flame, none comes to mind that help adjust the amount of heat the pot gets as does the Burtonsville Rig.
Boiling food is the best way to preserve vitamins, minerals and much-needed calories in a survival setting. Boiling food breaks it down so it can be more palatable and easier to digest; in addition, it kills harmful organisms. Roasting, broiling and baking cause more water loss and fat evaporation, while boiling retains it.
Late Canadian bushcraft and wilderness survival instructor Mors Kochanski popularized the Burtonsville Rig in his book and videos after seeing this type of setup being used on Burtonsville Island, Canada. It’s a system that suspends pots and kettles over a fire at varying heights using a notched stick.
This rig requires a stout pole of about wrist thickness propped up at a 45-degree angle, with the support made with a “Y” stick or log. A small dimple is carved into the flat, screwdriver-shaped end that’s positioned above the fire. The opposite end is pinned to the ground with a forked stake, heavy rock or log, or stuck into deep snow.
The hanging stick should have a forked end to hook the bale onto and a series of pot-hanger hooks carved into it so you can adjust the pot or kettle’s level over the fire. Usually, about four or six notches that are carved a few inches apart will suffice. When this is done correctly, the hanging stick should be able to sway slightly in the wind without any danger of separating from the pole.
Making a Burtonsville Rig is a good way to practice knife skills and engineering. This cooking system is a true northern forest favorite.
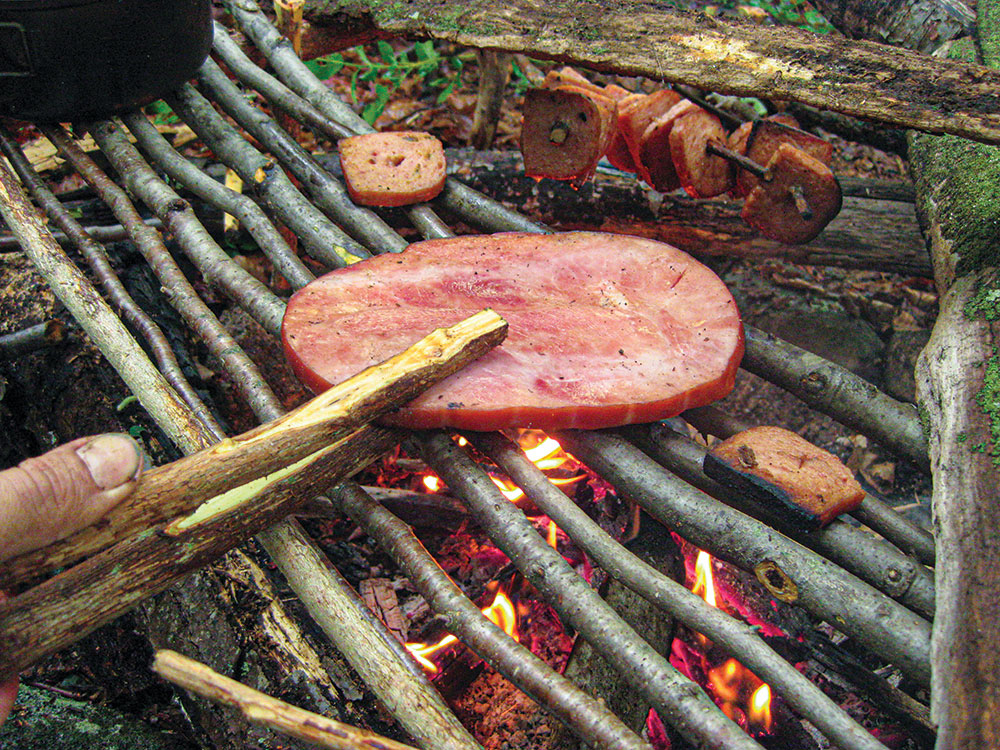
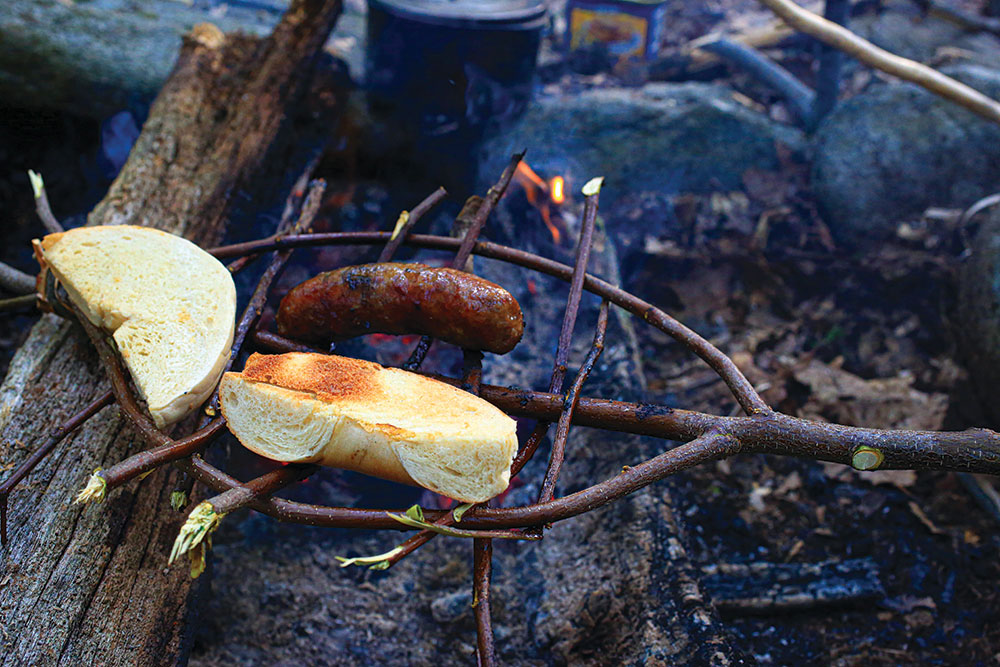
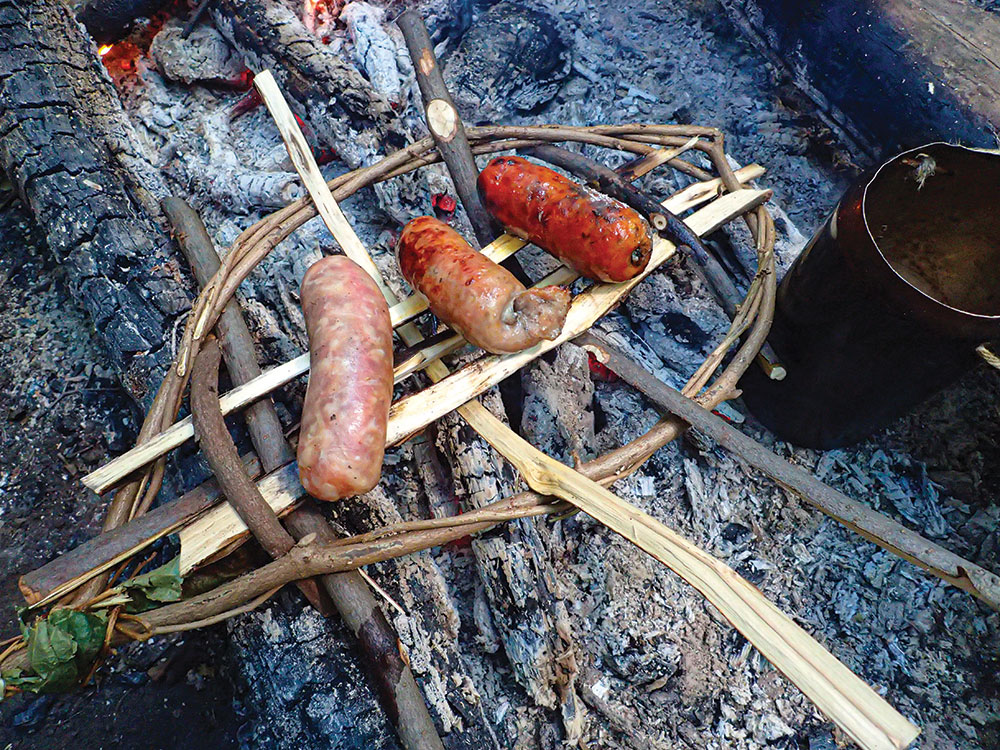
Hand Grill
Two types of grills come to mind when I think of rustic outdoors survival cooking. One is loosely called a “swamp grill”; the other is more of a handheld grill. While they both have their uses, the swamp grill can be made for a larger group from more-substantial green wood. A hand grill is usually for broiling and roasting food over coals or a very low flame. I use a hand grill for warming or toasting bread and tortillas, but I’ve also cooked sausages this way.
A hand grill is made with flexible, green branches from a nonpoisonous tree. Start with a branch about the span of both arms and bend it to make a hoop that can be bound or just held in place by its own friction. A centerpiece is needed, and then add smaller branches perpendicularly, filling in the shape of the grill. This takes some adjusting and spare parts, and it rarely comes out to be a “thing of beauty.” Besides, a grill such as this is disposable. It’s used once, maybe twice, but the greenwood dries out fast.
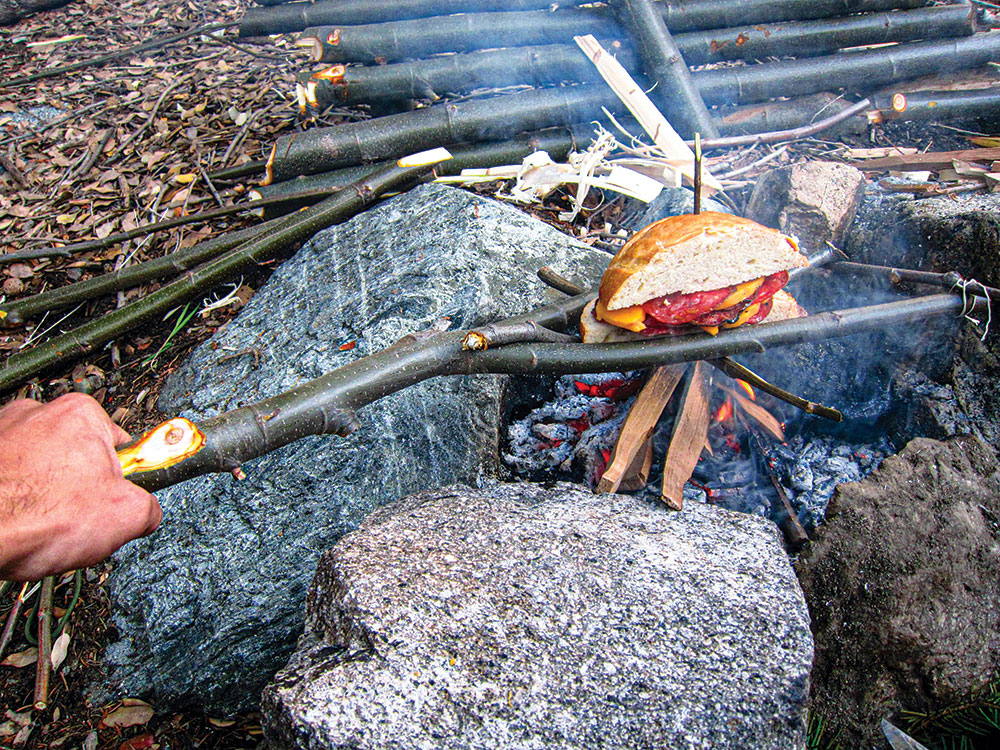
Jungle-Style Cooking
For most people, the romance and lure of the jungle equates to an epic adventure. Thoughts of lush greenery, snakes, bugs, long blades, bamboo and wild animals all play into our imagination.
Cooking in the jungle is a little different. There’s a lot of building material available in a green, lush jungle. And, as long as there’s a machete or other long blade close by and the ability to make fire, jungle cooking is a breeze.
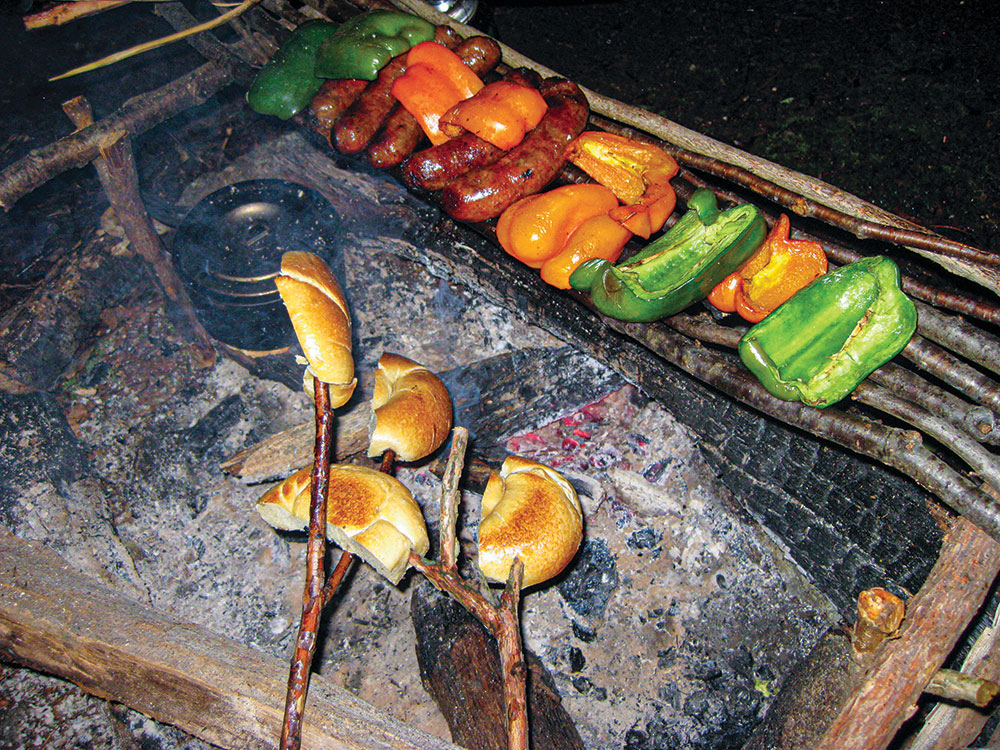
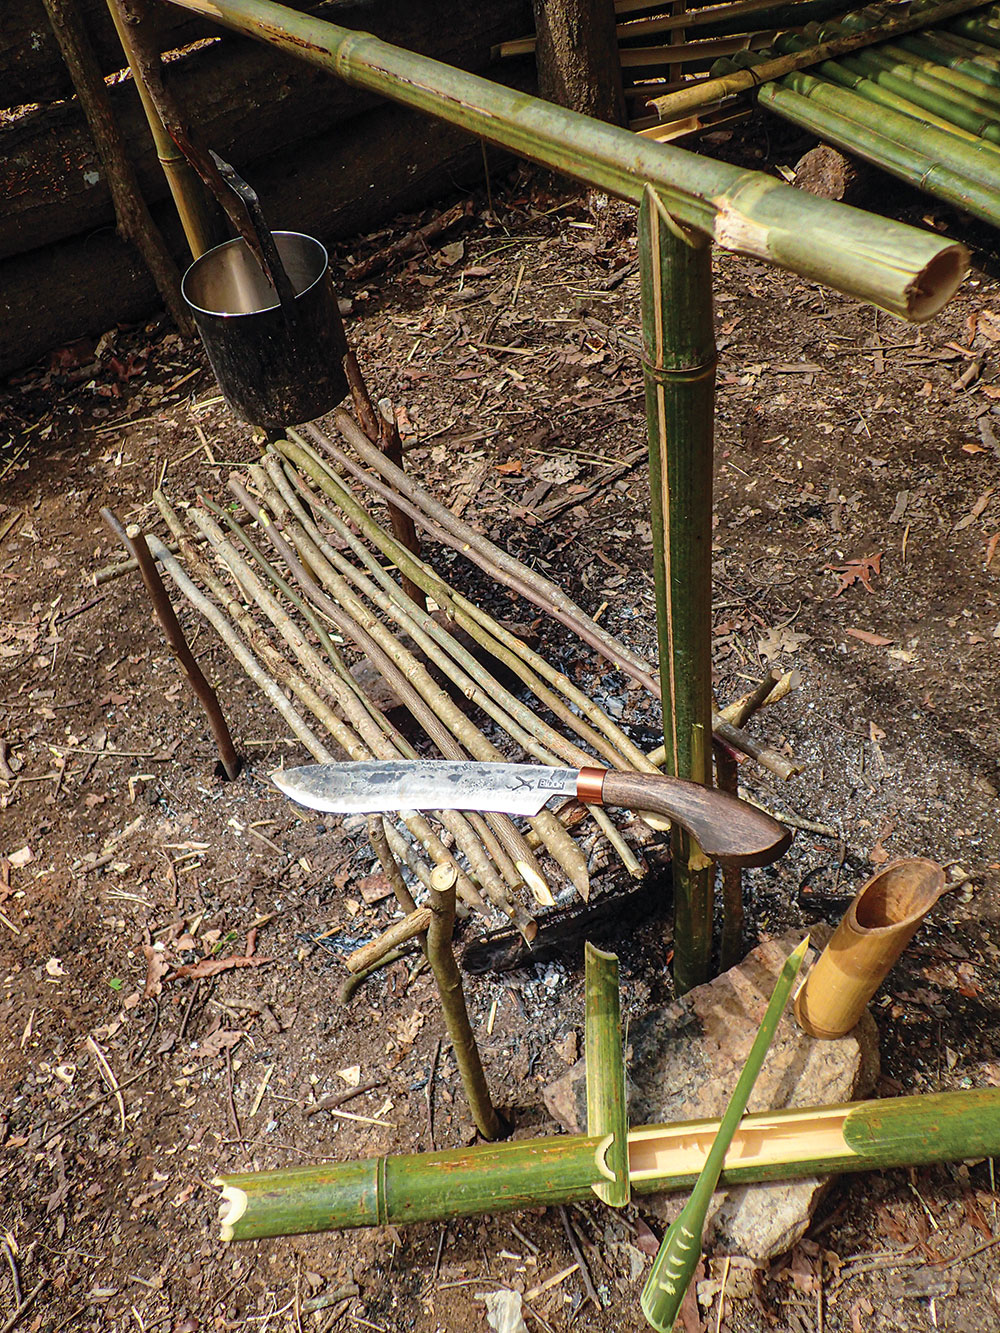
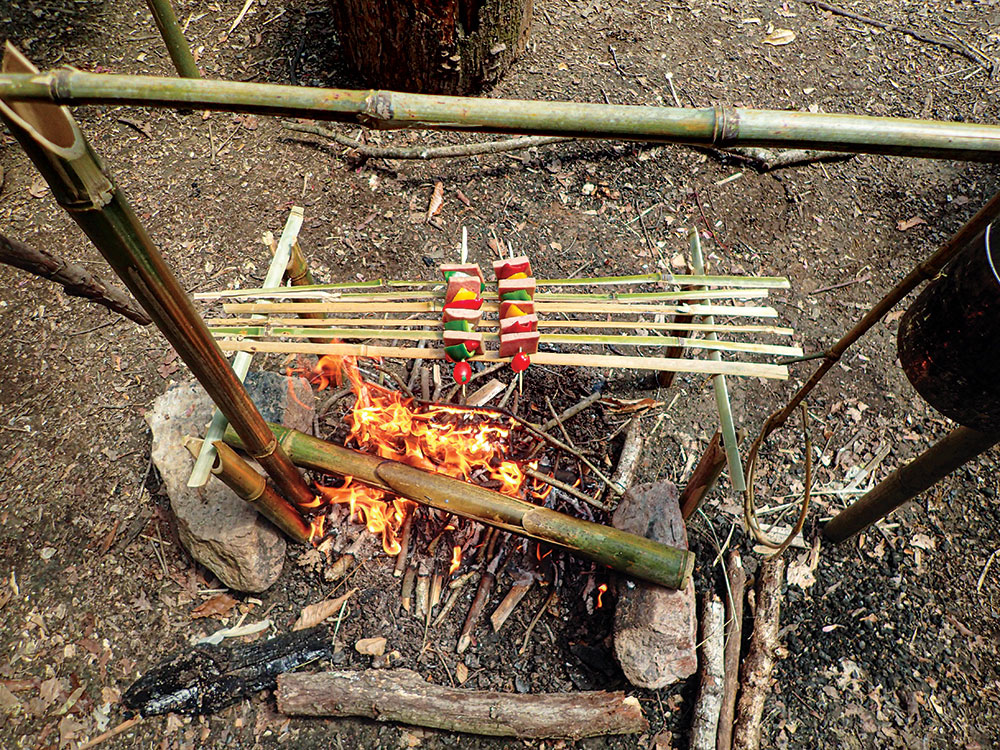
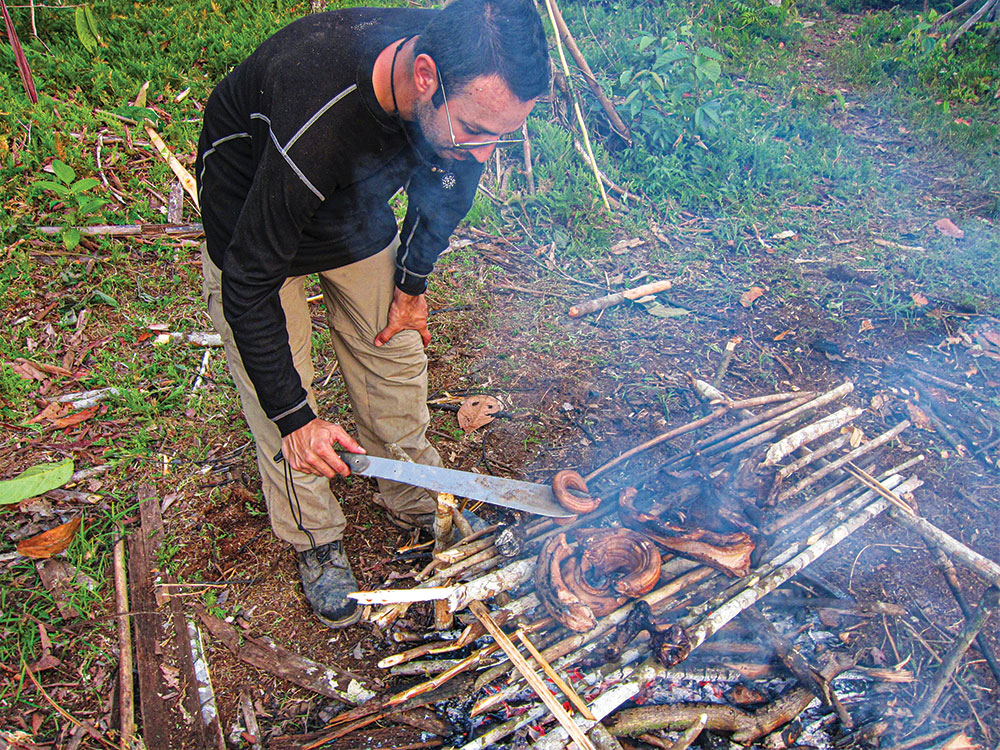
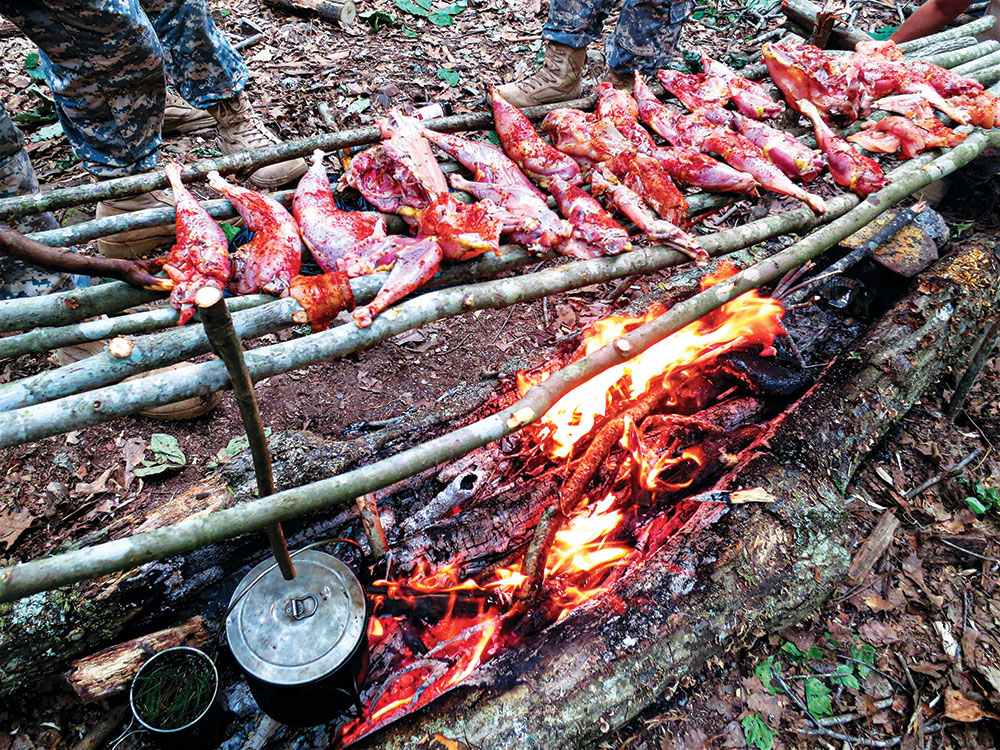
A swamp grill is a cooking technique I first learned while I was in the Peruvian rain forest. Nevertheless, it’s also been used for a long time in many other places. All it takes to make is a little bit of ingenuity and some green sticks.
Making a cooking rack or grill is much like making a raised bed (“swamp bed”) for sleeping in the jungle. Four “Y” (forked) sticks are stuck into the ground and mark the corners of a rectangle. Cross sticks are laid across the forked sticks closest to each other first (widthwise). The last step is to procure straight, green sticks about the thickness of a thumb and lay as many of them as needed on the support sticks (lengthwise). You need to have as many as are necessary to support the food you’re cooking while leaving some space between the sticks to allow heat to pass through. This will form the grill.
The size of the grill has everything to do with the size of the campfire and the amount of food that needs to be cooked. With this kind of grill, a piece of meat, pepper or bread will eventually be lost to the fire, especially if there aren’t enough sticks initially laid down when the grill is being built.
The best thing to do when using a grill such as this is to make a pair of tongs to help move the food around more efficiently and to retrieve food that might have been sacrificed to the “fire gods”!
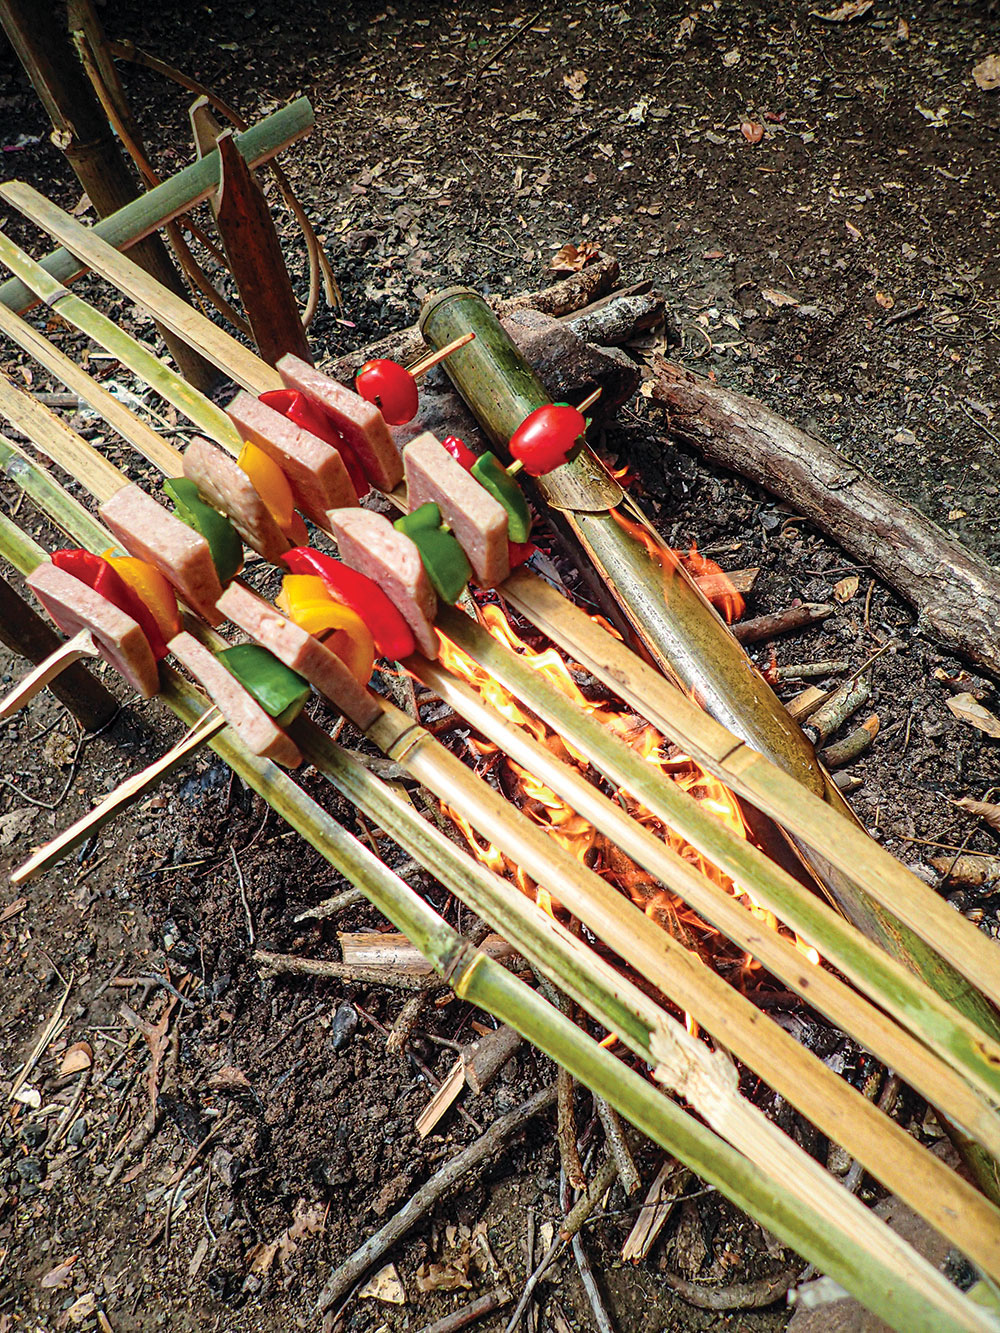
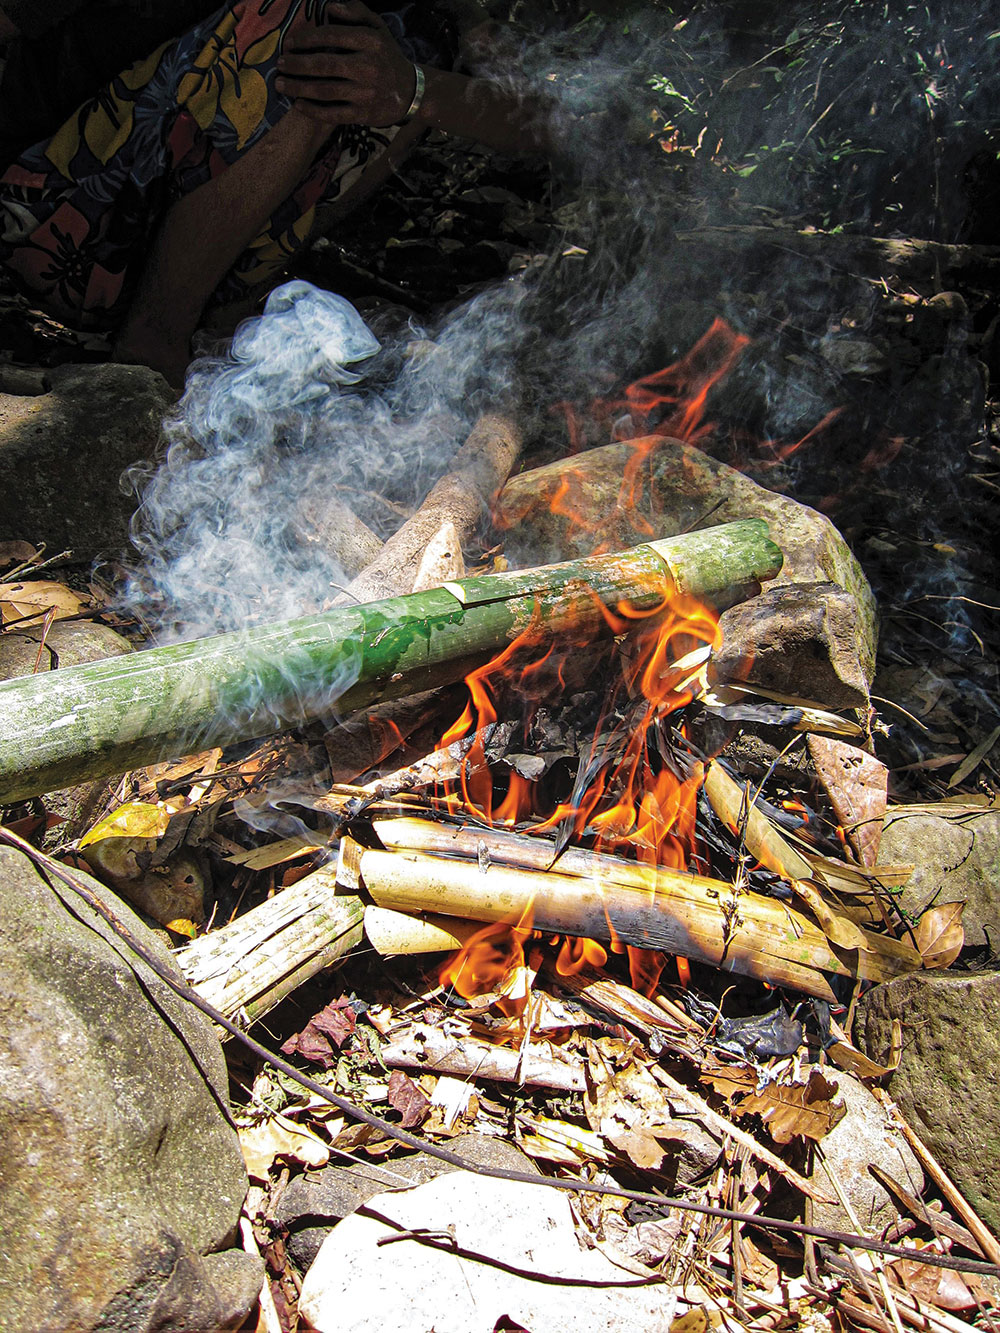
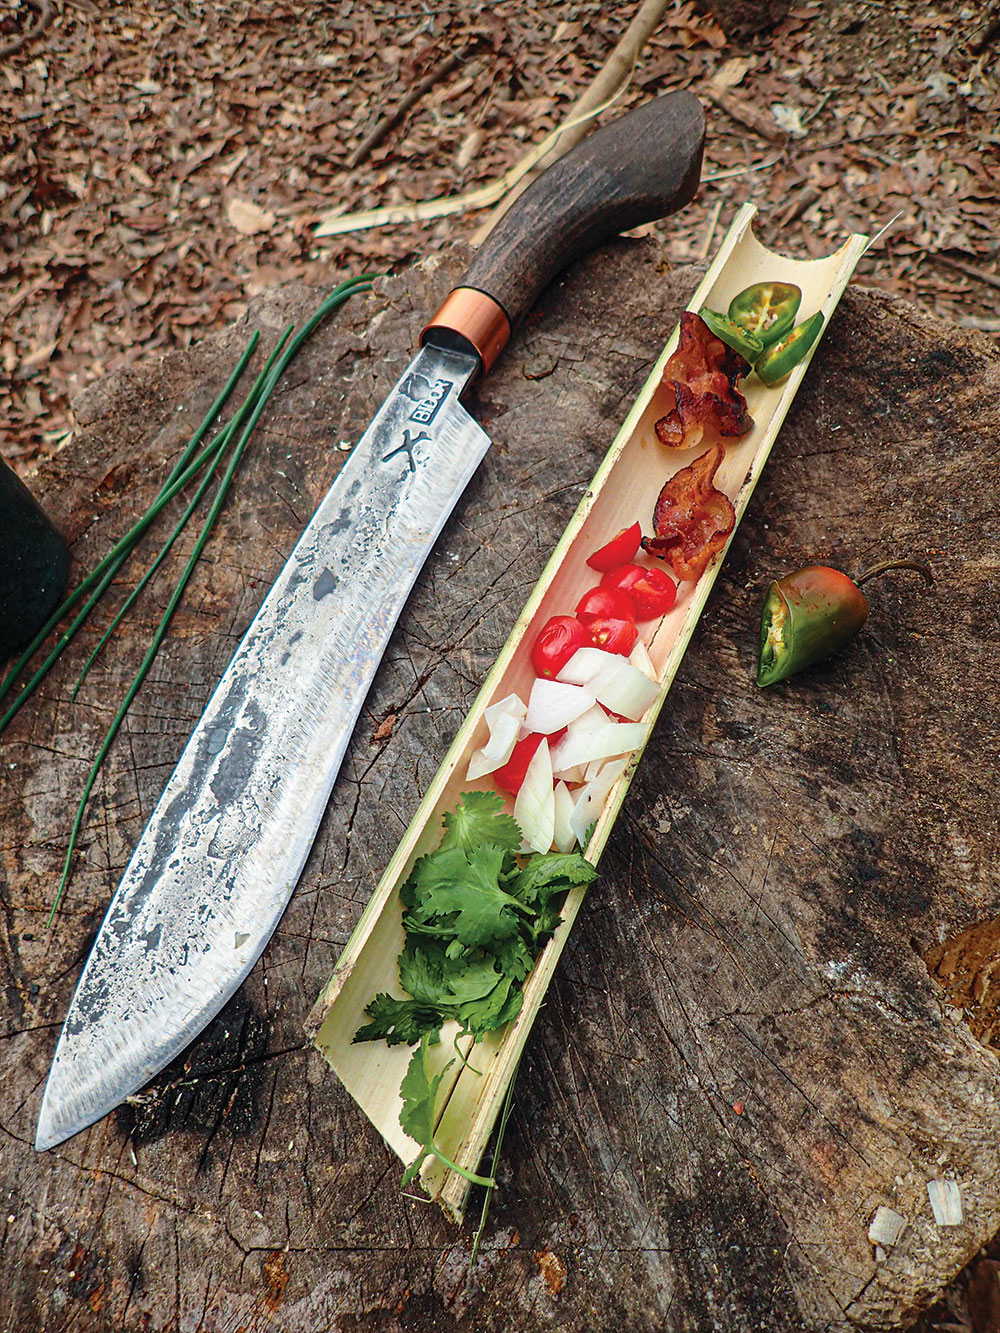
Cooking With Bamboo
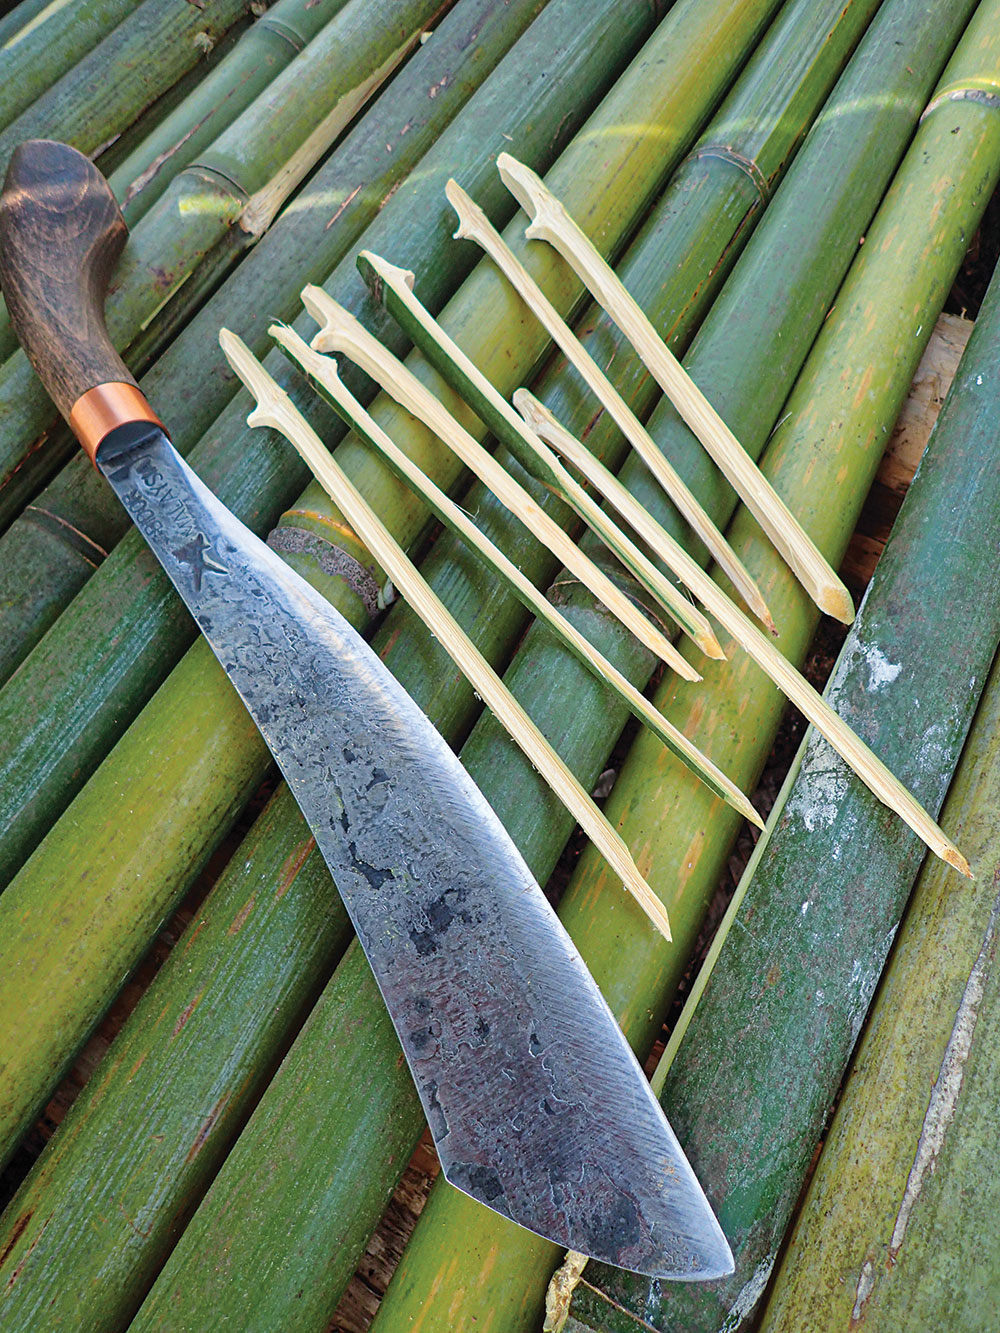
Bamboo cooking is just plain fun! No other material in nature can be made into a boiling container, grill and be used to fashion utensils. Let’s not forget that bamboo is also food (that is, young bamboo shoots). I’ve made skewers with bamboo—similar to making a bamboo stake, utilizing the section at the node to act as a food stopper.
I’ve made tea and coffee and boiled some shellfish in bamboo. I cut longer pieces of bamboo below the section divider to keep the bottom intact while I carefully cut the top to make an opening. The bamboo chamber was simply propped up at an angle over the fire using a green “Y” stick or some rocks. Cups can be made in the same fashion with a bolo knife, only they’ll be smaller.
Cooking rice in bamboo was something I had to do to complete the J.E.S.T. (Jungle Environment Survival Training) course in the Philippines, along with making all the necessary utensils and serving platters. I used green bamboo to cook rice by simply making a short, controlled chop with a sharp bolo perpendicular to the length of the bamboo and all the way through into the chamber. Then, I made one more chop about 4 inches above the first cut—this time, moving the blade sideways in a prying motion to take the piece out of the bamboo that would then serve as a lid for the chamber.
I filled the bamboo section halfway with rice and then filled the entire chamber with water. I laid the bamboo down with the opening facing up and re-placed the bamboo that had been pried off to use as a lid for boiling purposes. The tricky part is getting the round bamboo positioned above the fire to boil without rotating or falling over, draining the water and thus extinguishing the fire.
After 25 to 30 minutes, the rice was done … but my job wasn’t: I still had to set the table and open up the steaming-hot bamboo while being very careful not to spill the food inside. I then had to give the end of the rice-cooking chamber three chops, each one a little offset from the others. Then, I stood the bamboo up with the part I chopped at the bottom. The other end is where I had to put the bolo blade into the bamboo—just above the surface of the rice—and proceed to slice the length of the bamboo, taking off the top of the chamber.
When the bolo met the three chops at the other end, the top was free, and the rice was exposed. If this is done correctly, everyone in camp eats the most amazingly cooked rice! If it’s done wrong, nobody eats much rice at all and, needless to say, this results in an automatic failure for the cook.
Bamboo is an excellent material for boiling; and sometimes, it can be used more than once. Keeping one node and chopping (or sawing) the other end off makes a good boiling container that stands upright and gets propped up in the fire to boil. When the bamboo is placed horizontally, a lid can be cut out of a chamber to boil or cook an omelet.
There’s almost no limit to the options of bamboo cooking, because it makes grills, roasting sticks, tables, cups, boiling containers and cooking implements. If you’re given the chance, try out these simple techniques to see how amazing bamboo cooking really is.
Wild Cooking Utensils
Nothing completes the look and “romance” of cooking in the wild like primitive cooking utensils to go along with that open-flame swamp grill that’s full of wild game or hot dogs. No matter what kind of fish or freshly caught/bought meat might be on the menu, it’s important to not lose any of it to the fire. A little char and ash never hurt any food, but sometimes, the coals, themselves, could be too hot to get close to.
A pair of tongs (or “bush tongs,” as they are often called) can save a meal or two. One way to make them is to use a green stick that’s no thicker than a broomstick and soften it over a fire until it bends so the ends touch. Carve the ends that meet to a chisel point that’s thin enough to be able to scoop up bacon, as well as larger meat.
Alternatively, split the wood down the middle and wedge the parts open with a small stick. Carve the ends in the same way as described above. If they’ll be used long term, use cordage at the end of the split to secure it from splitting further. To make the most out of them, sharpen one side of the tongs to a sharp point for poking and forking meat.
Survival-style cooking can be fun to try out in a camp situation so that if the need to improvise ever arises, you’ll be ready.