

How and Where to Store Your Supplies and Gear for the Long Haul
As a vendor at several prepper shows, I have had the privilege of learning from customers and, on occasion, the opportunity to help them with their survival supply storage practices.
At least one customer at each show would share with me that they had secured enough long-term storage food or other supplies to last a year or more.
While it is commendable to have such a supply, when asked where and how they were storing these supplies, oftentimes, the answer would be in boxes, stacked in the garage, in the basement or in an upstairs bedroom.

Preparing for potential disaster can be expensive and time consuming; ensuring you really have supplies should be a priority.
No matter where you reside, there is risk for some type of catastrophe, and regardless of how well you store your supplies there is always a chance the unexpected will occur, such as a structure fire, so I suggest you have backup supplies.
Basic Storage Practices
If it’s within your budget, store your supplies in airtight, waterproof containers. Not only will this protect your supplies from water and air, it provides protection from insects and rodents.
Long-term storage food purchased from companies such as Legacy and Wise typically comes in airtight, waterproof buckets. If it’s not within your budget, purchase plastic totes with a good fitting lid from a discount store.
For added protection, tape down and seal the lid using a quality duct tape such as Gorilla brand. Another option is metal ammo cans which can be purchased in various sizes relatively cheap online, at military surplus stores and at gun and prepper shows.

To assist in rotation and identification of stored food, write the contents and expiration date on the side or end and top of containers in big letters with a Sharpie.
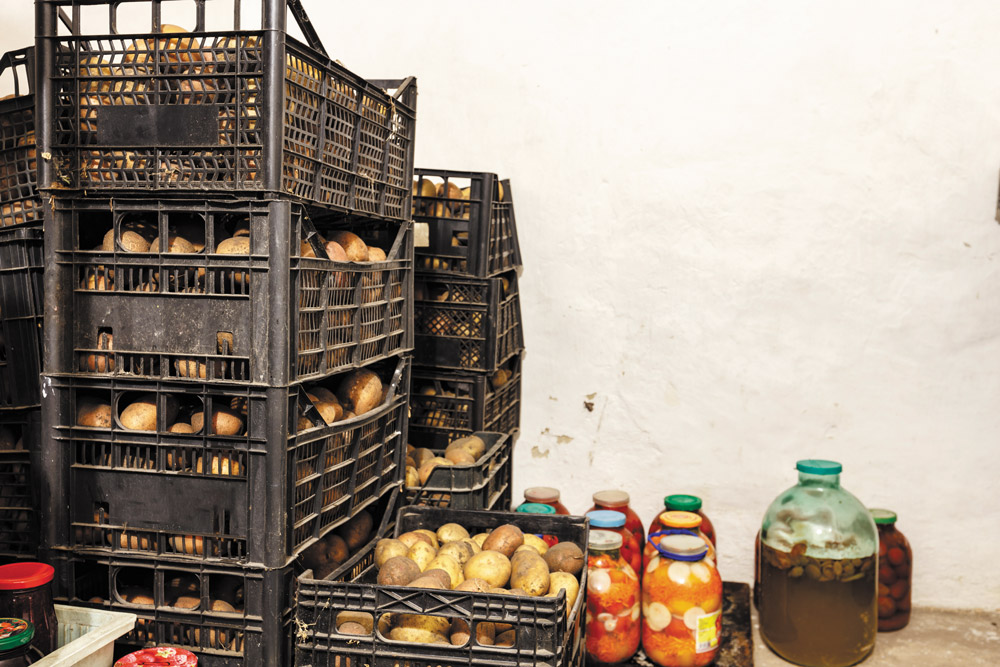
For home preserves, write the date they were prepared and the best-used-by date on the jar or container. The ink will come off with rubbing alcohol when it is time to reuse the container.
Make sure the information is facing toward the front of the shelf or the direction from which you will be checking your supplies. Always put items with the longest expiration date toward the back, working your way forward to what needs to be used first.
Location, Location, Location
Some folks forget to consider excessive heat and direct sunlight as a danger to their food and other supplies.
I once had a customer from Louisville, Kentucky, (average summer temperature around 89 degrees (F) and freezing winter cold are not uncommon) who told me he spent a few thousand dollars on long-term storage food, most of which contained water; he stored it in his garage, in front of a window, with no climate control; a few years later he discovered much was ruined from the heat and a few containers actually burst from freezing cold.
Try to store food in a dark, cool area above 32 degrees and below 60 degrees (F) with as little fluctuation in temperature as possible.
“NO MATTER WHERE YOU RESIDE, THERE IS RISK FOR SOME TYPE OF CATASTROPHE, AND REGARDLESS OF HOW WELL YOU STORE YOUR SUPPLIES THERE IS ALWAYS A CHANCE THE UNEXPECTED WILL OCCUR.”
Store supplies on shelving to protect against flooding, assist with supply organization and make food rotation easier.
Heavy-duty (200 pounds per shelf) capacity ventilated plastic storage shelving works great, especially in humid areas.
They are lightweight, easy to assemble and disassemble, and can be purchased at most hardware stores and home centers. I found a unit at HomeDepot.com that is 6x3x2 feet for about $55.

Think about where to store your supplies. In March 2019 a bomb cyclone hit the Great Plains with rain and snow, resulting in historic flooding, and some areas reportedly experienced hurricane-force winds.
Nebraska, Wisconsin and Iowa declared states of emergency. Tornados are a major concern in this area, so most people probably have some type of underground shelter (basement, root cellar, etc.).
One would think they would be the perfect place to secure survival supplies, however, in this instance, if supplies were not in waterproof containers, the massive flooding would’ve most certainly ruined most if not all of those supplies.
Improper storage of your supplies can be the same as having no supplies.
Pick the Right Location
To assist in your decision on where to store supplies, the following is a list of risks faced by many.
Consider each one, include any risks not on the list you may face, and rank it on how likely it is to happen to you:
- Volcanic eruption
- Earthquake
- Wildfire/field fire
- Blizzard
- Flood/flash flood
- Tornado/severe storms with damaging winds/hail
- Landslide
- Dust/sandstorm
- Freezing
- Nuclear/radiologic incident
- Hurricane with high wind, flooding and possible tornados
- Heat wave
- Sinkhole/cave collapse
- Rockslides
- Power outages of three days or more
Here in southern Indiana tornados and severe storms, flash flooding and power outages are common.
Though not as common, heat waves, drought, sub-zero temperatures and sinkhole formation and cave-ins are real concerns.
Topology is a consideration, even though we don’t live in a flood zone.
With flash flooding and runoff from the surrounding fields, having standing water and 6 inches of water running through portions of our property and yard are common occurrences.

With this in mind, I have ranked the risks in our area as follows: 1) Tornado/severe storms; 2) Power outage; 3) Freezing cold; 4) Flash flooding; 5) Heat wave; 6) Drought; 7) Sinkhole/cave collapse; 8) Field fire; 9) Blizzard and 10) Earthquake. The rest do not apply in this area.


The next consideration: Where or what structure do you have available for supply storage and how is it constructed? Consider using your:
- Basement or root cellar
- Storm shelter
- Outbuilding (garage, barn or shed)
- Safe room
Think about where structures are located, and if you plan to construct a storage area, consider the geology.
For example, in many areas of Florida, a basement is out of the question because of a high water table, while here in southern Indiana, care must be taken to stay away from areas riddled with caves or prone to sinkholes. Then ask yourself:
Has it or could it flood?
- If the spot has high humidity, can it be reduced? Mold is hazardous and a major concern in humid areas.
- Can you regulate the temperature to keep it between 33 and 60 degrees (F)?
- Is it in an area that may be prone to mudslide/rockslide?
- Is it constructed well enough to withstand an earthquake, hurricane, tornado, etc.?
- Is it close to an area susceptible to fire and is it constructed of flammable materials?


Knowing how your home or storage area is constructed is another consideration, if you are building a storage structure, plan accordingly.
During the 1974 super outbreak of tornados, my childhood home took a direct hit from an EF4 (winds between 166 and 200 mph) tornado and stood; the roof was peeled back, windows were broken, shards of glass and debris penetrated the walls several inches, and the walls in our block basement were cracked from the violent shaking.
Our neighbor’s home was hit by the same twister; it was flattened and the block basement caved in on top of our neighbor.
Another neighbor hit by the same storm was in the process of building a house and living in the basement which was poured concrete (not cinder block); the house structure was gone, but the basement suffered no ill effects.


As with any storm, the effect and devastation may be different within a few feet however, construction and design do make a difference.
My childhood home was designed and built by my uncle in the 1950s with solid oak (hardwood) and true 2×4 and 2×6 lumber; the neighbor’s home that was flattened was built by a construction company in the late 1960s with pine (softwood) and the other neighbor’s poured concrete basement withstood the storm much better than the block basement constructions.
Check the Local Weather
Research historic weather patterns for your area. If you are in a high-risk area for hurricanes or tropical force winds that typically come from the south, store supplies in the northern part of your home or structure.
If you’re at high risk for tornados from the southwest, store supplies in the northeast part of your home or structure. Put as many walls as possible between your supplies and the probable path of any potential storm.
Storms in my area typically come from the west or southwest. When my childhood home was hit in 1974, there was one room untouched: a bedroom in the northeast corner.
“FOR ADDED PROTECTION, TAPE DOWN AND SEAL THE LID USING A QUALITY DUCT TAPE SUCH AS GORILLA BRAND. ANOTHER OPTION IS METAL AMMO CANS WHICH CAN BE PURCHASED IN VARIOUS SIZES RELATIVELY CHEAP ONLINE, AT MILITARY SURPLUS STORES AND AT GUN AND PREPPER SHOWS.”
You cannot foresee or protect your supplies from every potential event or series of events, so don’t keep all your eggs in one basket.
The goal should be to have multiple caches of survival supplies in different locations to ensure you have the bare minimum.
Consider storing supplies with trusted neighbors, friends or family members within hiking distance.

To bring this all together, I will share how our survival supplies are stored and how it has progressed through the years. The storage plan has been and is dynamic, changing based on time, goals and budget.
The original part of our home is about 130 years old and is constructed of red oak. The outside walls are 8 inches thick, some floor joists are 2×6 and others are 2×8 construction, and the frame is roughly 8×8 inches (reminiscent of railroad ties). There is no foundation, it literally sits on limestone boulders.
On the rare occasion our area experiences tremors, we only know when we hear it on the news or from a neighbor.
Supplies inside the house are stored in plastic containers, on shelves, in a room that is part of the original structure that is on the east side of the house.
As I mentioned, our storms typically come from the west-southwest and there are four walls of the original structure between the west-southwest exterior of the house and the supplies. Go-bags with emergency supplies are kept beside the bed.

In 2002, a garage was built 15 feet from the house. Survival supplies were packed in totes and placed on shelving units in the garage; and survival backpacks were put together for our vehicles.
In 2008, a wood stove was installed in the house for heating, and cooking and we can also cook on our kitchen stove as it is fed from propane tanks.
“TRY TO STORE FOOD IN A DARK, COOL AREA ABOVE 32 DEGREES AND BELOW 60 DEGREES (F) WITH AS LITTLE FLUCTUATION IN TEMPERATURE AS POSSIBLE.”
In 2012, an underground storm shelter was installed 20 feet from the house. It is stocked with a month’s supply of food and water and tools and gear to ensure we can survive for the long term (sleeping bags, clothes, water purification, hunting\fishing supplies, seeds and preserving equipment).
While care was taken to install the shelter in an area not prone to flooding, a drainage system with a 12-volt sump pump was also installed.
Supplies are stored on shelves in plastic totes and airtight, waterproof containers; in summer a dehumidifier is used.
In 2013, the storm shelter was equipped with deep cycle batteries and solar panels to recharge them.
In 2015, one bay in the garage was turned into a cool room for long-term storage food; this was done very economically by using insulation board, duct tape and a small air conditioning unit; a small radiant oil heater is turned on when temperatures may drop close to freezing.

In 2018, the supply totes in the garage were upgraded to Pelican cases.
Additionally, we have supplies available with friends who live within hiking distance and have always had the bare minimum of supplies in a waterproof container, buried in our barn.
When considering your bare minimum survival supplies of food, shelter and water, take inventory of your natural resources.
For example, if you live close to a river or lake with trees, store fishing hooks, line and sinkers. Most likely, you can find a tree branch to use as a pole.

If you or a family member suffer from a life-threatening condition that requires prescription medication, ask your health care provider for an emergency supply in at least the amount recommended by FEMA (10 days) or if specialized medical equipment is needed, try to secure a portable version.
Consider those items an extension of yourself and make sure they go where you go. In the case of powered medical equipment, ensure you have the ability to power them, such as by batteries.
If you have a condition such as high blood pressure or diabetes that might be controlled with diet or exercise, I encourage you to speak with a professional and attempt to control these conditions that way to wean yourself from prescriptions. You never know how long you may be without them.


Each person’s situation is unique and there are no absolutes, but you can give yourself the best chance possible by thinking through the risks associated with where and how to store your supplies.
Choose the Right Containers
If you are using plastic containers for storage, consider using something like a FoodSaver system to further protect crucial items inside the container. On a tight budget? Metal ammo cans are a good choice for waterproof containers.
Ensure the seams and gasket are intact and the lid clamps tightly. You should feel some resistance when you close the lid. Consider putting crucial items in Ziploc kitchen-size or closet-size bags.
Food-grade, airtight, waterproof plastic buckets can be purchased from stores such as Lehman’s, where a 4-gallon bucket is about $10.
Pelican is well known for their airtight, waterproof, rugged and impact-resistant cases that are made in numerous sizes and styles, but they can be expensive.
Organization is Key
Growing up on a self-sustaining farm, we preserved enough food annually to last until the next harvest and beyond. Rotation was easy: as we preserved, the date was written on the jar and jars were stored on shelves in free-standing wooden cabinets in the basement.
Shelves were built to accommodate pints, quarts and gallons without stacking them, and the doors were plywood. At least one row (front to back) was left empty to enable us to reach into the cabinet and move jars without unloading the shelf.
For example, in summer we made blackberry jelly; we went to the shelf containing blackberry jelly and moved any remaining jars forward, filling in the back with the new jelly.
When I left the farm and began filling my own cupboards with a goal of having enough food for six months, I learned not to buy food I wouldn’t normally eat because, when it expired, I threw that money away.
If you are on a tight budget, consider setting up a secondary pantry (preferably not in the same structure as your kitchen). Purchase only items you will actually eat for your secondary pantry each time you shop.
Then, use the secondary pantry as your store by bringing those food items into your kitchen as space opens up there. Refill your secondary pantry with new purchases made, always moving the older food forward and filling in the back with your new purchases.
My food rotation now is almost as simple. When it’s time to prepare for the spring storms (February), I check expiration dates on food, water, and medical supplies in the go-bags and vehicles; then I go to the storm shelter and read the expiration dates on the front row of food, beverages and medical supplies.
That which expires first is always in the front. When holiday season arrives in the fall, I go into the garage to get decorations and this is my reminder to check food stored in the cool room. Again I only need to read the expiration dates on the buckets, containers and cans that are in the front row.
Editor’s note: A version of this article first appeared in the December, 2019 print issue of American Survival Guide.