

OVERCOME THE STIGMA AND SAMPLE THE CUISINE.
There is no shortage of reasons that roadkill should be harvested from the streets whenever possible.
From an ethical standpoint, it is wrong to let the animal die for no good reason and be left on the street to rot when there are people in this country who go to bed hungry every night. When you look at it from the perspective of sound economics, you can save a great deal of money by supplementing meat that is commercially raised and butchered with meat you can salvage from the street.
Eating roadkill is also an opportunity to get over any food aversions you might have prior to a survival situation, and it gives you a chance to try some different species of wild game you might otherwise not have had the opportunity to eat.
However you look at it, eating roadkill is not the “taboo” that many people in our society have made it out to be. Remember the infamous words of your mother: “Try it; you might like it!”
Harvesting roadkill is generally a four-part process: locating the roadkill, inspecting it for edibility, processing the meat by separating the skin, organs and guts from the meat and quartering and cleaning the meat, and finally, either cooking the roadkill for immediate consumption or freezing it for cooking at a later date.

Locate the Victuals
Locating roadkill in America is hardly a challenge. Each year, according to a 2010 Humane Society estimate, vehicles kill approximately 365 million animals on America’s vast network of highways and roads.
A 2008 Federal Highway Administration report estimated that one to two million large animals were killed on our roads per year. If you pay attention, you will not have to look very far to find an animal that has lost its life on or near a roadway.
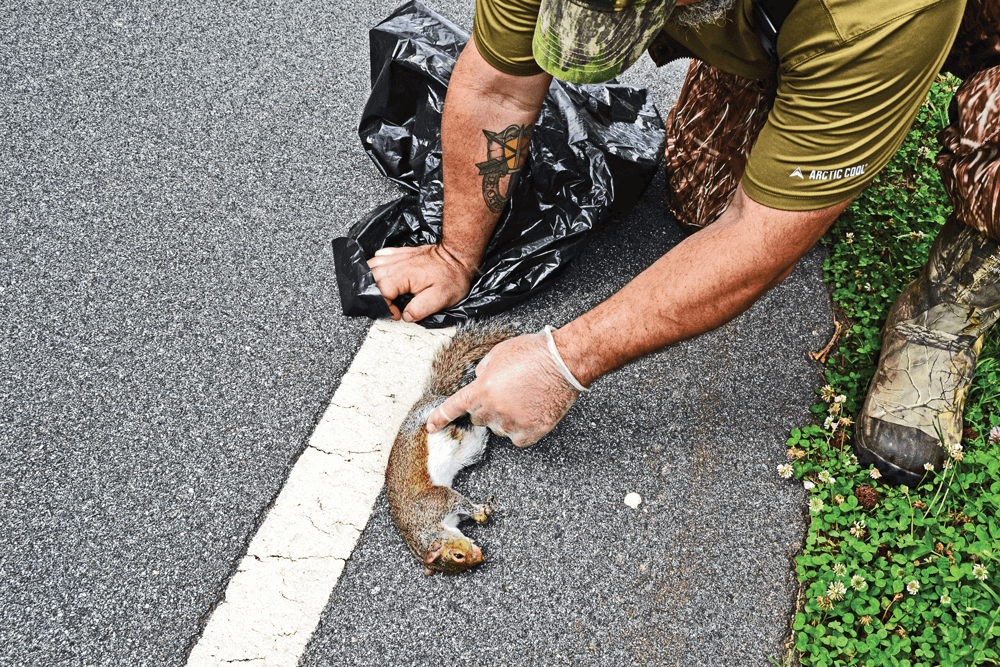
Inspection Is Key
First and foremost, trust your senses. Human beings, in general, have an innate ability to know when food is edible or inedible. Dietary preferences aside, what I mean to say is that when food looks, smells or tastes rotten, you will know it.
Think about when you drive or walk by an area where an animal carcass is decomposing. You don’t need a professional to tell you that the meat on that animal has gone sour. How often have you opened a bag of chicken thighs that had passed its expiration date, only to get knocked on your butt by the foul smell of the spoiled meat?
FROM AN ETHICAL STANDPOINT, IT IS WRONG TO LET THE ANIMAL DIE FOR NO GOOD REASON AND BE LEFT ON THE STREET TO ROT WHEN THERE ARE PEOPLE IN THIS COUNTRY WHO GO TO BED HUNGRY EVERY NIGHT.
Animals possess different levels of senses to help them find food and avoid eating things that can hurt them. Humans possess a keen sense of smell for exactly this reason. If the meat is bad, listen to your nose, because it will tell you all you need to know!
If the roadkill passes the smell test, it is still extremely important to inspect it. Assess not only how fresh the meat is but also whether the animal suffered internal injuries from the blunt force trauma that killed it. Vehicle strikes can often cause internal injuries that result in tainted meat, making it much harder to salvage many of the animal’s edible parts.
Another thing you will want to check is how long the animal has been dead. Rigor mortis can often set in quite fast, sometimes in under an hour, so it is not a good indicator on its own that the meat is no good.
Most wild, warm-blooded animals that have fur are infested with fleas. One way to see how long an animal has been dead is by looking under its hair for these little parasites. Fleas prefer to feed on the warm blood of their hosts. Once an animal has been dead for a few hours or more, the parasites will generally have moved on to find another source of food.
You can also inspect the animal’s eyes. One of the first changes to occur as an animal starts to go through the decomposition process is that a white, milky film will form over its eyeballs. If the eyes are clear, it’s a good sign the animal has been dead for only a short time.
Of course, the amount of time an animal can stay on the road before you harvest it is also affected by the temperature. The colder the temperature, the longer the animal can stay in the elements without rotting and without being processed and cooked.
Finally, look for flies. Flies are amazing creatures—they have an uncanny ability to appear, seemingly out of nowhere, once an animal starts to decompose. That said, flies are not always going to be a deal-breaker when it comes to harvesting roadkill, because they are sometimes unavoidable, depending on the location and time of year.
There are certain animals you should pay particular attention to before deciding if they are worth harvesting. Reptiles pose a particular risk.
Turtles, iguanas and snakes are all possible carriers of salmonella and should never be eaten raw. This is really the rule for most meats—particularly when harvesting roadkill. In this scenario, ”well done” should be the only choice in preparation.
It is possible to be infected by bacteria such as E. coli and salmonella through consumption of wild game; that is why it is important to do your research and take all the appropriate steps to inspect and prepare your harvest prior to consumption in order to mitigate the risk of getting sick.
When it comes to the risk of being infected by tainted meat or from a disease-infected animal, the best advice is to research the areas where you are going to harvest your roadkill to determine which animals might be at risk for carrying disease. Then, inspect the animal’s carcass, both externally and internally. As an added precaution, you should cook the hell out of any meat you plan to consume.


Processing Your Protein
While you already started the inspection process to get to this point, you should keep in mind that the inspection never really stops, because the final test of whether or not the animal is safe to eat is going to be taste and digestion. If it doesn’t taste right, it probably is not good, and your body will let you know that via one end or the other.
When it comes to processing roadkill, the steps at this point very much resemble the way you would prepare any other meat for consumption. The exact steps are merely “techniques,” and everyone has their own. I will share how I like to do it, and you can use my method or do it the way you prefer. Either way, the main concern is that you have clean, untainted and apparently uninfected meat.
EATING ROADKILL IS ALSO AN OPPORTUNITY TO GET OVER ANY FOOD AVERSIONS YOU MIGHT HAVE PRIOR TO A SURVIVAL SITUATION …
I like to start by removing the animal’s head. For most animals, I try to make my cut just below the head to leave as much harvestable meat as I can. Some animals, such as snapping turtles, have some of the best cuts of meat on the neck, so you want to salvage as much of that meat as possible.
When processing poisonous snakes (or any snake, if you are not certain), it is a good idea to make your cut about 6 inches below the head to make sure the sacks that contain the poisonous venom have been removed.
Because we are talking about snakes and snapping turtles, another good tidbit of information to remember is that both animals can bite you long after they are dead, so great care should be taken to avoid the business end of these creatures once the head has been separated from the body.
A snapping turtle’s body seems to live on for an hour or more after being killed. I have butchered an entire turtle down to removing the shell, separating the different types of meats and removing all the guts and organs. I was still able to hold its separated heart in my hand and watch it beat for more than 20 more minutes until it finally stopped pulsating. The turtle’s head, severed from its body, still possessed the biting force needed to break a number two pencil when placed in its beak!
Poisonous snakes completely lose the ability to regulate how much venom they deliver after they die. They still have the ability to bite you after they are dead, so you are going to get all the venom they have to give. I recommend you place the head in a sharps disposal container and then dispose of it in accordance with your community guidelines. If you can’t do this, put the head into a jar with a screw-on lid and bury it in a hole several feet deep. The jar will protect your pet if they get curious and try to recover what you buried, but I would still make sure your pet stays away from the disposal site.


I then cut off the lower portion of each of the animal’s feet just at the joint. At this point, on smaller animals such as squirrels and rabbits, I prefer to cut a small incision across the center of the backbone just big enough to get two of my fingers under the skin on each side. I then pull the skin and fur in opposite directions, and the skin will generally peel right off.
I prefer to hang larger animals that have a large amount of blood from their hind legs and peel the skin down. On animals larger than a rabbit, I cut the skin all the way around the anus before I peel the skin off the animal. When the animal is skinned, I make a downward vertical incision with a sharp knife, starting at the animal’s neck and continuing all the way down through the center of the rib cage. I continue down through the center of the hind legs all the way to the anus to expose the small intestine. Then, I remove the animal’s guts in the same way that one might clean out a fish.
It is important to note that special care should be taken to not rupture the animal’s bladder, bowels, bile ducts or stomach, because this can spoil the meat. Remember: The inspection process never really ends.
After you have the animal gutted, you should inspect it to ensure that none of the tissue or organs appears abnormal in shape or color and that there are no abscesses or parasites visible.
… TRUST YOUR SENSES. HUMAN BEINGS … HAVE AN INNATE ABILITY TO KNOW WHEN FOOD IS EDIBLE OR INEDIBLE. DIETARY PREFERENCES ASIDE … WHEN FOOD LOOKS, SMELLS OR TASTES ROTTEN, YOU WILL KNOW IT.
While the heart and liver of most animals are edible, it is an acquired taste. However, there is no harm in giving it a try. Look for any bile ducts or glands in the liver and other organs, and make sure you do not puncture them or that they were not ruptured when the animal was struck by the vehicle. If they were, you will probably smell it before you see it. The bile will taint any meat it comes in contact with, so it is definitely something you need to be aware of when processing roadkill.
I don’t like to waste any part of the animal, so I put all the unused parts of the roadkill into my composter or use it for catfish bait. If you are in a survival situation, or you just want to practice your bushcrafting skills, you can make tools and even fish hooks and sewing needles from the animal’s bones and clothing or shelter with the hides or pelts.


Let’s Get Cooking
Now, you are ready to update any of your favorite “barnyard” recipes with whatever exotic treasures you were able to harvest off the street.
Bon appétit! Check out a few recipes that work well for me (see the sidebars on pages 101, 102 and this page).
While in a survival situation or when eating “at your own risk,” you can eat fresh roadkill as soon as you find it, inspect it and process it. There are several precautions you can take to help lower the risk of getting sick from eating contaminated meat:
Many experts advise that you freeze roadkill at -4 degrees (F) for four days or longer to be certain you have killed any tapeworms or other parasites that might have been present in the meat.
Regardless of whether you freeze the meat or eat it right away, it is always smart to cook the heck out of it. At a minimum, you need to make sure the meat is cooked to above 160 degrees (F) before eating it.


RECIPE Rabbit and Cabbage Stew
· 1 small rabbit (approximately 3.5 pounds)
· 2 potatoes (diced)
· 9 cherry tomatoes (quartered)
· ½ a medium-sized head of cabbage (sliced and cut into bite-sized pieces)
· 1–2 medium onions (sliced and quartered)
· 2 tablespoons vegetable oil
· Salt (to taste)
· Freshly ground pepper (to taste)
· 1 quart chicken broth
· 1 bay leaf
Rinse the rabbit, pat it dry and cut it into 12 pieces. Peel the potatoes, rinse and dice. Rinse the tomatoes and cut them into quarters. Rinse the cabbage, trim, remove any fibrous center ribs and then thinly slice. Peel the onion and cut it into strips. In a saucepan, heat the oil and sear the rabbit pieces until they are golden brown on all sides. Season with salt and pepper, add the broth and simmer over medium heat for about 30 minutes. Add the vegetables, herbs and spices and simmer for another 15 minutes or until the vegetables are tender. Season with salt and pepper and serve.
RECIPE Snapping Turtle With Potatoes and Vegetables
· 1 to 2 pounds snapping turtle meat (or you can substitute other turtle varieties)
· ¼ cup dry sherry wine (optional)
· 2 teaspoons minced onion
· Garlic (to taste, minced or halved)
· 2 carrots (sliced)
· 1/8 teaspoon basil (dried or fresh)
· Salt (to taste)
· 2 cups water
· 2 celery stalks (diced)
· 1 large red bell pepper (chopped or sliced)
· 1–2 large zucchini (diced or quartered slices)
· ½ cup green onion (diced)
· 8 small red potatoes (skinned and halved)
Salt the turtle meat well and place it in your slow-cooking pot. Add all other ingredients in the order listed and then cover and cook on low heat for six or seven hours or until the turtle meat is tender. Remove the meat from the pot and cut it into bite-sized pieces. Return the meat to the pot, cover and continue to cook on low heat for an additional two hours.
RECIPE BBQ Buffalo Hot Squirrel Leg Dippers
· Front and back legs from 2–3 squirrels
· Salt
· Freshly ground black pepper
· 1 bottle favorite brand of Louisiana hot sauce or Buffalo hot wing sauce
· 1 stick butter
· Garlic powder
· Hickory wood chips
Soak the hickory chips in water for about one hour. Next, season the squirrel legs with salt, pepper and garlic powder to taste. Put the hot sauce into a pan. Add the butter and a few shakes of garlic powder. Heat on low until all the butter is melted. Keep it on low and stir often. Add the hickory chips to a hot grill and then put the squirrel legs on it, grilling them on medium heat until done. Baste the legs frequently with the hot sauce, with a final heavy basting at the final flips prior to being finished. Grill the legs over medium to medium-low heat, adding more chips as you see fit. Cook until done (use poultry guidelines), basting often with the sauce. Save plenty of the sauce for dipping instead of using it all for basting.
Editor’s note: A version of this article first appeared in the October 2018 print issue of American Survival Guide.