

When faced with a short-term wilderness survival scenario, food is typically not a priority until all other urgent physiological needs are met. In a long-term wilderness living scenario, priorities and goals are likely to change as you settle into an off-grid homestead or woodland shelter. In a long-term situation, things you make at home could hold enormous value in trade. The knowledge to source and obtain resources directly from the land is paramount in the quest for long-term self-sufficiency. These resources can lead to the creation of items like maple syrup.
If you have something people want that nobody else has, its value will skyrocket. Shells for sugar? Meat for Syrup? Creating value in your cache is an important element to survival. Do so with maple syrup.
“If you have something people want that nobody else has, its value will skyrocket.”
FLAVORS OF THE FOREST
The harsh reality is that wild food typically tastes different from the domesticated crops, livestock, and the store-bought processed garbage most of us have grown accustomed to eating. The average modern American diet consists largely of fats, salts, and sugars. In the wild, these are three of the hardest things to obtain by simple means. These flavors we have grown to expect are often seasonally or regionally specific and can be difficult to obtain or stockpile for year-round use without modern tools and domesticated livestock.
This is why even a lean venison back strap that was cooked to perfection will often taste “gamey” to that city slicker buddy of yours and he will likely reach for his favorite steak sauce or seasoning…typically one that is loaded with salt.
TAPPING
In a pinch the sap of non-poisonous trees can make an excellent source of readily available clean drinking water. The inner layers act as the circulatory system of the tree by pulling water from the ground up the trunk of the tree to its extremities in the form of sap. The sap of sugar maple trees contains a much higher concentration of sugars than other trees such as sycamore. Estimates vary depending on who you ask, however, a good rule of thumb is that 40 gallons of sap will produce about one gallon of finished syrup.
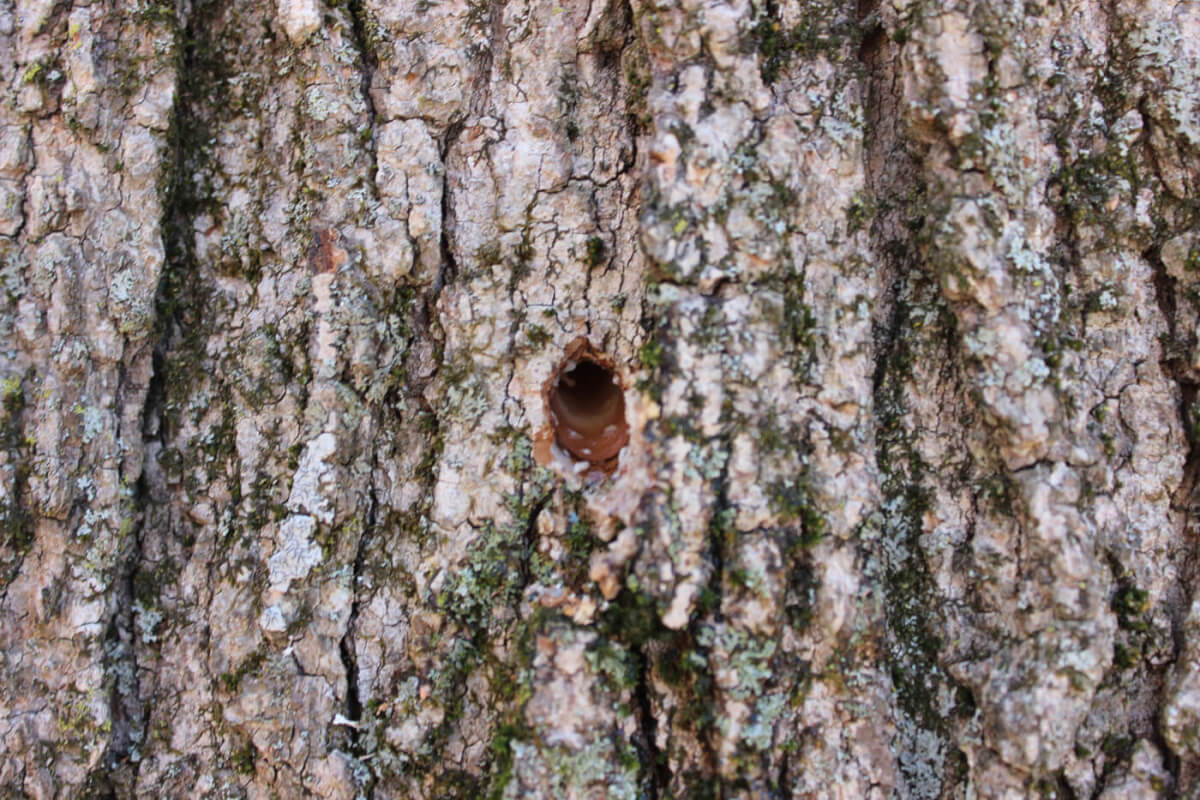
Drilling a small hole or tapping a tree will pierce these inner layers and allow the sap to leave the tree so that it can be collected. The tree sap typically flows best from about mid February to late March when nighttime temps are still low and the days are warm and sunny. As the sun and daytime temperatures warm the tree in the morning the sap will begin to flow up the trunk of the tree. It is for this reason the sunny side of the tree will often flow better in the morning. A hand drill will prove very helpful when tapping numerous trees and commercial tree taps can be purchased and are very effective; however, in a pinch they aren’t completely necessary.
Once you’ve selected a tree, bore a hole through the outer bark and into the cambium layer of the tree. The required depth of the hole varies from tree to tree so drill a couple inches and clean any debris out of the hole to check and see if the sap is beginning to flow. Once satisfied that you’ve drilled far enough, hammer the tap into the hole with the back of an axe or heavy stick and hang a collection container of some sort from the tap itself. Five gallon buckets or empty milk jugs with an attached hanging wire work great for this.
To tap a maple tree in a survival scenario, bore a hole with your knife. You will likely not be able to drill very deep with your knife so cutting a V shape into the tree will allow more sap to flow into a concentrated area to be collected. Wedge a small piece of flat wood or a twig into the base of the V so that the sap drips away from the tree and into your canteen or cup.
Bartering played a huge role in the past and will likely play a huge role again at some point in the future. Things like spices, sugars, and cooking fats will likely yield a high demand as more and more families are forced to become self-sufficient. Over time, eating only bland tasting foods can have negative effects.
Nobody wakes up in the morning looking forward to a long day of work after having a not-so-hearty breakfast of leaves and hot water.
Sweeteners can make even the blandest of wild teas a delightful treat and people will certainly be willing to trade other useful goods for a hot cup of humanity they can look forward to each morning. Maple syrup is a natural resource that can be obtained will relative ease in the spring time in certain parts of the country and its regional limitations make it an ideal trade good. The current price of true 100 percent natural maple syrup in a grocery store says it all. Money doesn’t grow on trees but it does flow through them, and with a couple trees, a few containers, and a little patience you can collect maple tree sap and turn it into syrup for trade or personal use.
THE FIRST BOIL
After leaving the buckets to collect sap you’ll want to check them regularly. Keeping the buckets covered will help to keep debris, bugs, and the occasional mouse out of the sap. Checking tapped trees first thing in the morning is typically sufficient. After collecting the previous day’s sap, empty it into a separate set of buckets or holding containers so you can continue to collect additional sap while you’re boiling. If you plan to use a fire to boil your sap, build a fire near the tapping site for the continued ease of transporting sap to the fire. A simple adjustable tripod set up works fantastically for boiling sap as a slow even boil is desired to prevent burning the syrup during the finishing process.
A Number 12 cast iron Dutch oven works well as a boiling pot as it can be easily suspended over the coals of the fire and will slowly heat up for a slow even boil. If there is particulate such as leaves or tree bark in the sap it can be strained thru a piece of cloth such as a bandanna before being transferred to the boiling pot. Once the fire has burned down to an even coal bed, place the boiling pot on the tripod and lower it over top of the coals. As the sap boils the water evaporates, leaving the sugar behind.
The remaining sap will become thicker as the sugar content rises, becoming amber-colored and releasing a heavenly aroma. Take caution not to overcook the sap on the first boil. Once the sap begins to thicken, remove it from the fire and allow it to cool or add more sap. If you choose to remove it from the fire, pour the cooled sap into another holding container such as the stainless steel cup of your canteen.
FINISHING THE SYRUP
With the second holding container full of half-rendered sap it can now be suspended from the tripod and cooked at a low heat to finish the sap without burning. From this point it’s a slow process to get the majority of the remaining water to evaporate out of the sap so that you’re left with only syrup. If the sap is cooked too hot or too fast it will solidify to the bottom of the boiling pot and you’ll have to start over.
Personal preference also plays a part in finishing the syrup. If you prefer a watery syrup you don’t have to boil it all the way down, however, if you’re planning to store it without canning or refrigeration, it’s a good idea to remove most of the water.
Once your syrup reaches the desired sweetness and consistency strain it off into a bottle or jar using a piece of cloth to remove any remaining debris or ash from the fire. Store it in a cool dry place until you can no longer resist the urge to pour it over some pancakes.
NATURE’S SPORTS DRINK
As you can tell, it takes a lot of maple sap to make a pancake’s worth of syrup. This project shows it can be done with a few common tools and containers that you may have lying around a temporary camp. Making large quantities of maple syrup with larger scale pots and buckets is much more practical for a long-term scenario. Producing syrup with minimal equipment is a fun camp project and the sap itself is essentially nature’s sports drink.

allow gravity to guide the sap into the metal tap.

flow and the sweetness of the sap itself as sugar concentration tends to vary from tree to tree.


adjustable tripod. Keeping the lid off during boiling
allows for maximum evaporation. Try to keep the sap at a slow rolling boil for best results.


corked. This syrup was
intentionally left slightly watery making it slightly less concentrated for use and a natural sweetener for wild teas. This amount of syrup was the result of a full Dutch oven’s worth of sap.
Editor’s note: A version of this article first appeared in the Fall 2015 print issue of American Survival Guide.