

HOW TO MAKE YOUR OWN ARCHERY SET IN NATURE
Archery today is a complex sport. The types of bows are numerous, such as the crossbow, recurve and compound. Specialization, competition and much debate occurs with even the smallest components of the modern bow.
Archery is an enjoyable sport and I would encourage readers to learn more about the various archery products on the market and to investigate local archery clubs where you can practice alongside seasoned archers.
The primitive bows of the American Indians may seem like toys by today’s standards but they provided the Indians with food and protection. Indians routinely abandoned their rifles to the bow.
After all, the bow was familiar as a tool they used all their lives. To operate the bow, all the needed tools and parts came from nature. However, replacement gun parts, the repair know-how, and ammunition were the reasons why they quickly reverted to their bows when guns failed.
A STUDENT OF THE MASTER

I was one of several students of Joe Dabill during our week-long stay in the woods of the Sequoia National Forest. Dabill is a master at the art of bow-making and all of its related skills.
He handed each of us a stave he had cut and split a few months earlier. My stave came from a California bay tree. It was nearly five feet long, and my job was to reduce that stave to a functional bow. Dabill’s job was to mentor me in each step of the process.
I liked the look of my raw stave and was eager to see it become a bow. After Dabill explained some of the basics, I clamped my stave to a wooden table, and Dabill carefully looked it over.
The stave was over an inch thick in sections, and as much as 2 ½ inches in parts. Dabill took his carpenter’s pencil and marked my stave to indicate those sections that should be completely removed.
Archery Is An Enjoyable Sport
Taking a spoke shave, I began the process of shaving off wood, always from the belly of the bow (the side that faces you when you shoot it), and never from the back.
I spent several hours shaving, though some of those hours were spent resting. Dabill, and his assistant Sig Nubla, would periodically come over and look at my work and make helpful suggestions. (I began to refer to Sig as Dabill’s disciple.)
As the stave began to look more like a bow, I began to use the Shinto wood rasp, which shaves off lesser amounts of wood. Dabill or Nubla would come by, make a few comments, put some more marks on my soon to- be bow, and then I’d get back to work.

Sometime during the second day, Nubla looked at my “bow” and told me I was only 20 percent done. Fortunately, he was kidding, as I had done considerably more than 20 percent of the work.
I also used a flat rectangular piece of metal to scrape the belly and the sides of the bow. This removed fine slivers of wood and helped to smooth out the surface.
Eventually, Dabill removed the bow from the clamps and filed nocks into each end. I’d already twined a bow string from linen, which I then waxed with beeswax. Dabill strung it, and tested the tiller (how evenly each side of bow bends).
He and Nubla then carefully examined the strung and pulled bow like two scientists. They pointed out the still-stiff areas and then Dabill marked those stiff areas for further reduction.

“It’s getting there,” said Dabill. “A little more and you’ll have a bow.” I clamped the bow back to the table and began the careful end-game. I reduced each end a bit, as per Dabill’s instructions, and did some careful thinning in certain areas.
After another two hours or so of off-and-on work, Dabill tested the bow’s tiller again.“Looks good,” he said and fired a few arrows to a nearby tree stump. “Shoots good,” he said with a smile. I was happy, and Nubla and Dabill did a little more “fine-tuning” so my “finished bow” was now “a really good” bow.
START WITH A GOOD PIECE OF WOOD
If you’re going to make a bow from scratch, you first find a good straight piece of wood. You could select a perfectly straight shoot about 3 inches diameter, or you could cut a much larger tree and then quarter it down for separate staves.
This traditional bow is generally not curved when unstrung, and is all made from one piece of wood. It is often called a self bow or a long bow.
I prefer the least amount of work, so I select a straight shoot, about six feet tall. Also, I typically use willow, ash, or California bay because that is what is commonly available to me. I have also purchased red oak boards at Home Depot I carefully selected, but I prefer to make a bow from a shoot I have cut.
Next, I let the wood dry until it is thoroughly dry, which means at least two weeks, but probably longer. Some bowyers advise to cover the ends of the wood with paint or wax to cause the wood to dry slowly and evenly. Sometimes I do this, and sometimes not.
In A Survival Situation
According to Longbow (aka Alton Safford, one of the best old time bow-makers), you should begin with a standing dead limb at least 41⁄2 to 5 feet long, and about 11⁄4 to 13⁄4 inches thick. You don’t want green wood since it is too heavy and doesn’t cast the arrows well.
And you don’t want downed wood, since it will likely be waterlogged or rotten. Longbow says “you want a piece of wood that is free of knots, checks, bumps and irregularities. A slight bend is okay.
You can make a good bow from just about any type of wood, but some are better than others,” he points out. “The best bow-making woods are yew, osage, mulberry, black locust, apple, juniper, hickory and ash. But in a survival situation, you use whatever wood is available.”
“INDIANS ROUTINELY ABANDONED THEIR RIFLES TO THE BOW. AFTER ALL, THE BOW WAS FAMILIAR AS A TOOL THEY USED ALL THEIR LIVES. TO OPERATE THE BOW, ALL THE NEEDED TOOLS AND PARTS CAME FROM NATURE.”
Before you start to work on a particular piece of wood, Longbow suggests you test some of the smaller dead branches from the same tree by bending them to see if they will stand the stress.
You first examine your stave and bend it slightly to see which way it bends. You should be able to determine the natural way to begin carving your bow.


REDUCTION
Your next step is to flatten one side – the side facing you when using the bow. This flat side is called the belly, and all wood is removed from the belly, none (but bark) from the back.
Now, you’re ready to get to work. You can hold your stave or you can clamp it onto a vice or table. And you can use a knife, a small axe, a draw knife, a rasp, a file – and maybe all of these.
“Slowly, carefully, and evenly, cut flat strips down the belly of the bow all the way,” advises Longbow. “As you remove wood from the belly, test the bow periodically by bending it,” he explains. This process can take hours until the bow begins to take shape.
You might use a small axe and big knife at first, but you want to wield it very carefully as you proceed. Remember, you can always shave off more wood, but you cannot put it back on. If you carve too deep, you might ruin what could have been a good bow and you’ll have to start over.
The reduction process can take hours, and though everything can be done with one large knife, I strongly recommend beginners get a few of the other tools mentioned here.
THE TILLER
As you reduce more of each “arm” of the bow, you will get to the point where you can test how well your bow-in-progress flexes. You will want to make sure you have an even tiller, which means you want each arm to bend the same.
This means you will need to string the bow, and gently pull on it and observe how much each side bends. You want to see equal pull on each side.
One way to observe the tiller is to do the pulling in front of a large mirror. Another way is to have someone watch while you pull it. You can also use a tillering stick which allows you to step back and observe.
If the tiller is not even, you continue to carefully and slowly reduce the stiff side until the tiller of both sides is equal. Once strung, each “arm” must bend equally, or your arrows will not fly straight.
When you are satisfied that your bow is bending evenly, you cut nocks on each end for the bowstring, and you have a bow. Longbow suggests that you always carry good cordage for the bowstring into the woods, since the bowstring can be difficult to manufacture only from wilderness plants.


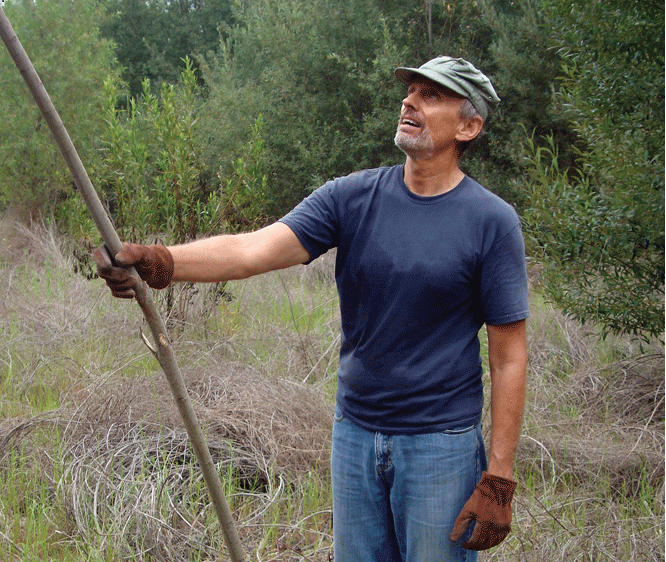
Though shown here working with “convenient” tools, crafting your DIY bow and arrows can be done with little more than a sharp knife.
ARROWS
A good straight arrow that flies straight is the single most important aspect of successfully using a primitive bow. Any bow can be quickly fashioned, but you’ve got to have straight arrows that fly to their targets.
That means you need to know how to make straight arrows, perhaps how to make broadheads (arrowheads) out of stone, metal, or bone, and how to attach feathers to ensure a straight flight.
Some of the simplest Native American arrows were nothing more than hardwood shafts that had a nock on one end and were sharpened to a point at the leading end. I suggest you practice with commercial arrows at first and then learn to make your own.
Once you learned some of the basics of bow and arrow making you’ll discover that it’s not difficult to construct them from scratch in the wilderness. After a bit of work, you’ll realize why the bow was the one weapon in universal use world-wide.
Editors Note: A version of this article first appeared in the April 2015 print issue of American Survival Guide.