

With everything that has been happening around the world in regard to terrorist attacks, mass shootings and stabbings, it seems as if the reasons to carry a concealed handgun just keep increasing.
Of course, most of the attacks occur on soft targets, where defenders are required to disarm, leaving themselves with limited tools to use against the many evil people in the world. However, there is an excellent chance that someone is carrying a handgun in every location in the country where it is legal. Because there are more locations in most states where carrying concealed is legal, the majority of Americans are protected by law-abiding “sheep dogs” in malls and other gathering places—whether they realize it or not.
Of course, carrying a concealed handgun at all times and actually knowing how to use it are quite different. Whether required by law or not, all concealed-carry advocates should obtain at least some training—perhaps an NRA First Steps class at the very least, although more-advanced training would be advisable. Beyond that, though, folks who carry a handgun for self-defense need to practice on a fairly regular basis to keep learned skills fresh, as well as to obtain new skills that could be useful in dire circumstances.

Exercise is one of the best ways to increase breathing and heart rate during firearm training. It also helps shooters get in shape for real situations.
In fact, training should be practically continuous and everlasting. There is no such thing as “enough,” and skills can never be too polished. Unfortunately, many shooters believe that an occasional trip to the range for some accuracy and draw training is enough to protect them on the streets. That might be true in many cases, but why take that chance, when there are numerous drills that can be inserted into a training regimen to add realism and be better prepared for a situation in the real world?
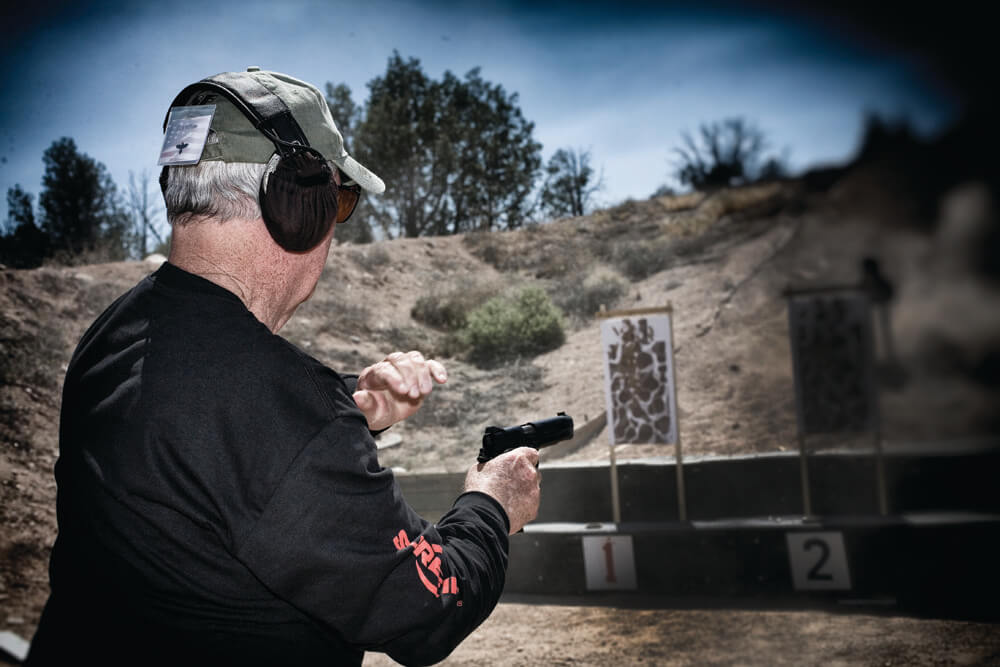
FAILURE DRILL
Also known as the “Mozambique drill,” the failure drill is designed to stop a threat when the standard double-tap isn’t enough. A double-tap is no longer standard procedure; now, it’s shoot until the threat is stopped. (However, this drill still develops shooter proficiency.)
Colonel Jeff Cooper developed the drill after meeting Mike Rousseau and hearing about a time when Rousseau used a Browning Hi-Power to stop an enemy soldier during the Mozambican War of Independence. During the fight, Rousseau fired two rounds into the body of an assailant armed with an AK-47. However, the attacker continued to advance, so Rousseau took careful aim and placed a round in the head and put the man down.
Cooper realized this drill would be extremely useful, because it simulates an attacker who is determined, drug-addled or possibly wearing body armor. The reason for the head shot doesn’t really matter; if an attacker hasn’t stopped after having two rounds placed in the torso, Cooper’s thought was that a fight-stopping head shot should be administered.
To perform the failure drill, set a silhouette target at 7 yards (21 feet), and from either a low-ready or retention position, fire two fast shots into the center mass of the target. Then, assess the situation, determine if the attacker is still advancing, and fire a carefully placed shot at the head. Variations can be added by including movement or by firing from cover or from the ground. The possibilities are only limited by the imagination and the potential ways a shooter might need to fire.
MALFUNCTION DRILLS
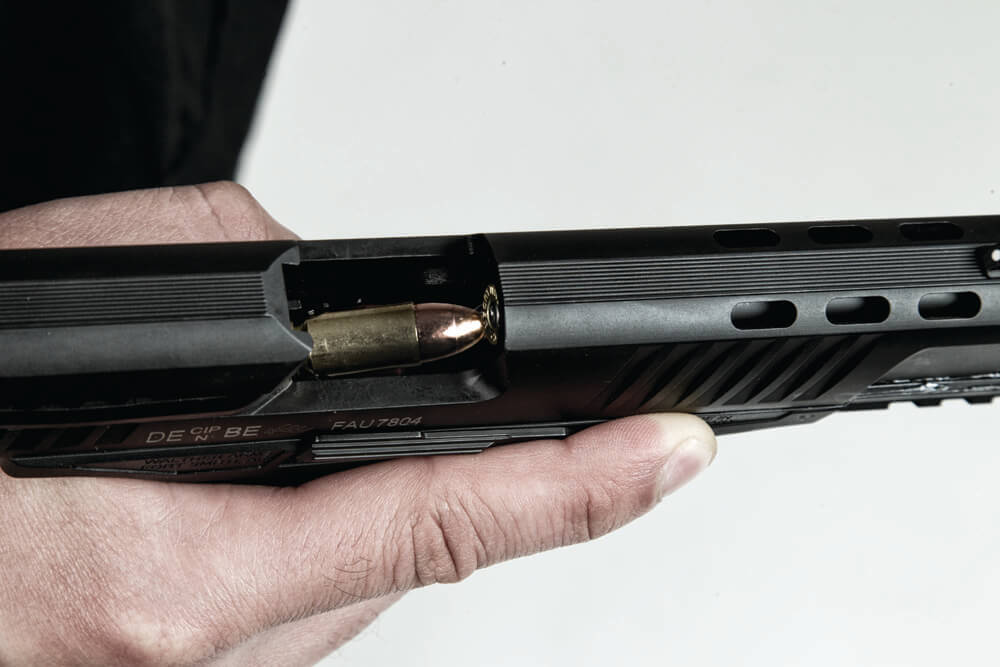
One of the most dangerous situations is facing a deadly threat with a gun that has malfunctioned, mainly because there is no time-out during a gunfight. Regardless of whether it’s an empty chamber, stovepipe or double-feed, a handgun malfunction at a critical time is more than just a problem; it can get a person killed.
Preventing malfunctions is the main reason shooters should perform proper maintenance on firearms, especially on carry guns. A handgun that is carried daily should be well broken-in so it can handle all types of ammunition. It should be cleaned and lubricated periodically and after every shooting session; it should also be inspected regularly to ensure that no foreign objects have worked into the mechanisms during carry.
Magazines should also be checked and rotated to maintain spring pressure, because faulty magazines are one of the leading causes of semiauto handgun malfunctions.
Of course, regardless of care and maintenance, malfunctions can happen, which is why shooters should regularly perform malfunction drills, both at the range and at home using dummy ammunition.
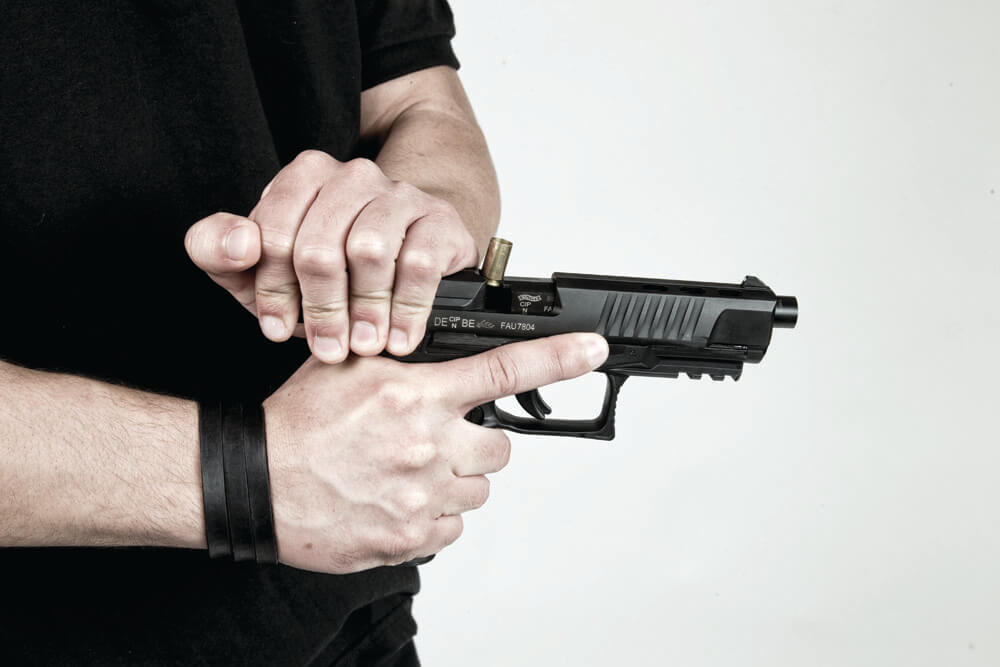
Drill #1: The first action that should be performed if a semiauto ever fails to fire is the “tap & rack,” because it will fix most malfunctions. It consists of a hard “tap” on the bottom of the magazine, along with a hard “rack” of the slide. This procedure returns a gun back to the ready condition for type I (unseated magazine) and type II (failure to eject) malfunctions.
Drill #2: The second drill clears type III malfunctions, also known as “double feeds.” If the tap & rack action doesn’t work, drop the magazine and cycle the slide at least two times. Then, reinsert the magazine and rack the slide. If these two procedures fail to bring the gun back into working condition, it is either jammed or actually broken and will require tools for proper repair.
Drill #3: The last drill requires a partner, who creates a malfunction and hands the gun to the shooter without revealing the type of malfunction. The shooter takes the gun, aims at a target and pulls the trigger. When the gun fails to fire, the shooter must assess the situation, clear the firearm and finish the scenario with two rounds in center mass on the target.
Variations include loading only one round to force a reload or inserting dummy ammunition into the magazine. The only constant is that the shooter should not know the condition of the gun during the situation, forcing him or her to determine the problem and clear the gun under pressure.
WEAPON JAM 101
PRESSURE DRILLS
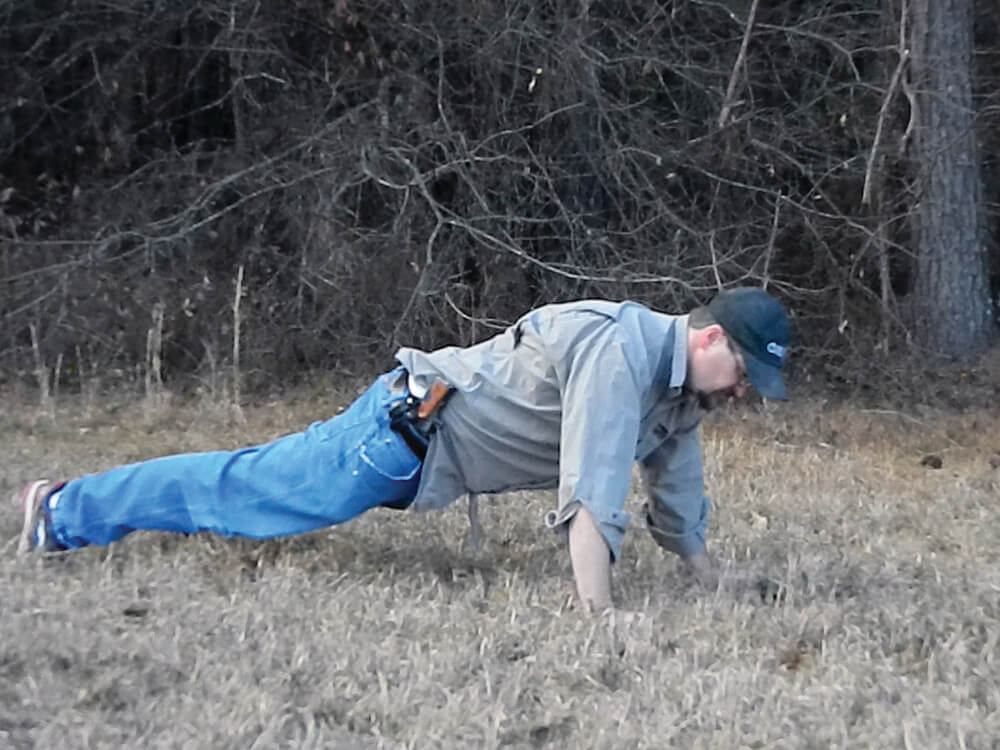
The hardest factor to train for in a self-defense situation is pressure. During a life-and-death struggle, a person’s heart and breathing rates rise, and fine motor skills break down. This is why firearm instructors stress gross motor skills during training, as well as repetition, to ensure that crucial skills are ingrained in the muscle memory. A person must be able to perform actions when the body is in flight-or-fight mode.
Advanced training schools, such as Gunsite or Shootrite, have methods to introduce pressure into training. Unfortunately, not everyone has the time or money to pursue advanced training from such sources. However, heart rate and adrenaline can be raised by other methods, such as exercise or timing.
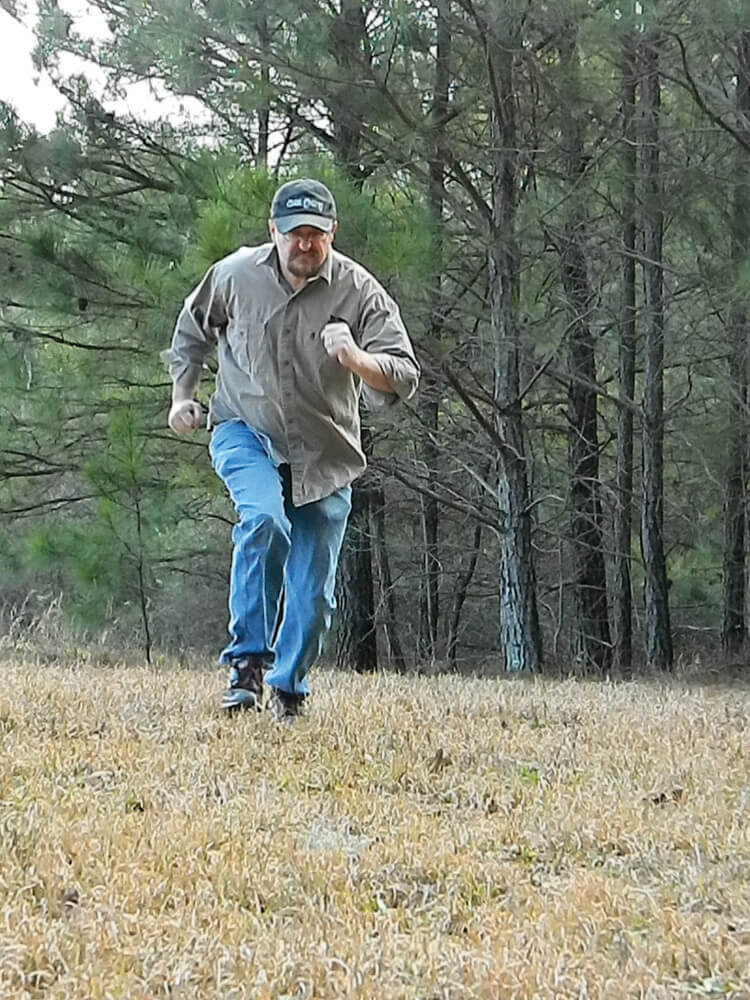
To conduct a pressure drill, shooters should perform push-ups, sit-ups, side-straddle hops or sprint a set distance and back to increase heart rate and breathing before each shooting scenario. Shooters can also include a stopwatch to compete against a partner or try to beat their own times to increase the pressure.
Another way is to set up targets with distances between shooting stations. A three-stage scenario works well, with targets set up 40 yards apart. Start at position one, draw and fire two rounds before sprinting to position two to fire again; then, on to position three and back to the beginning. Variations can be implemented by adding magazine changes, setting up barriers for shooting from cover and rotating station numbers. Use a stopwatch to produce competitive results against friends to show progress.
Firearm skills are finite and need to be constantly renewed. Drills help maintain muscle memory but must be performed regularly— or those skills will not be there when they are truly needed to save a life.
Editor’s note: A version of this article originally appeared in the April 2016 issue of ASG.