Traps don’t need to rest, nor do they need you to watch over them.
If you happen to run out of food in the wild, you can subsist on fruit, vegetables and roots you might find, but not for long. These foods are rich in trace minerals and vitamins, but don’t provide the energy you need that comes from protein and fat. To survive in the wild, meat is necessary to meet your daily nutritional needs.
Hunting is a good way to support your survival diet, but if you don’t make any kills, you will only be wasting precious time and energy and hastening starvation. As such, fishing and trapping small game can be an attractive alternative.
Getting food this way has many advantages. If set at the right spots, snares and traps can efficiently provide food for you and your companions while requiring minimal effort.
Traps don’t need to rest, nor do they need you to watch over them. By setting several up at a time, it’s like employing several hunters for free, 24/7.
Don’t be squeamish
When trapping small animals for food, you can’t afford to be picky. Be prepared to trap and eat animals you’ve never eaten before. Birds, reptiles, rodents, fish, eels, worms, certain insects… basically anything that crawls, swims, flies, or slithers that has non-poisonous meat should be on the menu.
The key word here is energy: the average adult American male needs between 2,400 to 3,000 calories per day according to the USDA. As long as your catch is edible and nontoxic, daily sustenance takes precedence over personal preferences and taste.
The tools you’ll need
To make the traps, you’ll need a survival knife, or at least anything that can cut or carve. Twine, rope, string or metal wire can make good cutting implements. If you don’t have rope, the roots of small trees like spruce are good substitutes.
Do your homework
Before you make and set up the traps, first you have to determine what sort of game is available to you. Next, study what kind of tracks they leave, what type of habitat they have, what time of day they’re active and what sort of food they eat.
Knowing what food they eat is important, since you’ll have to bait your traps. Here are a few tips for traps you can set up.
Snares
Snares consist of sturdy material fashioned into a noose, like twine, wire or thin rope, placed outside the game’s den or on its trail. The noose must be big enough for the animal’s head to pass through and, depending on the construction, the snare may be triggered to “whip” the animal violently and break its neck, or strangle it as it struggles to break free.
To make an effective snare, you must know how to make a proper knot as well as a notched trigger if you want to use one. You can increase your chances of success with a snare by using bait.


Deadfalls
Deadfalls are traps that make use of hefty items, such as large rocks or logs, to crush an animal. A classic example is the Figure-Four Deadfall. The name comes from the notched sticks that form the number “4”.
The horizontal stick supports the rock or log while also holding the bait, thereby acting as a weight trigger. For more detailed instructions on how to make an effective deadfall trap, read this.

Bird Traps
While Deadfalls can catch birds, one type of trap is specifically made for winged game: the Pine Pitch Bird Cup. Note that you should only use this in a survival situation, as it is considered an illegal and cruel method of trapping.
For this trap, all you need is an empty coffee or dixie cup, some bait (like bird seed) and sticky pine sap or pitch. The original native version uses a small cone of Birch tree bark, stitched to form a cone.
The inside is coated with sticky pine sap or pitch mixed with the bait. When a bird is attracted by the bait, its feathers get stuck in the pitch, holding it immobile until the trapper can collect it.
Pit Traps
The size of animals this trap can catch is limited only by how big you make it. The only drawbacks to this trap are that it takes a lot of energy to craft, and it must be placed close to a game trail.
Despite these drawbacks, it’s a good trap to use due to its simple construction and efficiency. First, find a trail where animals frequently pass, as indicated by tracks, droppings or disturbed vegetation. Dig a pit deep and wide enough to trap and hold the animal you want.
Place sharpened sticks at the bottom, then make a grill of sticks and branches to cover the pit. Hide the grill with leaves and grass.

Fish Traps
If you’re close to a river or stream, a fish trap is a surefire way of supplementing your diet with nutritious seafood. You can make a simple and effective pool or shore fish trap by setting up rocks and some sticks to funnel and then “fence in” fish close to shore.
Be sure to build the entrance of your trap opposite the current to prevent the fish from leaving when they enter your trap.
If you’re close to the sea, the tidal flat trap can help you take advantage of the tide’s ebb and flow. Make a crescent-shaped wall of rocks during low tide, with the “tips” of the crescent pointing away from the body of water.
The wall should be built such that it extends outward and into the water. The wall should be high enough to stick out at low tide, trapping fish when the tide goes out.

The basket trap can work with or without the current, and with the added enticement of bait. It consists of flexible branches tied with vines or thinner branches in a cone or funnel shape. The basket trap is then tied securely to shore, or weighed down with rocks inside.
The entrance of the basket is lined with an inward-pointing cone, fooling the fish into thinking they can’t get out. The advantage of these traps is the great results you can get from relatively little effort.
The basket trap is a bit laborious to make, but once it works, it’s very sustainable and can be used again and again. You can start with a pine cone to bait your first fish, then use its entrails to bait the next fish, whose entrails in turn baits the next, and so on.

For more detailed instructions on making the basket fish trap, use this guide.
Notes on Traps
Like real estate, the key to effective traps is location. Set traps in areas where you can see evidence of game “traffic”.
- Good spots to place traps include areas close to water sources.
- Your scent can put off animals from taking the bait. Mask your own scent by blowing smoke on the trap, or rubbing mud, dirt or leaves on your hands when you handle the trap.
- Do not hang around and wait to see if your traps catch anything. Animals may pick up your scent and stay away. Each time you set a trap, leave the area.
- Check your traps every 24 hours for a successful catch. This is reasonable span of time to get any catch before it rots or other predators steal them.
- When not setting or checking your traps, use the time more constructively by foraging, shelter-building or other survival-essential tasks.
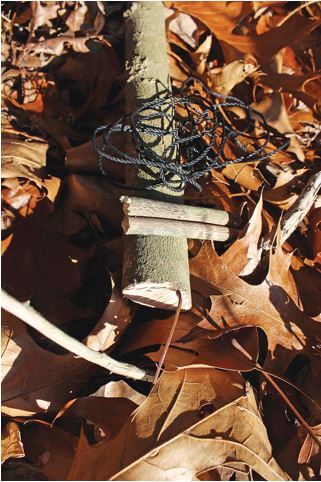
While waiting for your traps to spring, make the most of your time by hunting with an improvised pronged spear or “gig”. This is a primitive tool for catching fish.
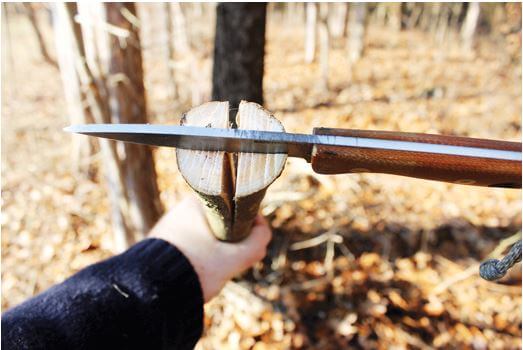
To make a gig all you need is a sharp knife, a reasonably straight, spear-length stick, cordage and some twigs. First, cut a “+” into one end of the stick to divide it into four equal quarters. Cut about 5 inches down the shaft of the stick, gently splitting it open so it forms four “prongs”.
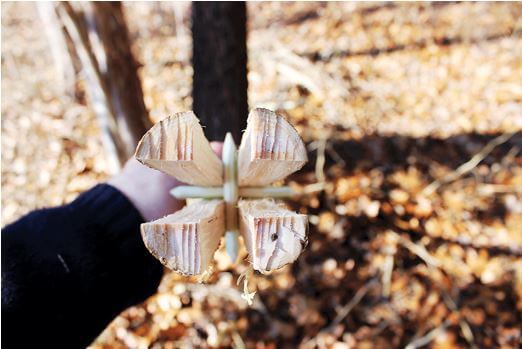
Next, get two twigs, inserting one after the other between the prongs and perpendicular to the shaft and each other, by lightly tapping one end of the twig while pressing the other end with your thumb. This will separate the prongs, creating four opportunities to spear your prey. The twigs should be positioned about 3 inches from the end of the shaft.
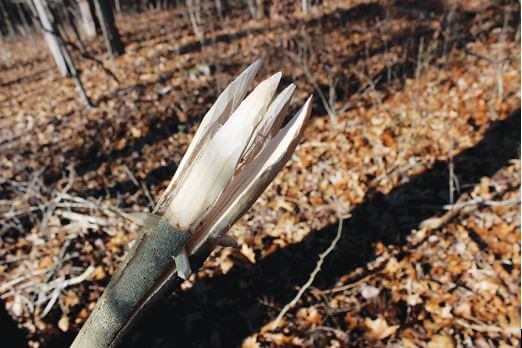
Sharpen all four prongs to a point. Strengthen the prongs by carefully turning them over a campfire. Do this for about 10-15 minutes, making sure that the gig doesn’t catch fire.
Once the prongs have sufficiently dried and toughened up, secure the two small pegs with cordage, and wrap the gig with cordage for about 1 inch on both sides of the twigs to prevent it from splitting open upon impact. Now you have a hunting gig to spear fish or any small animal you come across.
You can see a more detailed guide to making gigs here.