

In today’s push-button society, even navigation is as easy as talking to Siri, checking a smartphone app or GPS-equipped smartwatch, or even a car’s entertainment system. It’s modern, convenient, and makes you look cool, but not exactly useful in real survival situations.
What if there’s a real catastrophe that takes down all the power and comms infrastructure? What if your GPS device runs out of juice, or you lose it? What if a full-scale war takes out the constellation of satellites that form the backbone of GPS? These are the times when the old-school, tried-and-true methods of navigating with a map and compass come in handy. Here’s a guide on how to do it.

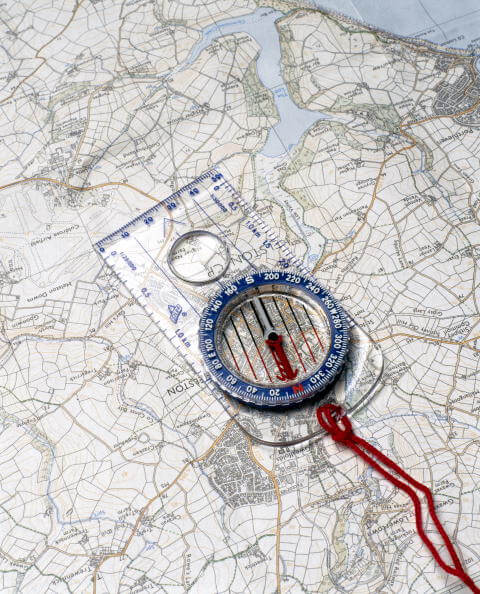
There are different kinds of compasses on the market, but for this guide, we will focus on the use of a Baseplate or Orienteering compass. These are usually filled with liquid, with a rectangular base made of transparent plastic to enable map reading underneath. Many also have a magnifying lens, luminous markings for reading in low-light conditions, a scale, or even a reflecting mirror, and several of these features can perform multiple functions in a survival environment.
Parts of the Compass
Here’s a rundown of the parts commonly found on a Baseplate compass and their functions.

- Baseplate – This is the “body” of the compass. Usually made of sturdy, transparent plastic so you can place it over a map for easier orienteering.
- Straightedge/Ruler –Compass baseplates are typically engraved with measurement units in inches or centimeters for calculating map distance and waypoints.
- Orienting Arrow – Used to orient the Bezel with “true north”. Once you know what the degree of declination is, move the Orienting Arrow to that setting, so your compass will always be oriented to true north regardless of your heading.
- Direction of Travel Arrow – This may be an arrow, a notch, line or other mark located at the center of the baseplate, opposite the rotating bezel. This is what points to the direction where you want to go, and determines your “bearing” or navigational point on a map (hence the saying “Find your bearings”).
- Magnetic Needle – This indicates where the “magnetic North” is located, relative to your present location. Wherever the needle points is where magnetic north is located. Note that the “magnetic north” is different from the “true north”. This degree of variance between them is called “declination” and this must be considered and compensated for, to get a truly accurate map reading… unless you don’t mind ending up 3 states away from your destination.
- Rotating Bezel – Encircling the compass is the Rotating Bezel, aka the Degree Dial or Azimuth Ring. This is marked clockwise with numbers from 0° to 360°, and tells you which direction to point the compass when you need to pinpoint or go to a specific direction (bearing).
- Index Line – Found right above the Rotating Bezel and in line with the Direction of Travel Arrow, this is the mark at which where you’ll read your bearings.
- Orienting Lines – Used to line up the compass with north on a map.
- Declination Scale – Some compasses have this convenient feature that helps find the degree of variance between true north and your compass’s magnetic north. Look for the declination diagram, near the legend of your map. This will indicate how many degrees and in what direction (east or west) the declination is to true north, at your present location. Just remember that magnetic declination changes over time. In a scenario where GPS and the internet are no longer available, the latest updated map is your best bet for an accurate declination.
Finding a Bearing with a Map
Be sure to have set or oriented your compass to “true north” by moving the orienting arrow to the degree of declination. After that’s set, you can now proceed to finding a bearing, or direction denoted by degrees on your map. Doing this is simple if you know where you are on the map.
- Spread your map on a flat level surface. Set the compass on top of your location on the map, such that the straight side of the baseplate lines up with your position. Determine where you want to go on the map, then rotate the entire compass (without taking it off your spot on the map) until both your current location and your destination are lined up.
- Rotate the bezel until the orienting lines are lined up with the map’s north and south. Remember to always align the north on your compass with the north of your map.
- Once you’ve matched the orienting lines with the north and south of the map, get the bearing on your Index Line. This is your bearing. Now that you have your bearing, hold the compass in front of you, with the Direction of Travel pointing away from you.
- While holding the compass, rotate your whole body until the “north” of the magnetized needle is inside the Orienting Arrow. This is called putting “red in the shed” for easy recall.
Once you’ve put “red in the shed”, you’ve got your bearing and you’re facing your destination. All you have to do now is to move in that direction to get to your plotted destination.
Triangulating your Position
If you don’t know where you are, your map and compass can help pinpoint your location.
- Bring out your map, and see if you can spot any distinguishing landmarks near you. When you’ve identified a landmark, hold up your compass in front of you, with the Direction of Travel Arrow facing away from you, and pointing right at the landmark.
- Keeping the compass level and steady, rotate the bezel until the Magnetized Needle is inside the Orienting Arrow, or, when you’ve got “red in the shed”. Take note of the bearing indicated by your Index Line.
- Lay the compass on the map, lining up its edge with the landmark. Ensure that the Direction of Travel Arrow is pointing in the direction of the landmark on the map.
- Line up the compass’s edge against the landmark, and line up the baseplate until the Orienting Lines are in alignment with the map’s north and south, and the north on the bezel is also pointing to north on the map.
- Draw a line on the map with the edge of the compass; your exact location is somewhere along this drawn line. Then do the same with another landmark you see that’s at least 60° away from the first landmark.
- Find a third landmark and draw its line on the map. The three lines should intersect, forming a triangle. Your location should be somewhere inside that triangle. The smaller the triangle you’ve made, the more accurately you’ve triangulated your position.
Important Notes
When using a compass, certain precautions must be taken to avoid getting an inaccurate or completely wrong reading. This is especially important if you’re in an emergency or survival situation.
- Always keep the compass level when holding it or when placing it on a flat surface. Even a slight tilt could destabilize the needle, making it wobbly and result in an inaccurate reading.
- Hold your compass such that the Direction of Travel Arrow is facing away from you.
- Keep your compass close to your stomach in a comfortable but level position, with your elbow bent and in the palm of your hand.
- Store and use your compass away from cellphones, radios, laptops, and other electronic devices that create magnetic fields. These may diminish your compass’s magnetization and affect your “magnetic north”.
- Keep your compass away from metal objects — pocketknives, flashlights, or even keychains can make your compass give a false reading.
- For the correct bearing, always make sure the Orienting Arrow and the Magnetized Needle line up – remember: “red in the shed”.
Despite our high-tech society, old-school navigation is still a valuable skillset worth learning and practicing. Modern navigation relies on a complex web of satellites, cellular data and vulnerable infrastructure, any one of which can be affected by a catastrophe. When SHTF and GPS goes down, your trusty compass, maps and wits are still your best tools of survival.