

Nhan-Esteban Khuong teaches “primitive” blacksmithing for the 21St century.
Metalsmithing—taking raw metals and pounding them into functional tools such as knives, swords, awls, fire-strikers, shovels and many more implements—is one of the oldest arts known to man. It’s a common oversimplification to think of human technological advancement in terms of “Stone Age,” “Iron Age,” “Industrial Age” and the like, because, in reality, humans have been working with metals for more than 10,000 years!
The development of metallurgical technologies (such as smelting and mass production) largely replaced the lithic arts, and the same has occurred with industrial technologies, replacing the old metalsmithing arts. After all, who needs blacksmiths anymore? Well, you’d be right … but you’d also be wrong.
About Nhan-Esteban Khuong
Nhan-Esteban Khuong is a professional martial artist and acupuncturist who got interested in the craft of metalsmithing in 2014 after participating in primitive blacksmithing at a primitive skills gathering. He then went on to apprentice for four years with world-renowned master smith Tai Goo and has been developing his craft ever since.
Khuong works in the greater Los Angeles, California, area, developing his skills and teaching others through workshops and private classes. In recent years, his focus has shifted to facilitating opportunities for bonding and self-cultivation for men through traditionally masculine skills, crafts and activities, including combative arts, bladesmithing, bushcraft, survival skills, archery and others.
He believes that modern technology has opened the floodgates to a near-limitless exchange and access to information through the Internet. But this is also leading to a decline in physical aptitude, a nature connection and the traditional handcraft skills that have formed the foundation of masculine social interaction since the dawn of humankind.
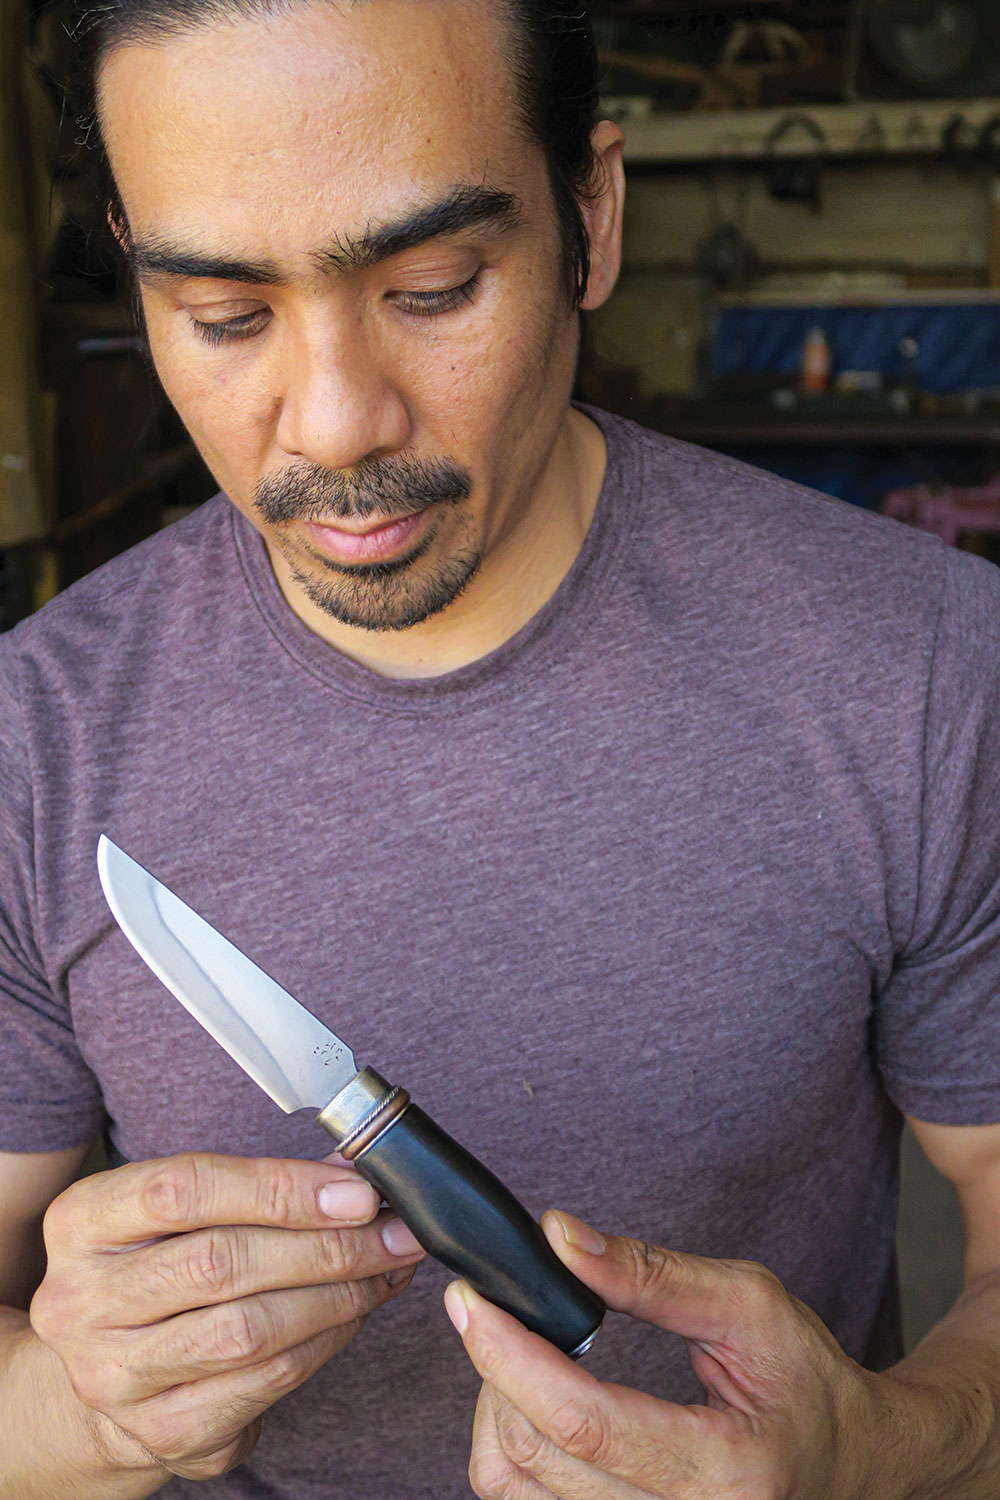
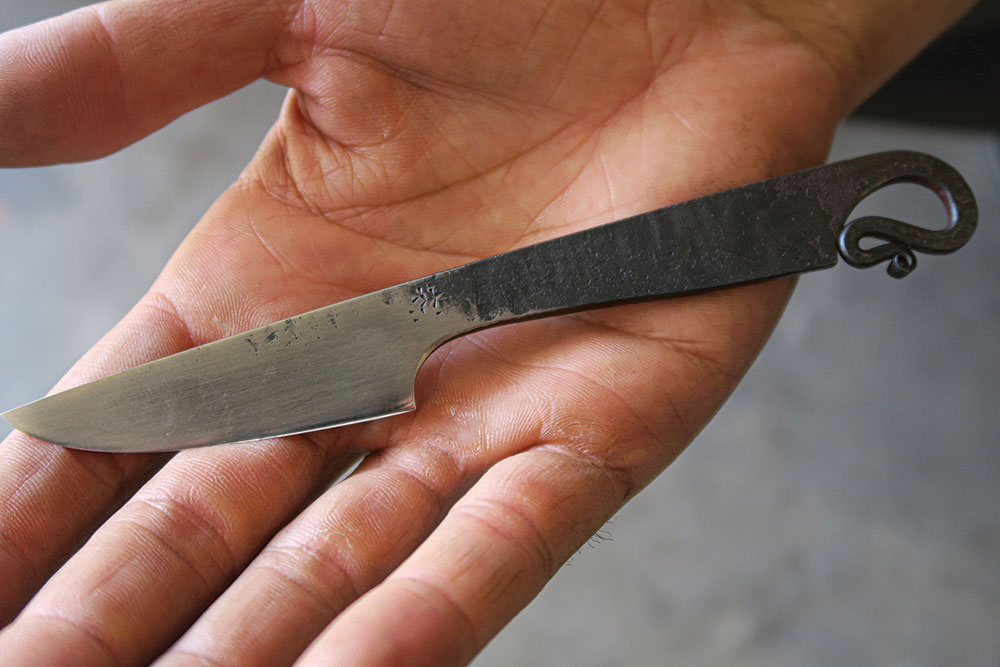
Khuong was fascinated by both the complexity and simplicity of the ancient art of bladesmithing; that is, taking a seemingly useless lump of junk and transforming it into what is considered by many the central tool in any survival kit: a knife. As a bladesmith and primitive skills instructor, he feels a responsibility to keep this knowledge of ancient practices alive, in part because it’s a skill that’s quickly going by the wayside—the result of nearly everything we use today becoming disposable products that are made by someone else (or machines) far away.
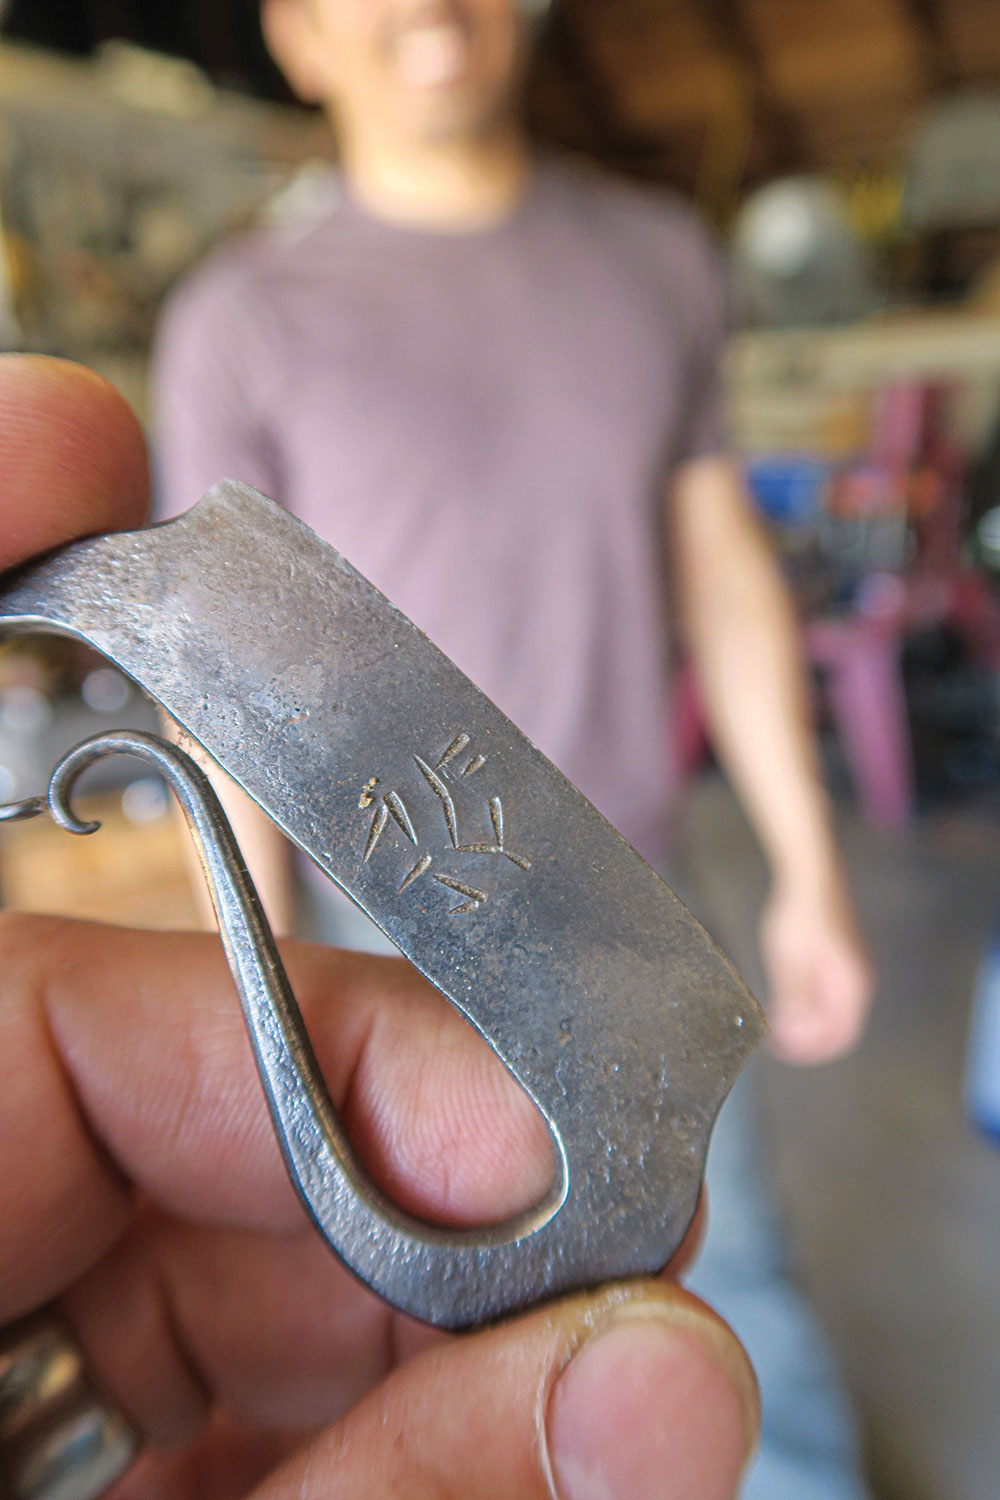
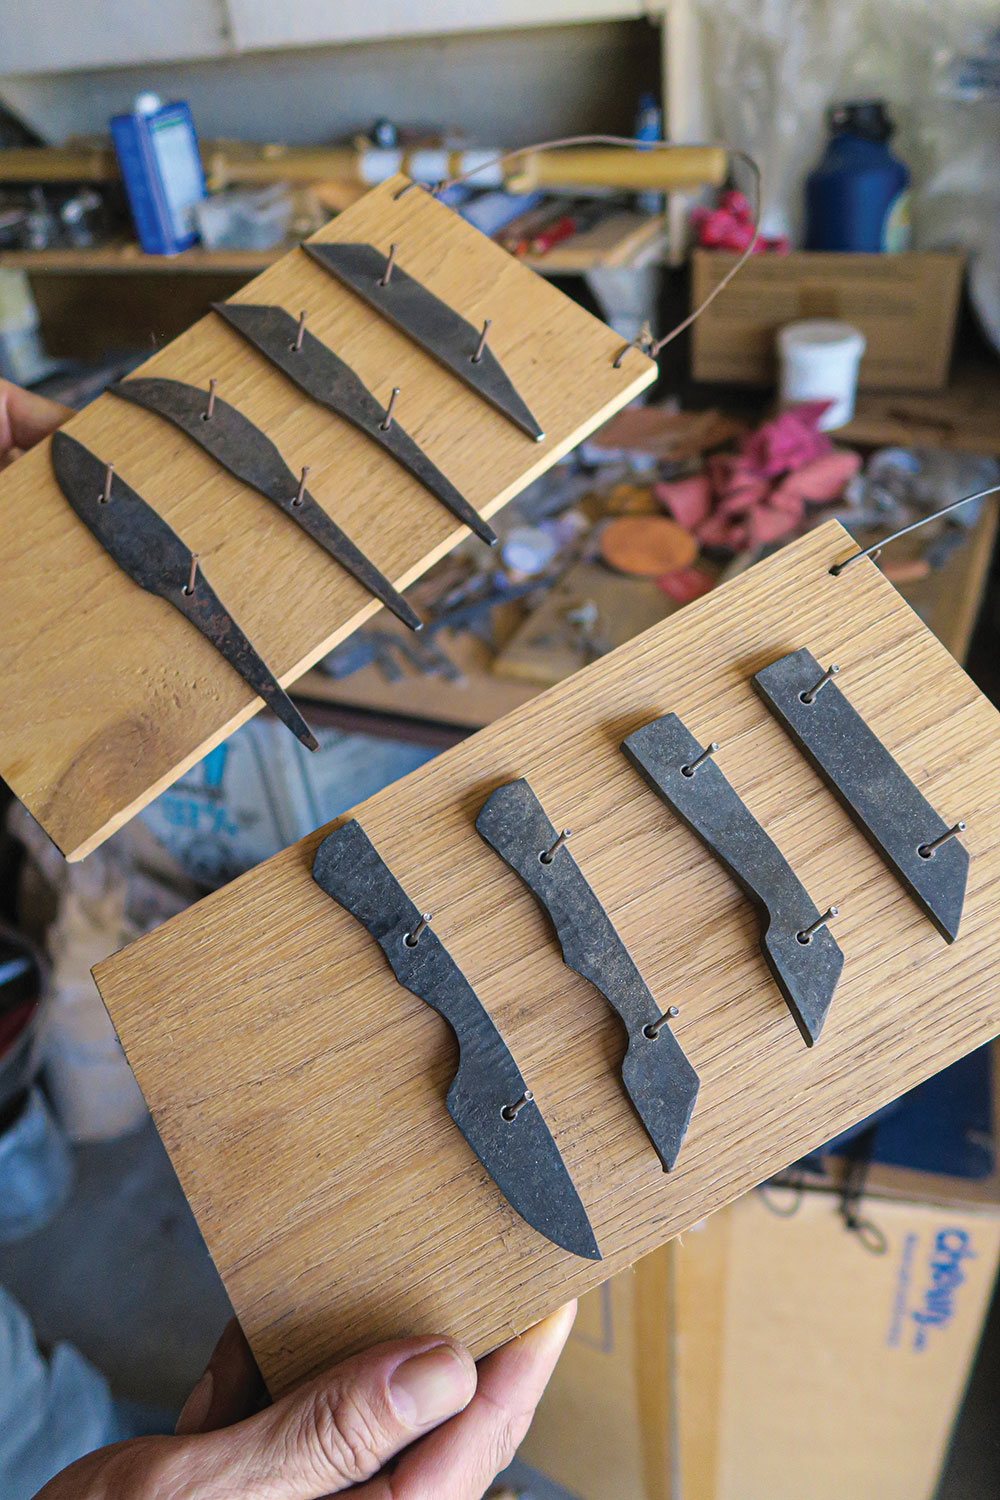
For the past seven years, Khuong has trained students to take a piece of metal (often, it’s scrap metal, which is so common in our age) and fashion it into a knife, fire steel, spoon, fork, awl, hook or other useful tools. According to Khuong, this ancient art is complex. However, under his tutelage, his students learn the fundamentals in just a few days.
During one of his workshops, he typically begins by sharing a bit of the history of this art, as well as the importance of practicing handicrafts for physical and mental well-being.
‘Primitive’ Blacksmithing
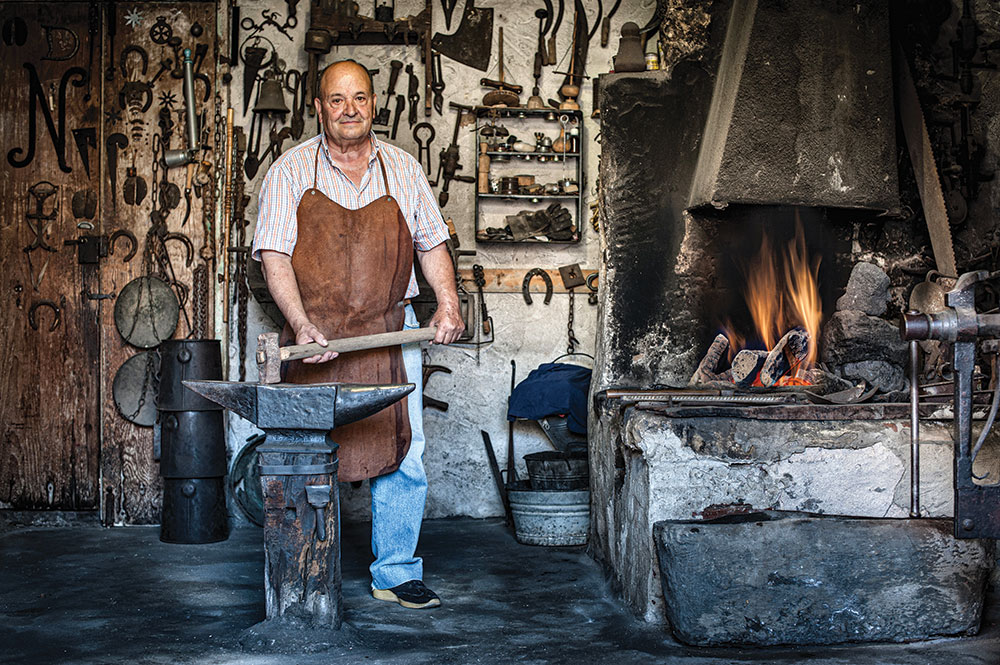
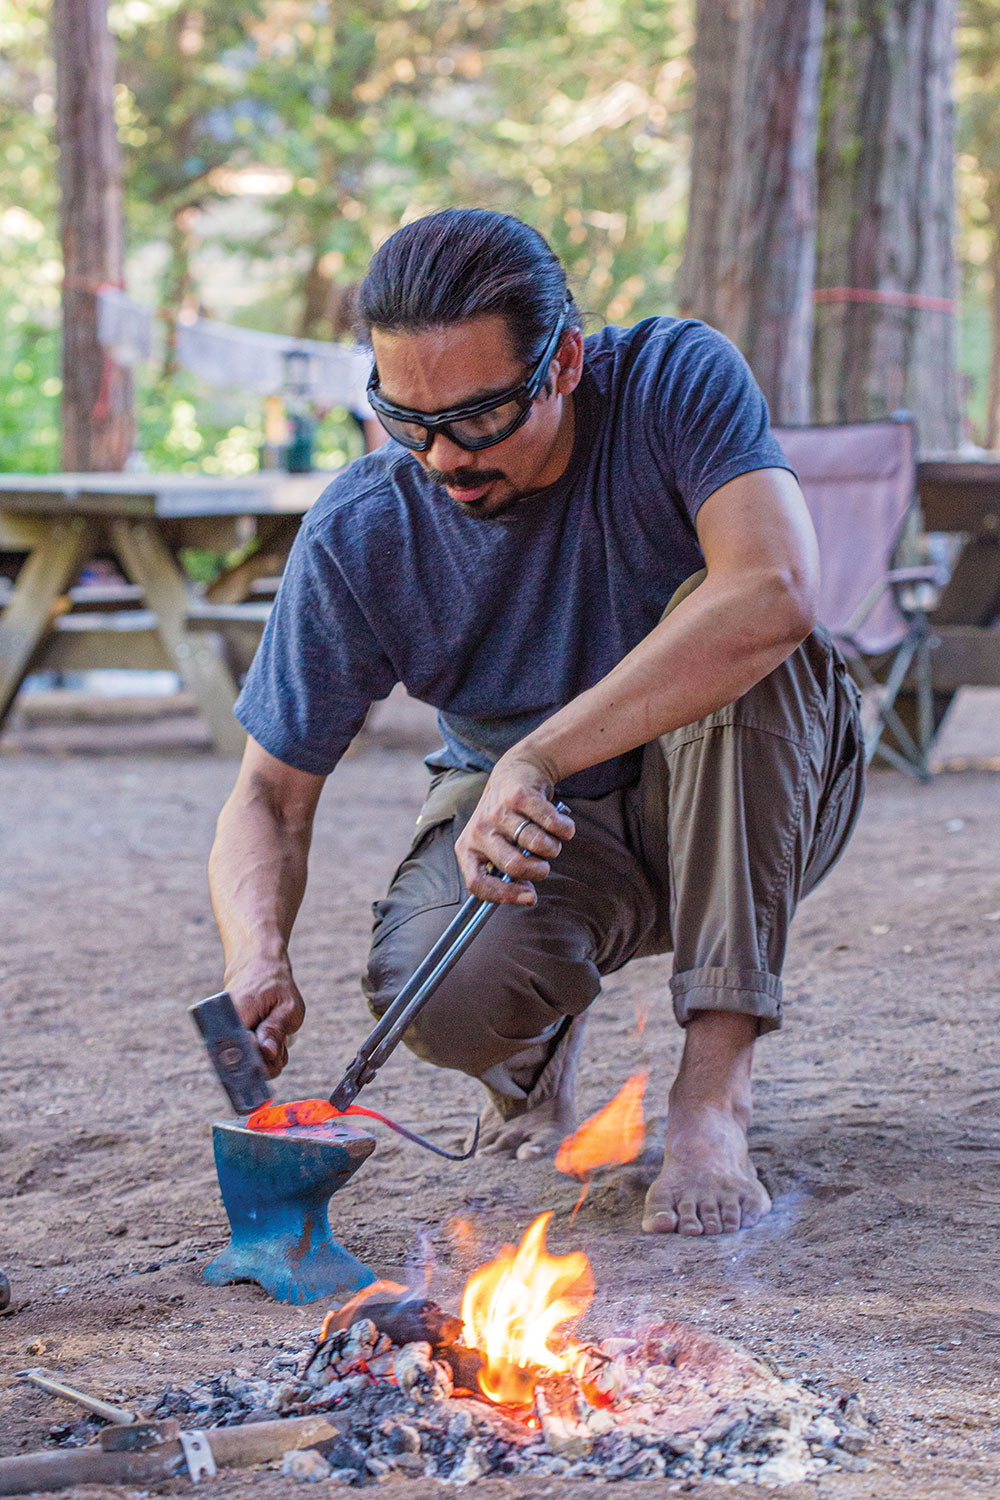
Blacksmithing is essentially the art of working iron into art or tools using a forge, hammer and an anvil.
Khuong teaches a modernized version of “primitive” blacksmithing that utilizes commonly found modern tools and materials to make the experience accessible to more enthusiasts. Perhaps a more descriptive term would be “survival” or “contingency” blacksmithing, which doesn’t require the specialized tools one would typically envision a blacksmith using.
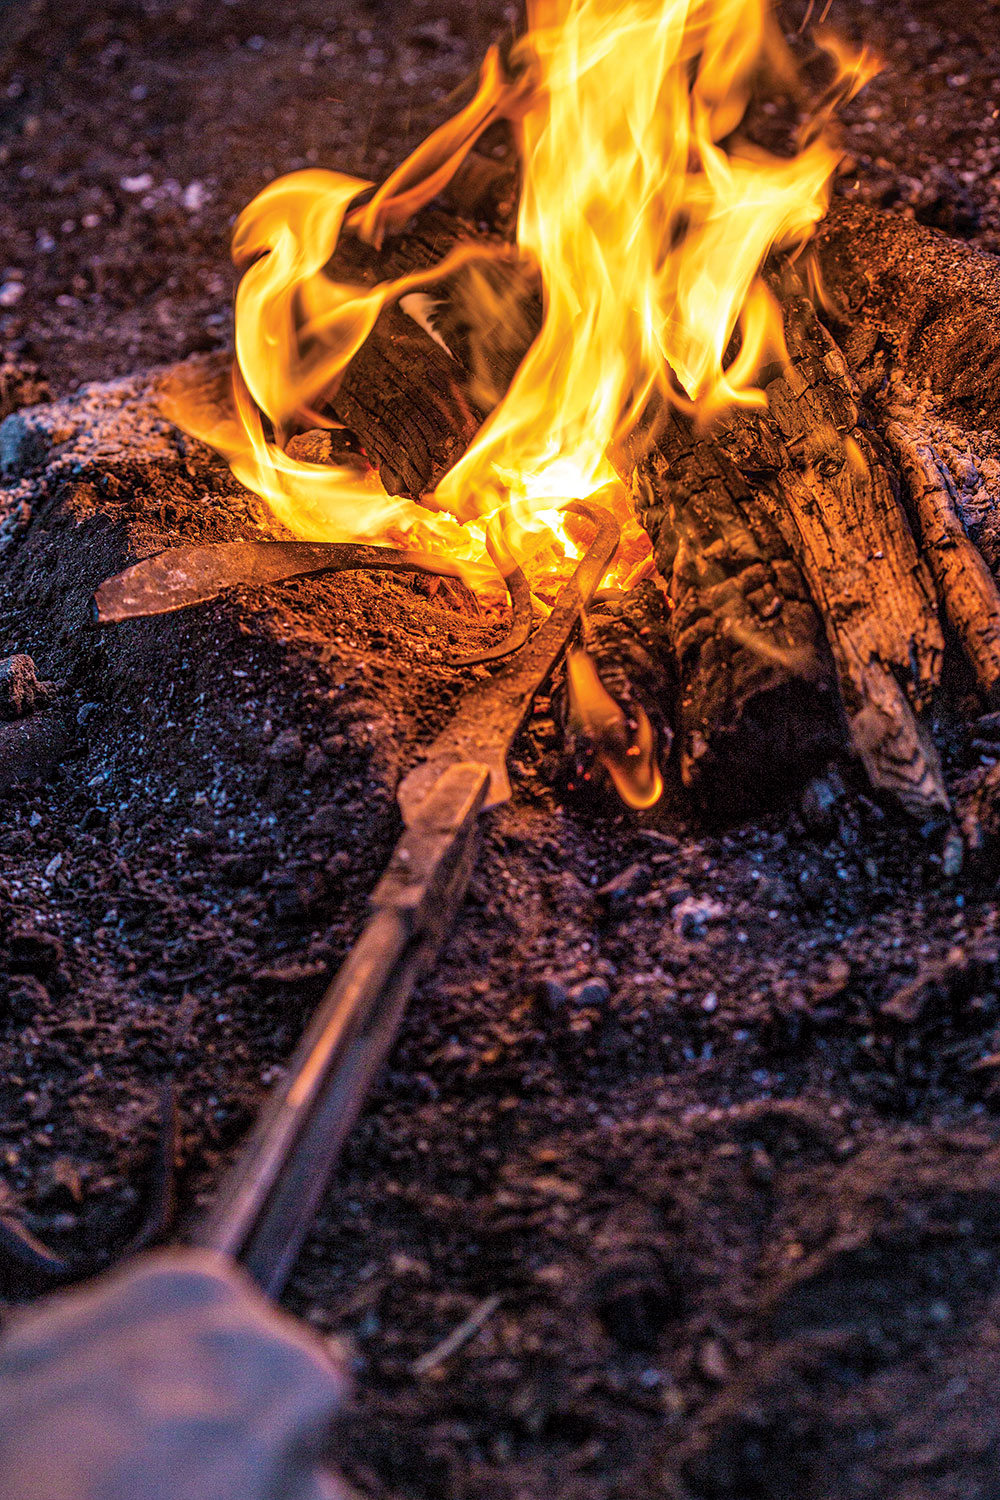
Primitive blacksmithing uses an earthen pit forge and charcoal instead of a modern coal or gas forge. The forge, itself, doesn’t cost anything other than the labor needed to build it. In addition, fuel for the forge is easily found in most hardware stores.
Tools
Most people who are interested in exploring blacksmithing find that their first challenge is finding the tools. Although it’s true that professional blacksmiths use very specialized tools, beginners don’t need these.
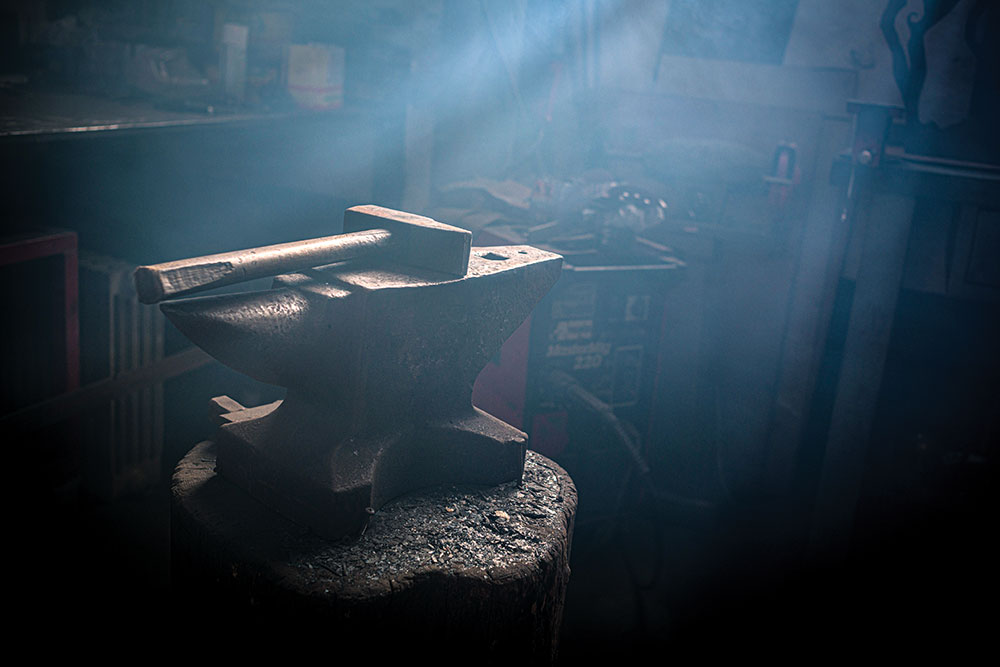
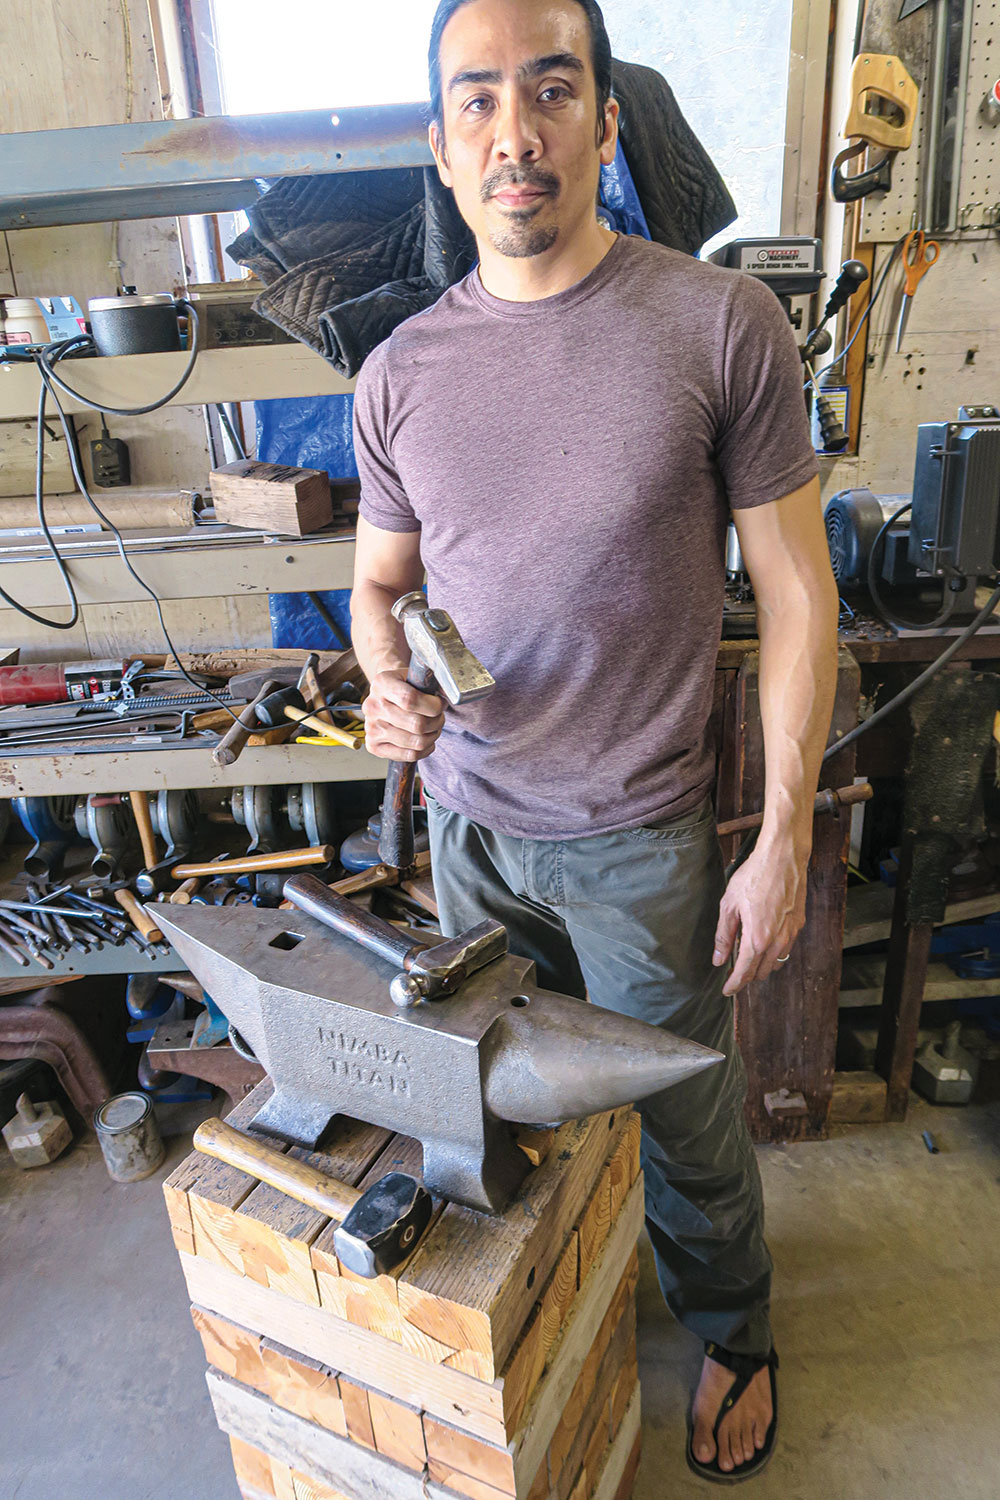
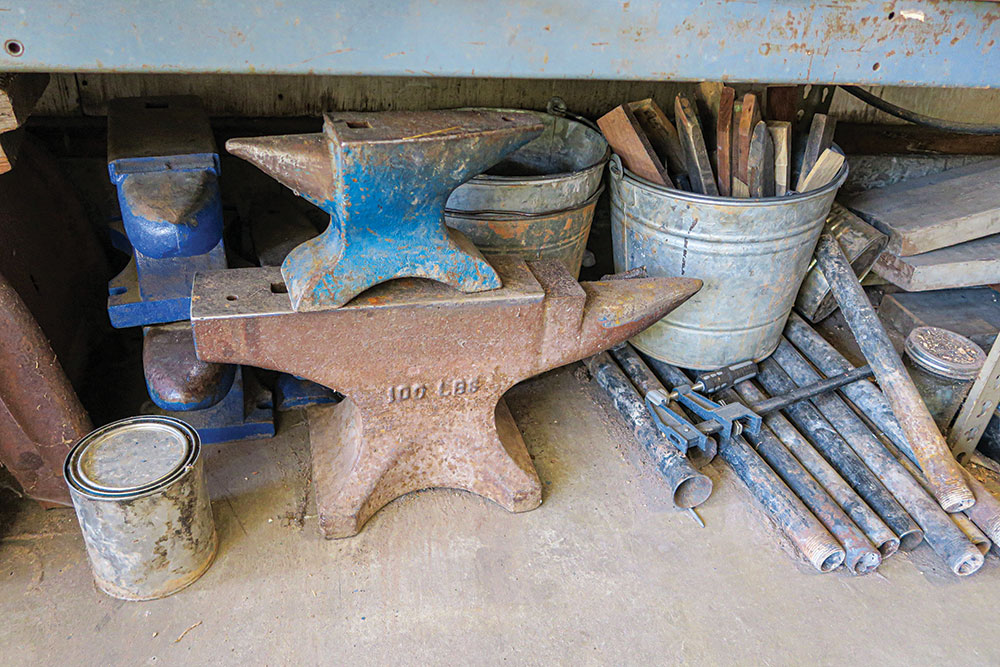
Anvil. Any sufficiently massive piece of metal can be used as an anvil. For instance, this might be a section of axle shaft, railroad rail or even a solid-steel dumbbell. In fact, Khuong describes how a large sledgehammer head embedded in a stump or block of wood can rival most professional anvils—at a fraction of the cost.
Hammer. For a basic and versatile hammer for most blacksmithing work, Khuong recommends a 2-pound engineer’s hammer or cross pein hammer to start; both can be found in any hardware store.
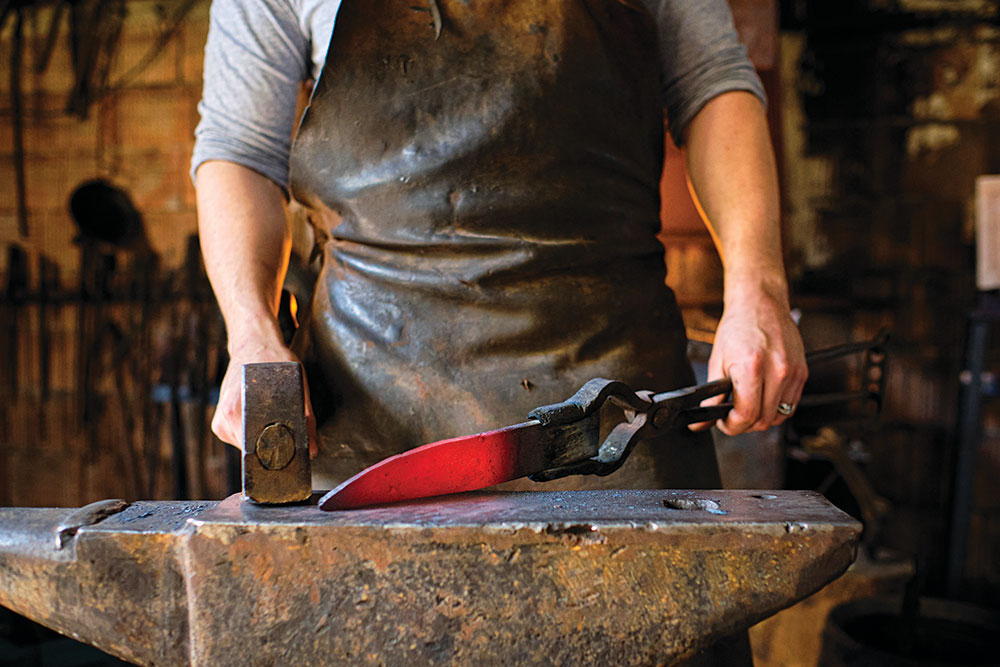
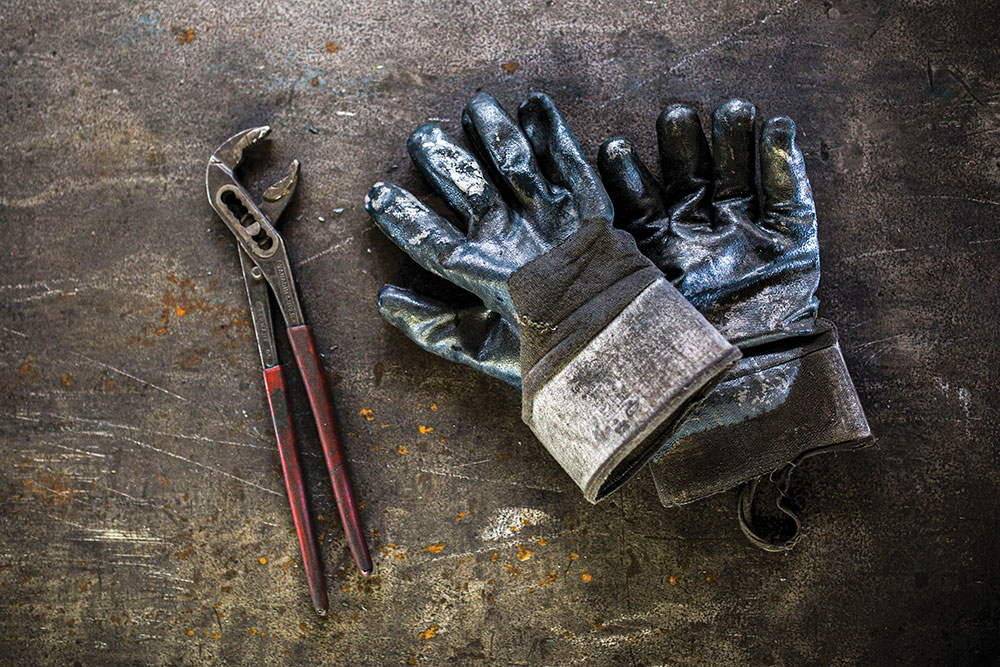
Tongs. A sturdy pair of long-handled pliers would work well for picking up and holding on to hot metal (tongs are also available at many hardware stores).
According to the Ploughshare Institute for Sustainable Culture website, “Over time, you’ll need many different tongs—one or two for each thickness of metal that you work with. Having tongs that are the right size for your materials makes it much easier to keep a good grip on your metal and improves the quality of your work … After you’ve gained some experience blacksmithing, you’ll be able to make your own tongs.”
Slack Bucket. The slack bucket is possibly the least appreciated tool—but it can be the most important. It’s simply a bucket or large container of water that’s used to cool material, tools and other parts.
Coal Rake. If you’re using a charcoal forge, a coal rake will also be necessary. This is a simple, long-handled tool used to manipulate the configuration of the fuel within the forge. If you don’t have a coal rake, a fireplace poker, a steel rod or even a simple stick can serve the same function.
File and Metal-Cutting Handsaw. A coarse file and metal-cutting hacksaw are also recommended as part of the basic starting kit.
Other Tools/Machinery. Some other helpful, but optional, tools might include a bench vise, C-clamps, round and half-round files, a propane torch and a leg vise (which has a long extension down to the floor, along with a provision to adjust the spacing of the bottom of the leg, to keep the clamping surfaces of the jaws approximately parallel, even though the work to be clamped might have various thicknesses).
Some common machinery that’s often useful could include a belt grinder, angle grinder and power drill. These optional tools and machinery will add versatility and convenience to the process, as well, and can reduce the amount of physical labor needed for some projects. However, they’re not required for a beginner who wants to dabble in blacksmithing.
The Pit Forge
Pit forges are the original forges our ancient ancestors used in developing the art of blacksmithing. They’re arguably still the most versatile type of forge, although using them also requires a much higher learning curve relative to modern gas forges.
In its simplest form, a pit forge is a depression in the ground that’s filled with fuel, with air being forced into it using a bellows.
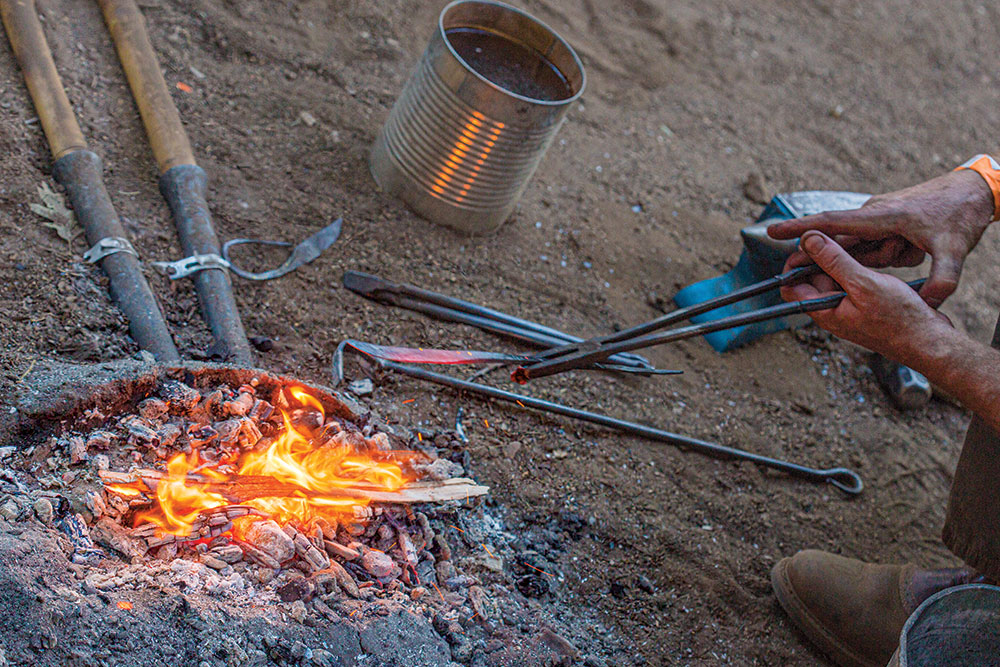
Modern pit forges often use a motorized fan (such as that of a hair dryer) as a bellows, but hand bellows work very well and are often more efficient. A crude hand bellows can be easily constructed using a cloth bag and a piece of pipe. Alternatively, hand-crank bellows can often be found online and are relatively inexpensive.
With experience, guidance and experimentation, pit forges can be versatile, efficient and highly cost effective.
Starting Material
Khuong points out that although most steels can be used, it’s important to test for basic properties in order to determine the best use of the material, as well as its best-suited application.

The most typically found type of scrap steel is commonly referred to as “mild” steel, which means that it’s a low-carbon steel with under 0.25 percent carbon content. Mild steel is not generally considered a steel that can be hardened, but it’s also the easiest form to smith with.
Medium- and high-carbon steels can be found in machinery and tools because they’re “hardenable”—which increases their application as tools that results from hardness, abrasion resistance, edge retention, springiness, etc. Medium-carbon steels can often be found in impact tools such as hammers, whereas high-carbon steel can be found in springs and cutting tools such as files and knives.
Khuong doesn’t recommend using highly alloyed steels such as stainless, because these modern steels are often difficult or even impossible to work with using primitive blacksmithing techniques. These types of steels tend to be highly specialized and require close monitoring of internal temperatures. They also have the physical attribute of being “hot hard,” which means they’re not malleable, even at normal forging temperatures.
Test Your Chosen Steel
If you’re unsure of the metal’s composition, the easiest way to test it is to heat a small, thin piece to “red hot” and quickly quench it in water. If it can be broken, rather than bent, it’s composed of medium- to high-carbon steel. If it bends, it’s likely a low-carbon steel.
Other simple ways to test steel include spark testing and scratch testing. A spark test requires a high-speed machine such as an angle grinder or belt grinder to produce sparks. High “sparkiness” gives the appearance of a sparkler, with many branching sparks, and is typically indicative of a high carbon content. The scratch test requires the use of a scratch test kit and relies on the principle that an object can only scratch another if it’s harder. A hard metal could indicate a high carbon content.
According to Khuong, “All these methods are crude and imprecise; and, although they can provide important information, they should be taken within that context.”
If you prefer to work with a known steel alloy, new material is easily obtainable online via blacksmithing and bladesmithing shops, as well as on eBay and other similar sites.
Set Up the Smithy
Now that you have your tools and material, you’ll need a space to work.
The typical smithy, or “forge,” as it’s more often referred to today, consists of an open space with shady or moderately low ambient light, along with the forge, anvil, tool rack, leg vise and slack bucket.
A beginner working with smaller projects can generally skip the leg vise, but the rest of the equipment will need to be arranged within the work space so that everything’s easily accessible (that is, within a couple of steps away). Hot metal will only have a small window of time during which it can be worked with a hammer; and, the smaller and thinner the metal, the less time it can be worked before it gets too cool. This window will typically range from five to 20 seconds, depending on various factors.
The primitive smithy is usually set up at ground level, because you’re working with a pit forge. This means that work will be done while you’re seated. This, in turn, means that your work space layout will need to be more efficient—having everything within arm’s reach. The charcoal pit forge will, of course, also need to be fed fuel periodically, so your charcoal should also be within arm’s reach.
Although charcoal is relatively clean-burning, pit forges will need ample ventilation and a space clear of flammable debris.
Ambient light is also a very important factor to control, because the temperature of metal is typically gauged by its color. Hot metal will glow much less—if at all—in direct sunlight, so make sure to set up a tarp or work under another source of shade.
Forge That Steel
You’re now ready to work on your first blacksmithing project and pound some hot metal!
At this stage, Khuong recommends practicing “the art of non-attachment”: This is a time to simply experiment with the material and develop coordination with the tools rather than focus on a specific outcome for your project.
“ … Khuong has trained students to take a piece of metal (often, it’s scrap metal, which is so common in our age) and fashion it into a knife, fire steel, spoon, fork, awl, hook or other useful tools.”
“Metalsmithing—taking raw metals and pounding them into functional tools such as knives, swords, awls, fire-strikers, shovels and many more implements—is one of the oldest arts known to man.”
Once you have your tools, space and materials and are in the right frame of mind, the three basic skills you’ll be practicing are forge management, material temperature management and forging technique.
Forge management
This is simply making sure your forge is always ready to do the work of heating up your metal. In the case of a pit forge, this means making sure the airway is clear, the fuel is arranged so that it heats up quickly and the buildup of ashes is being kept at an optimal level. If you’re using a modern gas forge, management is minimal and is just a matter of maintaining internal forge temperature.
Material temperature management
This is a skill that will require more precision, depending on the material and technical level of the project. This includes understanding how to identify material temperature based on appearance and optimal working temperature range.
The main factor here to consider is that hot metal can be struck hardest when it’s glowing orange and progressively lighter as it loses heat. Steel at a “black heat”—when it’s no longer glowing, can’t be forged without risk of internal structural damage and can only be lightly bent or straightened. Metal with too much internal damage is weakened and is more likely to lead to cracks and breaking later on. “Planishing,” the process of smoothing out the surface of the metal with light hammer strokes, can also be performed at a black heat.
Forging technique
It includes how the anvil, tongs and hammer are used to alter the shape and properties of the project material. Fundamental forging techniques include drawing, tapering, upsetting, bending and planishing. There are many more techniques, including variations of these techniques, but most projects can be completed using just these.
Forging is perhaps the most challenging and technical aspect of blacksmithing—as well as the most rewarding. During any given blacksmithing session, the actual hammer-to-hot-metal activity makes up only a fraction of the total work time.
The key to maximizing your forging time is to make sure your space is set up so that there’s minimal time from the forge to the anvil, as well as making sure your grip on the material with the tongs is already optimal as soon as you bring the material out of the forge.
Most beginners will find that their heat has dissipated by the time they pick up their hammer … because too much time was spent trying to manipulate the material with the tongs while having it rest on the anvil. To solve this problem, envision how you’ll need to hold the material on the anvil before it comes out of the forge. In addition, make sure your grip is secure and your tools are within reach when your material has been brought up to forging temperature.
Developing Skill
Khuong advises, “The key to developing skill in blacksmithing is practice, consistency, experimentation and getting constructive feedback. As your ability improves, it might be worthwhile to invest in better and more specialized equipment. If you can get some professional instruction, all the better.”
Books, videos and other sources can be very useful on your blacksmithing journey, but for the fastest and most effective skill development, there’s no substitute for practice time, quality instruction and feedback. However, and perhaps most important, is to enjoy the process.
According to Khuong, “Blacksmithing, and especially bladesmithing, are not only practical crafts. They can also offer a potent vehicle for self-expression through art and a connection with culture and technological history. It’s this subtle, but powerful, feature of the art of bladesmithing that keeps me coming back to the craft.”
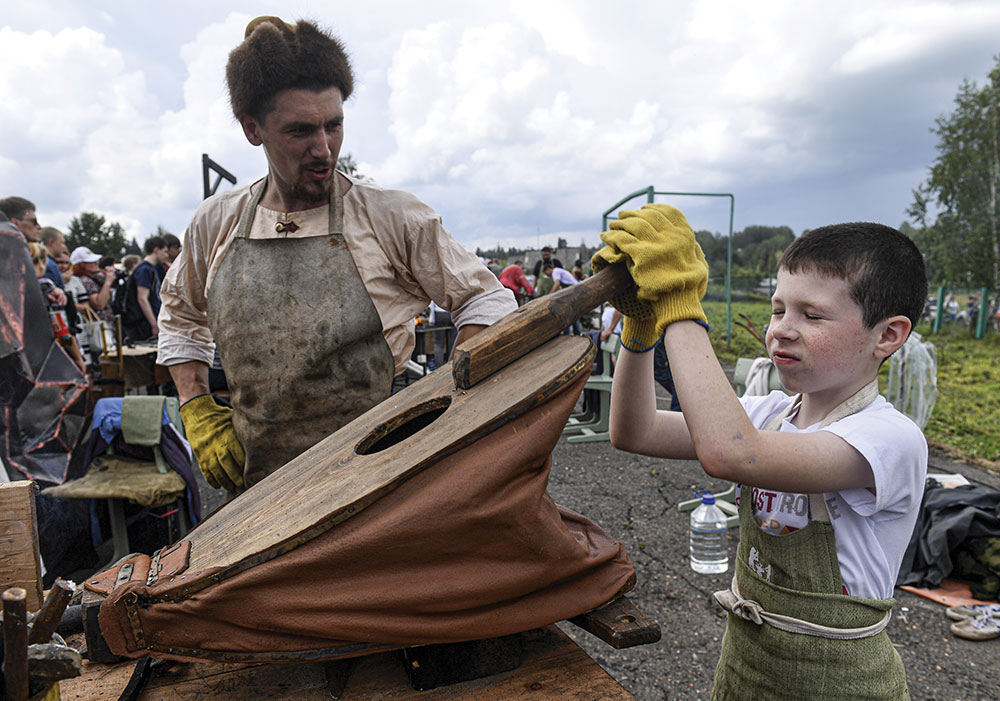
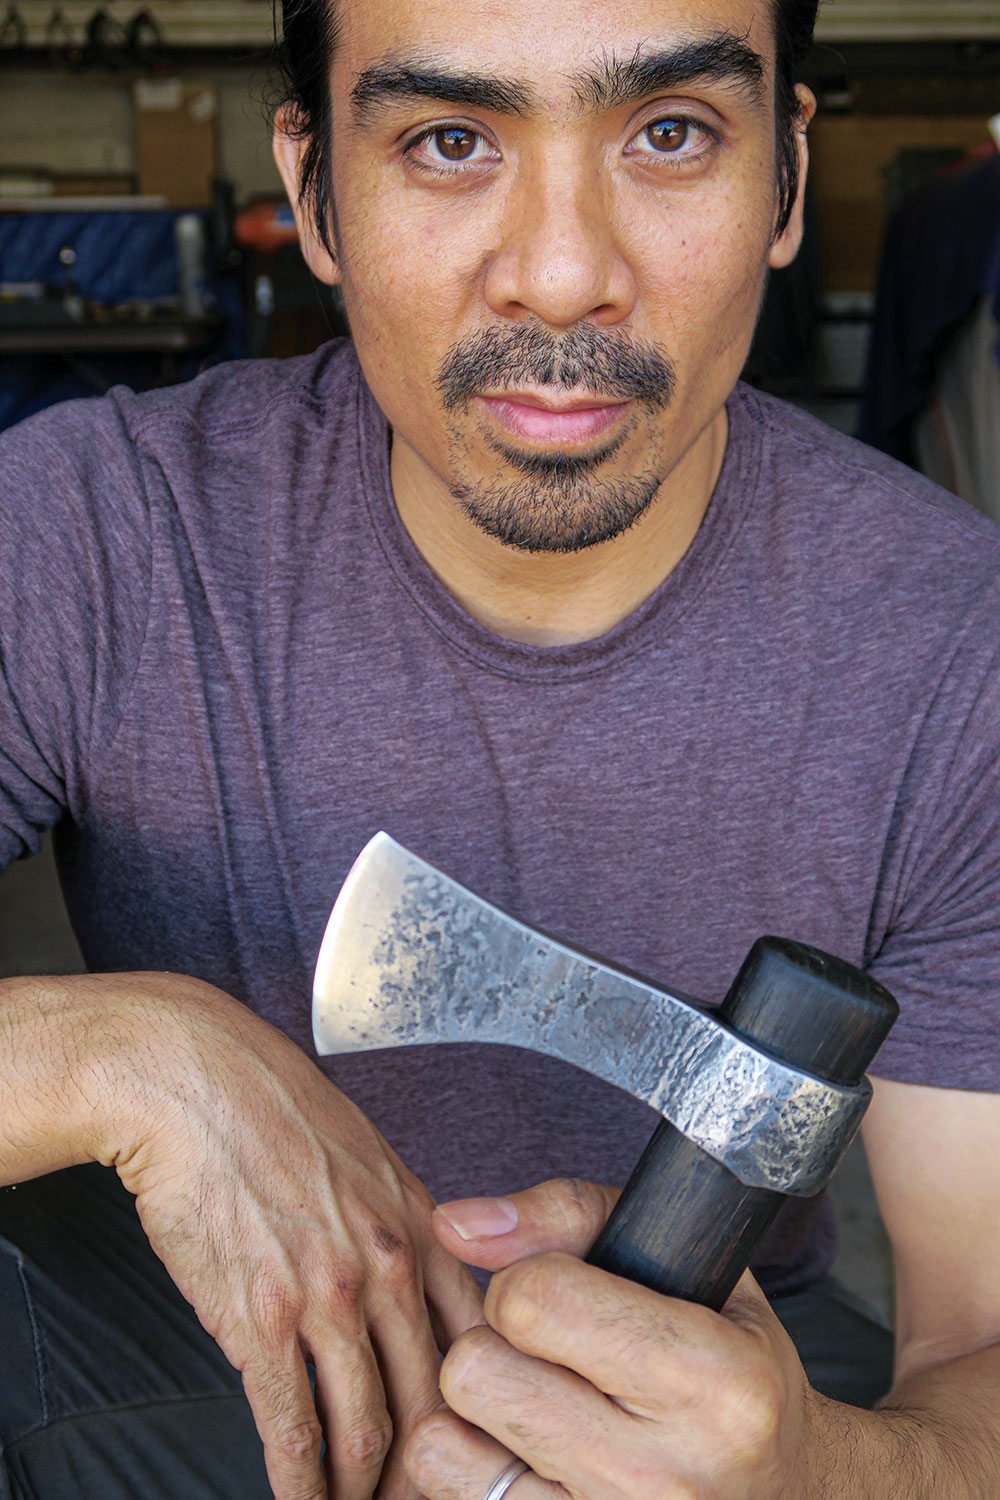
In this “portrait” of a traditional blacksmith’s workshop, the blacksmith holds a larger engineer’s hammer than would be used in a “primitive” blacksmith shop.
SOURCES
Find out more about Nhan-Esteban Khuong and the training he offers:
EarthSky People
(310) 907-9909
EarthSkyPeople.org
NhaVi Forgeworks
NhaViForgeworks.com