

A SURVIVAL KNIFE IS MUCH LIKE A FIGHTER PUSHED INTO THE 12TH ROUND OF A 10-ROUNDER
Rather than mimic the copy-and-pasted adage that a survival knife is the knife you have on you when you need it, I’d rather give my opinion. A survival knife is a multipurpose tool. There won’t be many spoons, try sticks, or gnomes carved during a survival scenario, let alone carved with the characteristics of a survival knife.
TALE OF THE TAPE
I’d recommend four inches to seven inches in blade length with a tang that runs the entire knife length, visibly seen between the scales (full tang). If you look at the United States Air Force Pilot Survival Knife, it has a five-inch-long blade. There is a long history of the United States Marine Corps using a Ka-Bar seven-inch bladed knife.
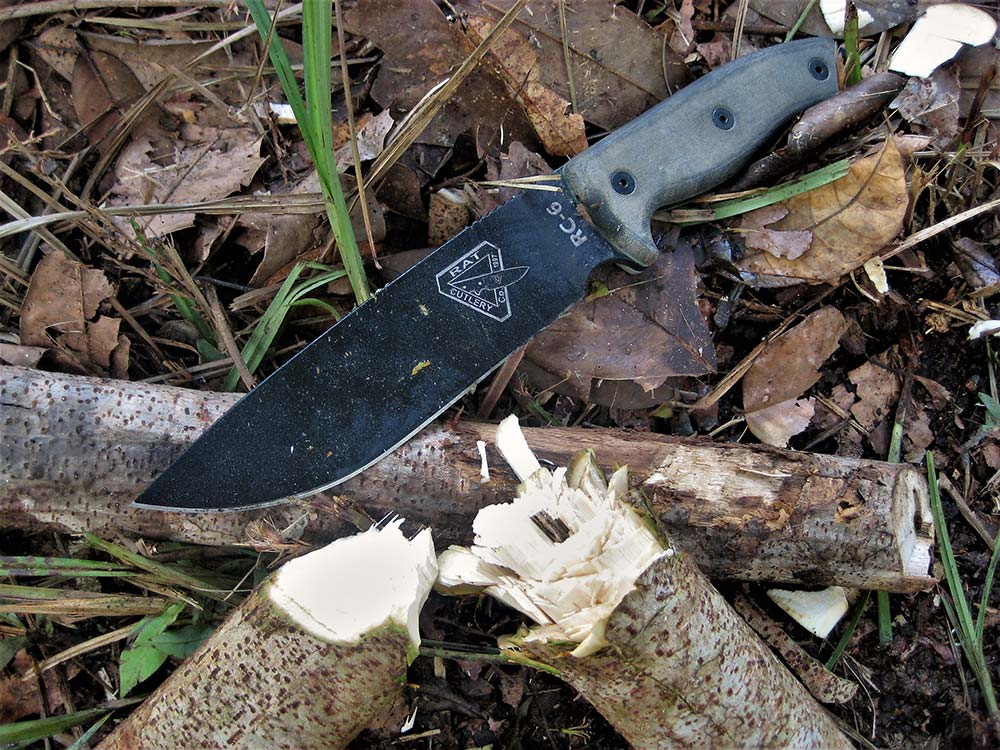
I am a fan of thin knives, especially when I have a saw and chopping tool such as a tomahawk, hatchet, or long blade. However, I’d go for a stout blade made to pull double and triple duty without the other tools. With a survival knife, chopping, digging, notching, batoning, and some prying may have to be done.
I wouldn’t go with anything less than 1/8-inch thick for a knife designated for emergency use. I’d recommend 3/16- and ¼-inch thickness. Carbon steel all the way because a river stone, cardboard, sandpaper, leather sheath, Cordura, and harder steel can all be used to sharpen a carbon steel blade easier than stainless steel. Carbon steel blades have more flex and are proven to resist snapping better than stainless steel. On top of that, a survival knife must be comfortable and portable.
HACK IT
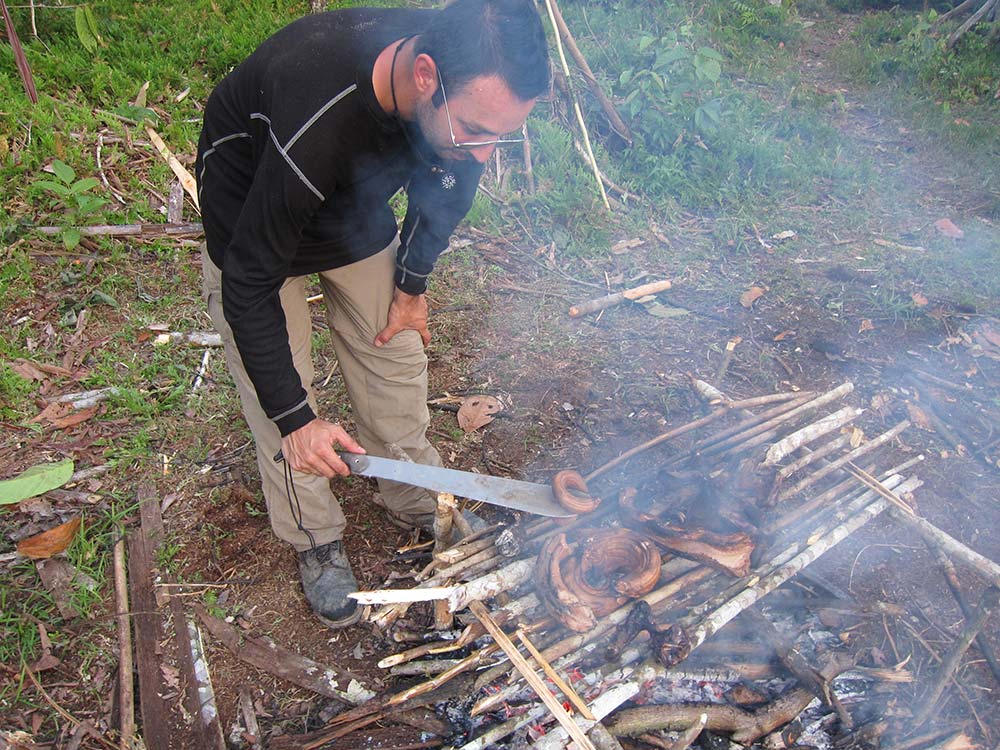
Chopping is hard work and a great expenditure of energy. If you’ve ever chopped a path through a wilderness environment such as a jungle, the romance of that adventure dies fast. Even chopping through bicep-thick wood is fatiguing, especially if you only have a seven-inch blade.
These days, Mother Nature and time have done much of the wood prepping for us in North America. Take a look around the forest for downed trees and limbs that can be pulled and cracked off any standing dead trees. Use the crotch of other trees to snap wood into manageable pieces. Use boulders to baseball-bat-swing wood onto sharp corners to break it down. However, if you must chop to free up that perfect ridgepole or straight green wood piece for traps, do so using these tips.
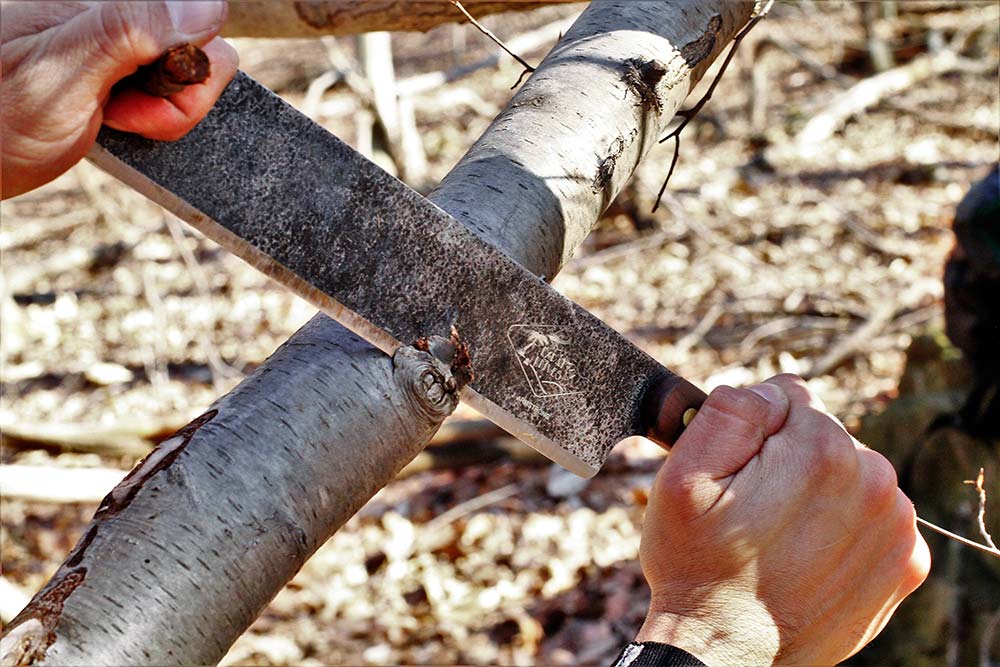
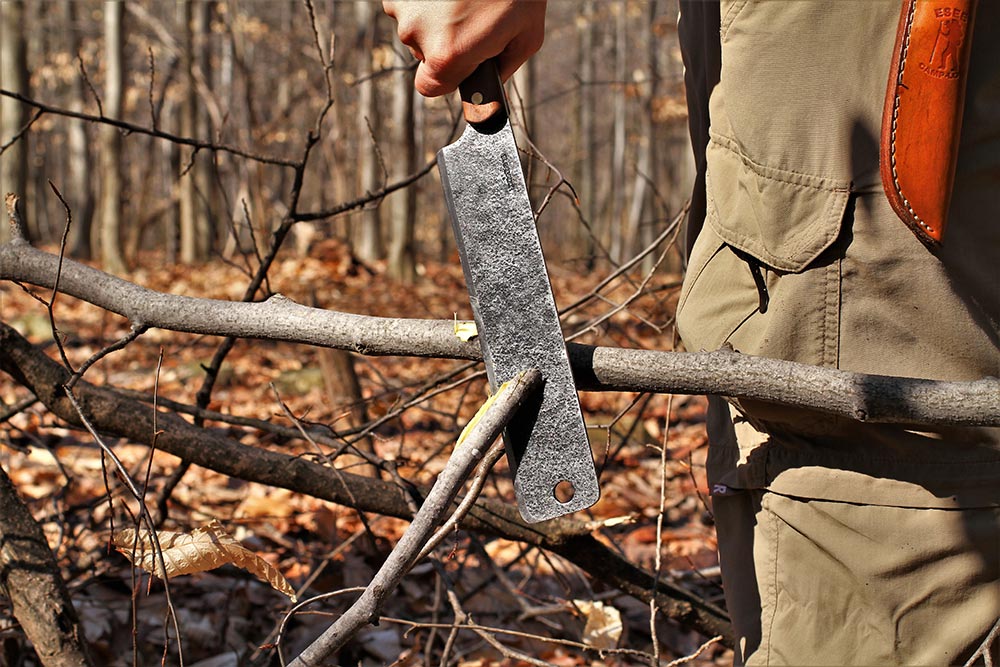
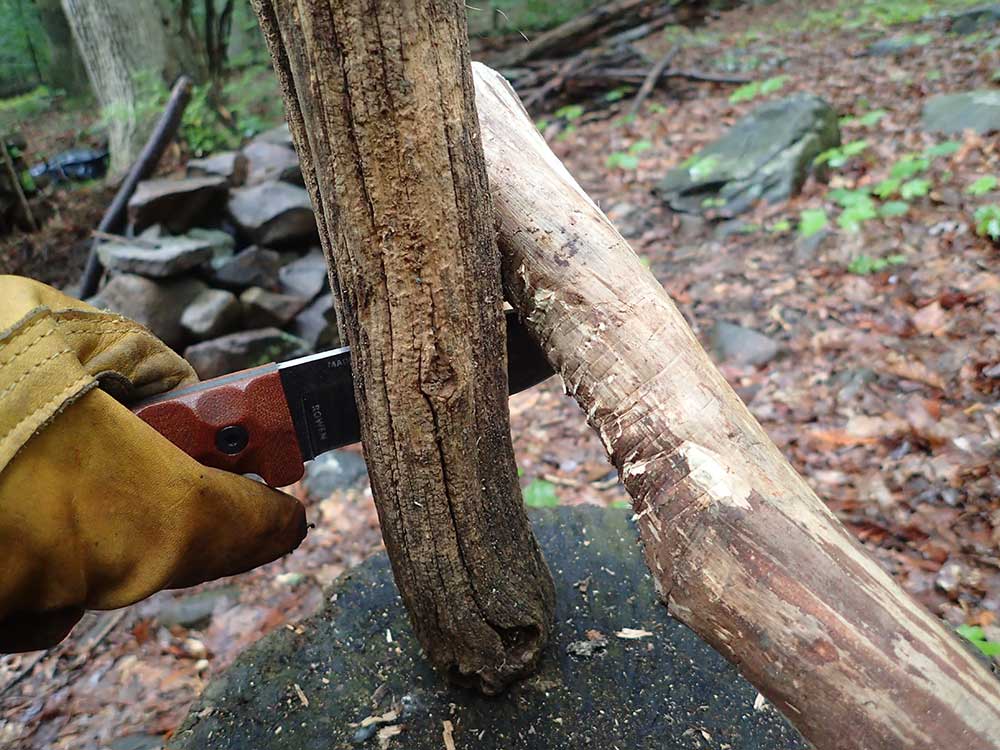
Chopping into wood at a 90-degree angle should primarily be done to create a stop cut. Efficient chopping is accomplished by striking the wood at an approximately 45-degree angle from each direction, creating a V-notch. This method works best if the wood is backed up by a solid surface like a log or stump.
If the piece of wood you want to chop is still attached to a tree, clear any smaller branches from tangling yourself or your knife. If your wood is on the ground but can roll, use that to your advantage, making chops around from a kneeling position. This will prevent the knife from coming back toward any part of your body.
Nothing is written in stone saying you must chop completely through a piece of wood, especially in a survival scenario where perfectly trimmed ends are not important. Get the wood weak enough to break easily with your hands or a good stomp. Choke back on the handle to get more leverage on the front end when chopping with a knife, if the handle design allows.
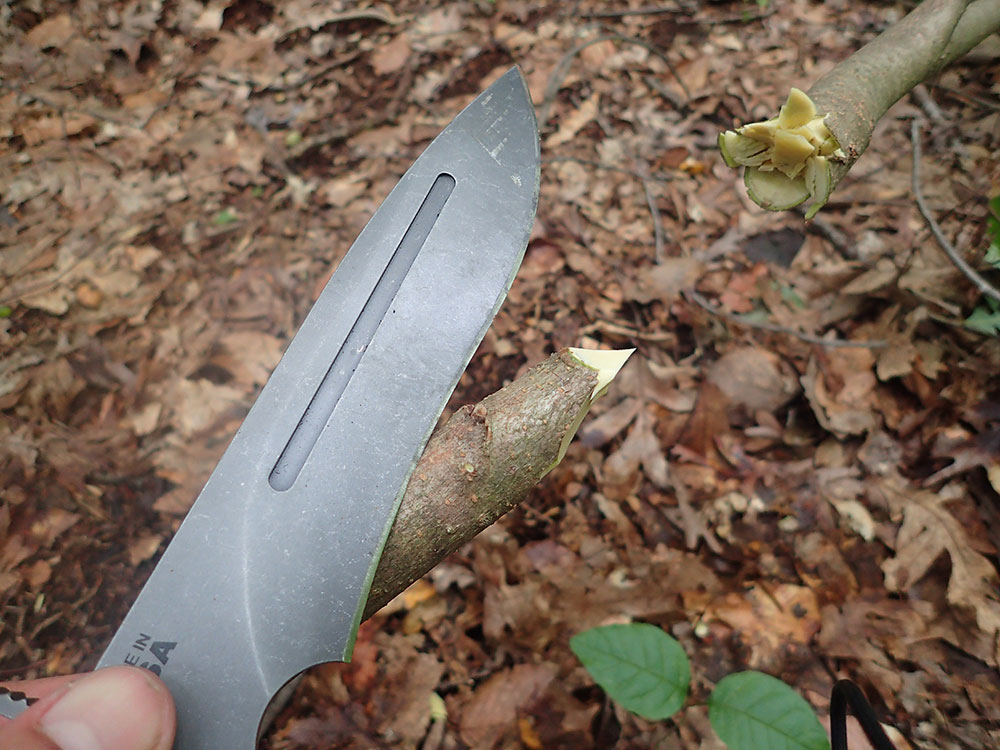
Wrist-thick wood should be all that is needed for 90 percent of projects in the woods. Anything larger should be called fuel and thrown on the firewood pile. A good technique to chop a pole that is broomstick- to wrist-thick is to hold the pole out with your support hand off to the side and chop into the wood at a 45-degree angle.
Turn the wood with every chop, weakening it until it snaps, which should be around four or five chops. The blade should pass through the wood and completely clear your body on the follow-through.
BEAT IT
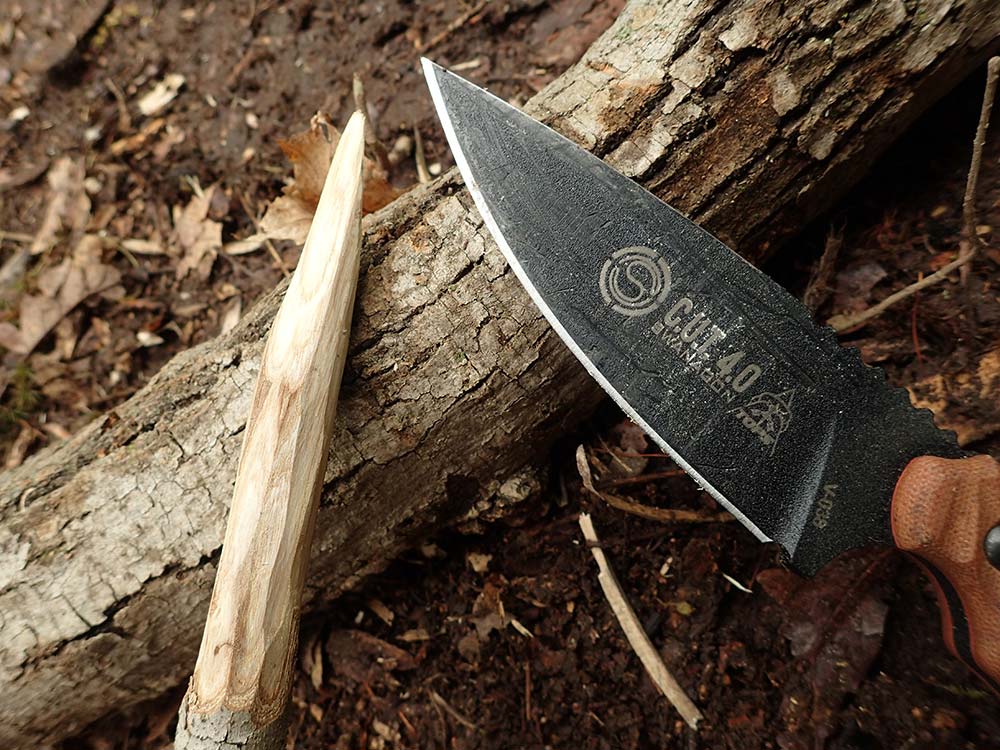
Any stout piece of wood that can be held comfortably is a baton. A baton striking the spine of a knife to split or make a deep cut in wood is called batoning. The energy it can generate in conjunction with a knife is incredible.
Batoning at a 45-degree angle can generate energy much like a hatchet or longer, thick chopping knife. This technique is safer than swinging a hatchet or tomahawk since there is zero chance of the knife swinging back to your body.
Splitting wood with a knife and baton is best done by placing the blade on preferably standing upright wood. Then, with a baton, strike the spine of the knife hard directly above the wood to get the most energy transfer.
Only start batoning closer to the tip when the knife has no more exposed surface directly above the wood. Stop near the end rather than beating the blade through and into the support wood or the ground. At this point, try twisting the wrist with the knife to pop the wood apart.
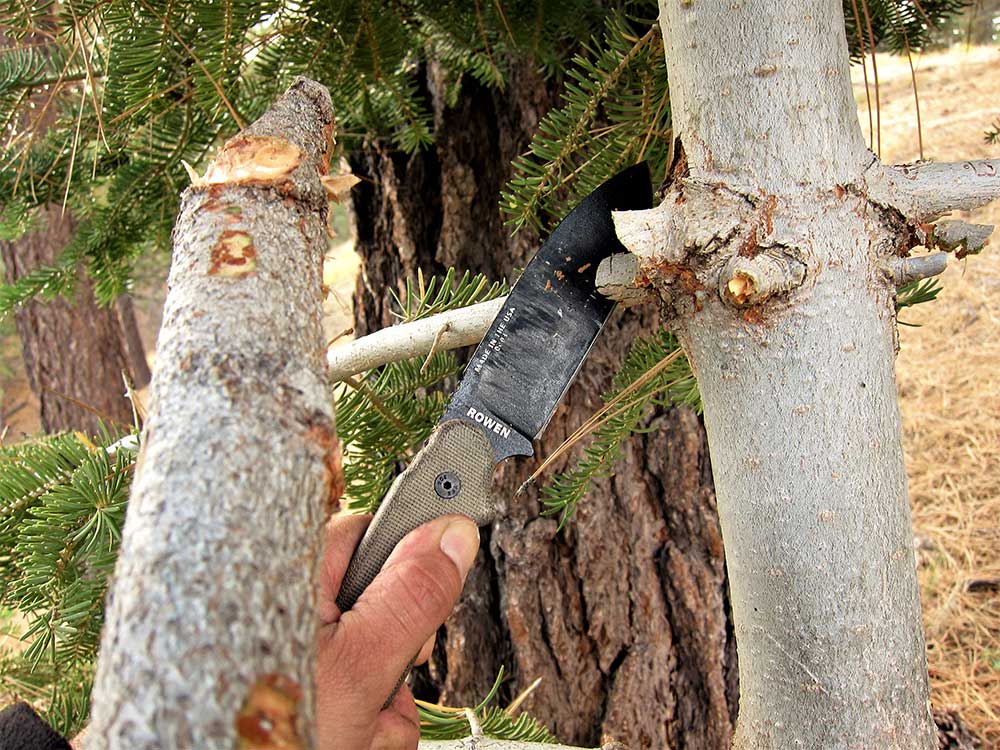
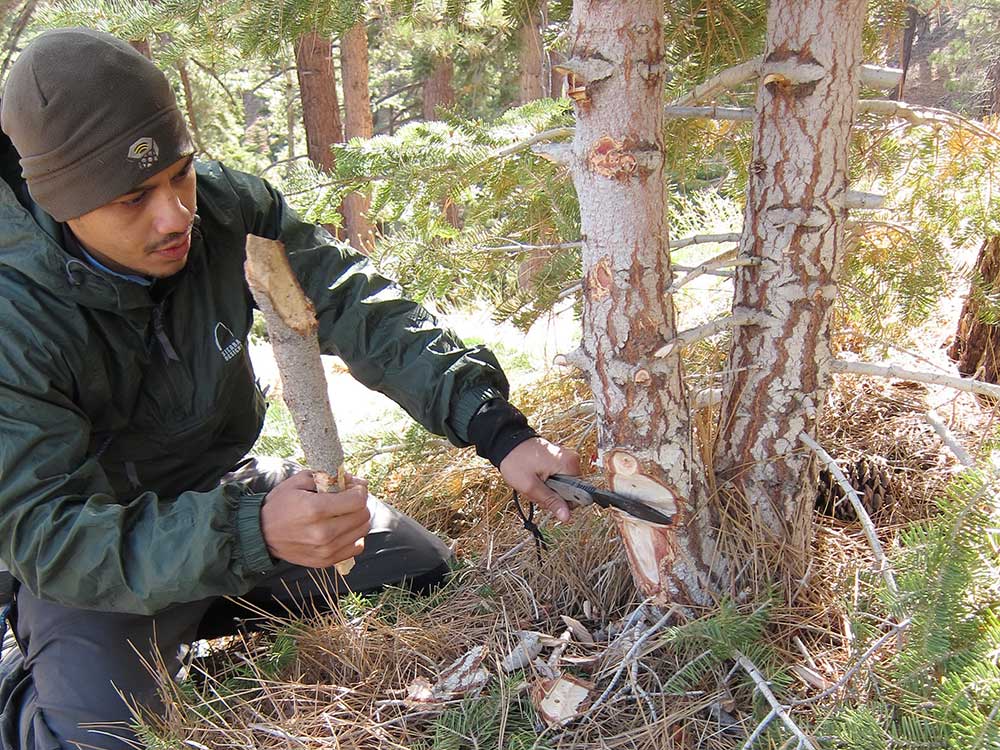
Taking down small trees is made easier with a baton and knife. I consider this a form of beaver-chewing. The knife blade is placed at an angle against the wood, and then the baton impacts the spine, driving the blade in deep. This process is repeated, working around the tree to weaken it.
It can be dangerous if performing this above head level and a little awkward if working very low to the ground. In the case of working low or obstructed by other growth near the base, creativity and safety must be your friends!
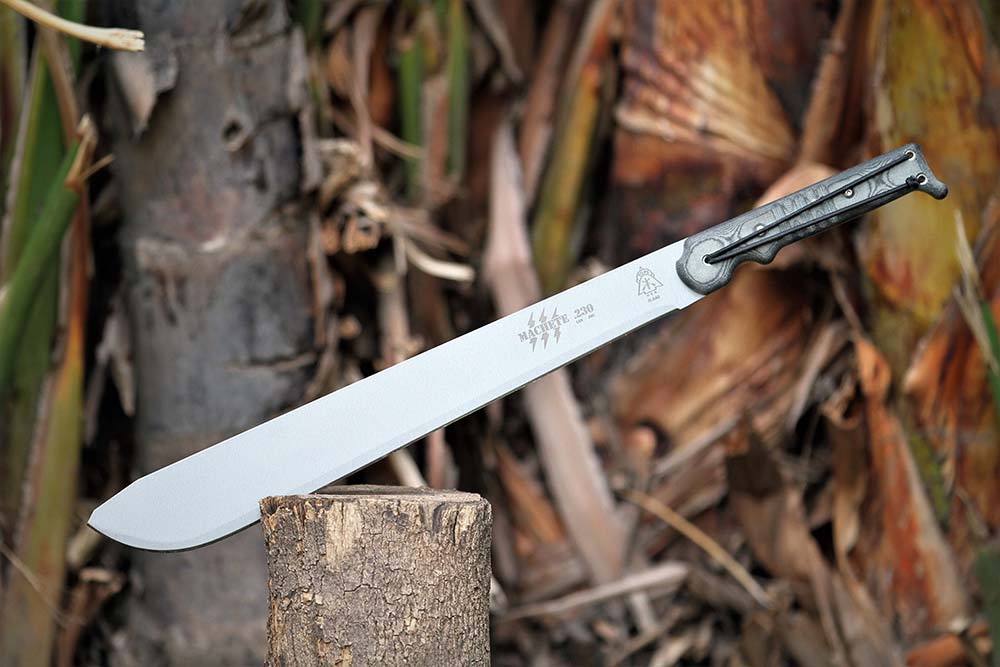
ARE MACHETES SURVIVAL KNIVES?
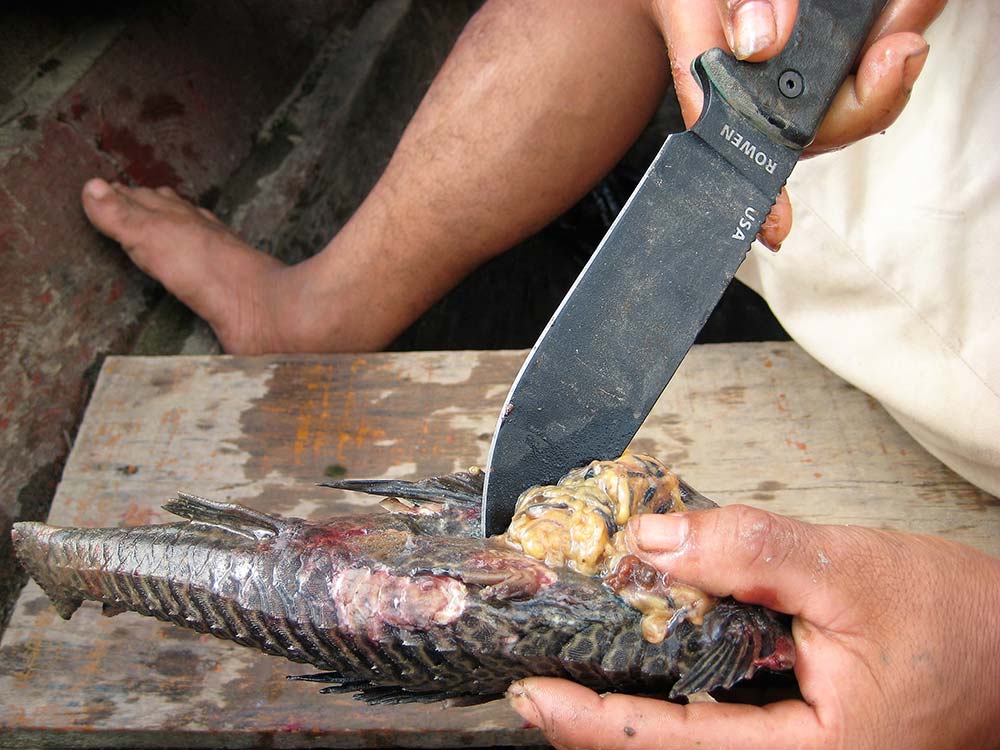
The ultimate survival knife is possibly a machete or long-bladed close relative. Blade cultures worldwide have thrived using a long blade for food preparation, butchering game, cleaning fish, regular land maintenance, self-defense, and every task needed to build and maintain a village. A survival knife often goes hand in hand with the often-debated “One Tool Option” in the outdoors community.
“Blade cultures worldwide have thrived using a long blade for food preparation, butchering game, cleaning fish, regular land maintenance, self-defense…”
Flashback to the outdoors forum days when people were “kitting out” their Becker Knife & Tool sheaths. They’d fit an Altoids tin in the pocket, stuffed to the brim, and wrap cordage around the sheath while lashing as many items as possible to any remaining available real estate. I should know, as I drank the Kool-Aid, too. The point being, those were knives that had five-, seven-, and nine-inch-long blades.
Sheath mods for survival knives weren’t the only modifications catching on; the Ontario 12- and 18-inch bladed machetes were also heavily modified to make them One-Tool-Options. The first two inches of the blade near the handle were made into a Scandinavian grind for controlled carving with a bastard mill file. Portions of the blade spine were ground to a 90-degree angle for striking a Ferro rod and scraping tinder. The options varied and were many.
THE TAKEAWAY

As always, safe knife practice must be at the forefront of our minds. Follow-through of the blade, hand, and eye protection should be considered. As my friend Alan Kay says about a survival knife, “If you will do, it will do,” basically meaning don’t let the tool dictate your limitations. Learn to do as many survival knife tasks as possible with as many tools as you can—that’s true survival, in my book!
SURVIVAL KNIFE PROJECT: MAKE A FROG GIGGING SPEAR
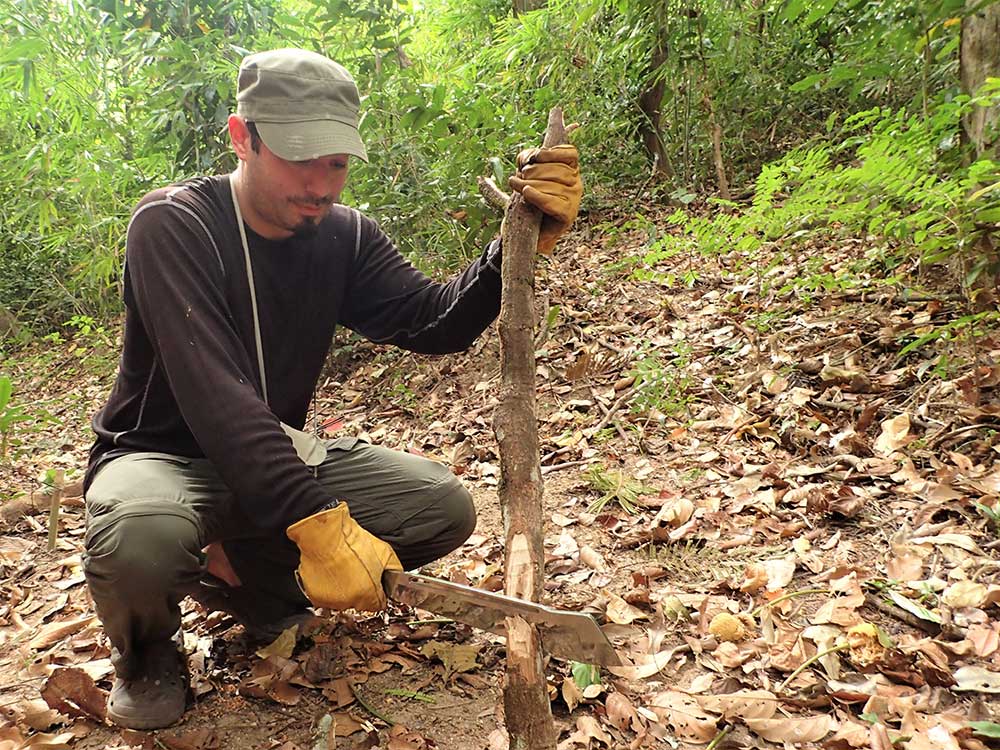
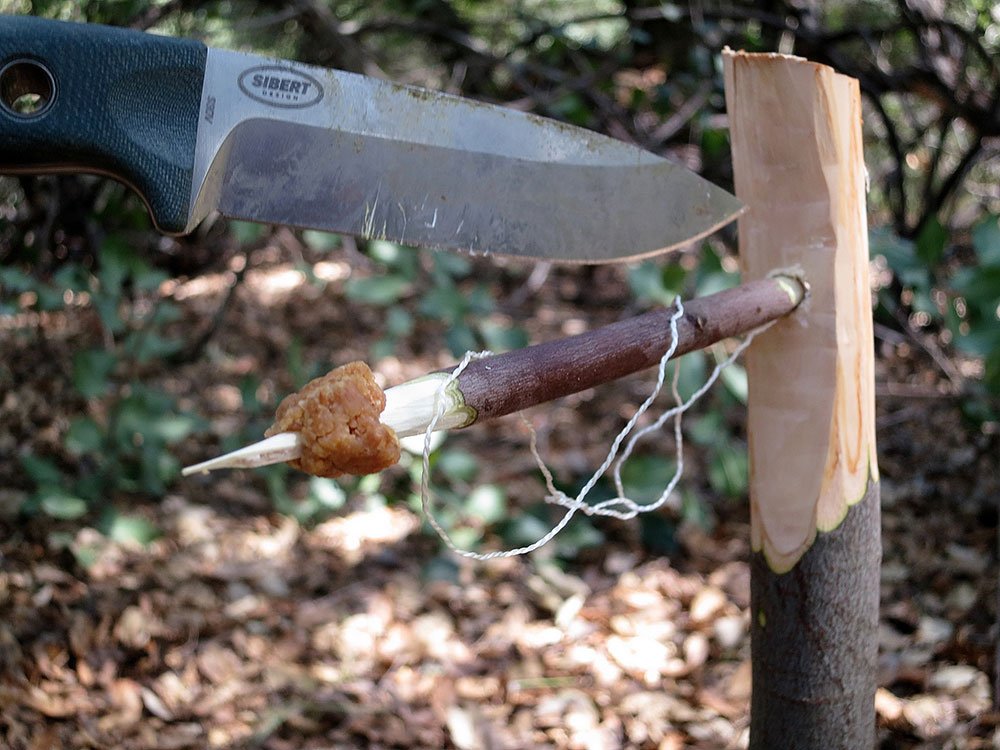
Chop a green pole to a height above the eyes. I put a rough point on mine and found that it makes the job easier and more uniform. Once the rough point is established, I use the knife in an icepick grip, inverted, with the cutting edge facing away from me. I put the knife tip under the rough point before it starts to taper and use a wooden baton to hammer the knife tip through the wood, evenly splitting it. I give the pole a quarter turn and repeat the process to create four even sections.
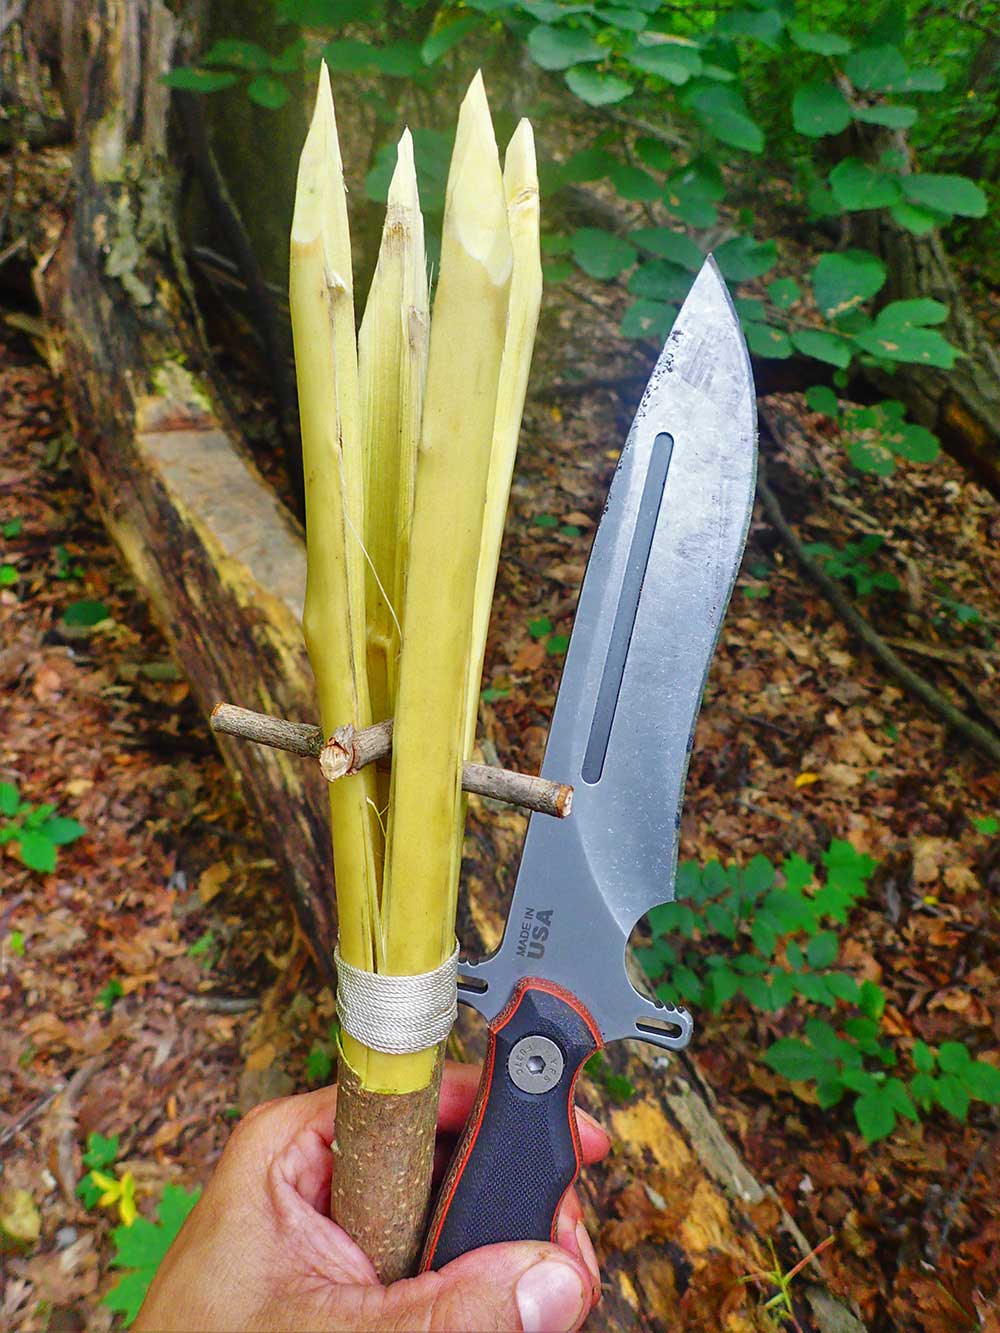
Once the splits are established, the knife can be used to make them a little longer until they are about six inches long. Use small sticks to wedge the prongs open enough for the spear to have more spread covering more area. Since I put a rough point on the spear to start with, I didn’t have to sharpen the four prongs much.
The space is small between the prongs for fine-tuning, so I use a sideways, chest-lever grip and put my left thumb out near the spine’s knife tip to assist in carving the points. I always finish the spear with some cord, applying a simple whipping type of lashing to keep the entire pole solid and prevent further splitting.
RECOMMENDATIONS
TOPS Knives
208-542-0113 | orders@topsknives.com
www.topsknives.com
ESEE Knives
256-613-0372 | info@eseeknives.com
www.eseeknives.com
Becker Knife & Tool
info@ka-bar.com
www.kabar.com
Chris Reeve
208-375-0367
www.chrisreeve.com
A version of this article first appeared in the June 2022 issue of American Outdoor Guide Boundless.