

Tips For Building Your Own Shooting Range
When it comes to personal protection and self-defense, the only thing more dangerous than choosing not to carry a firearm is to carry a firearm without being properly trained and prepared to use that weapon to kill another human being.
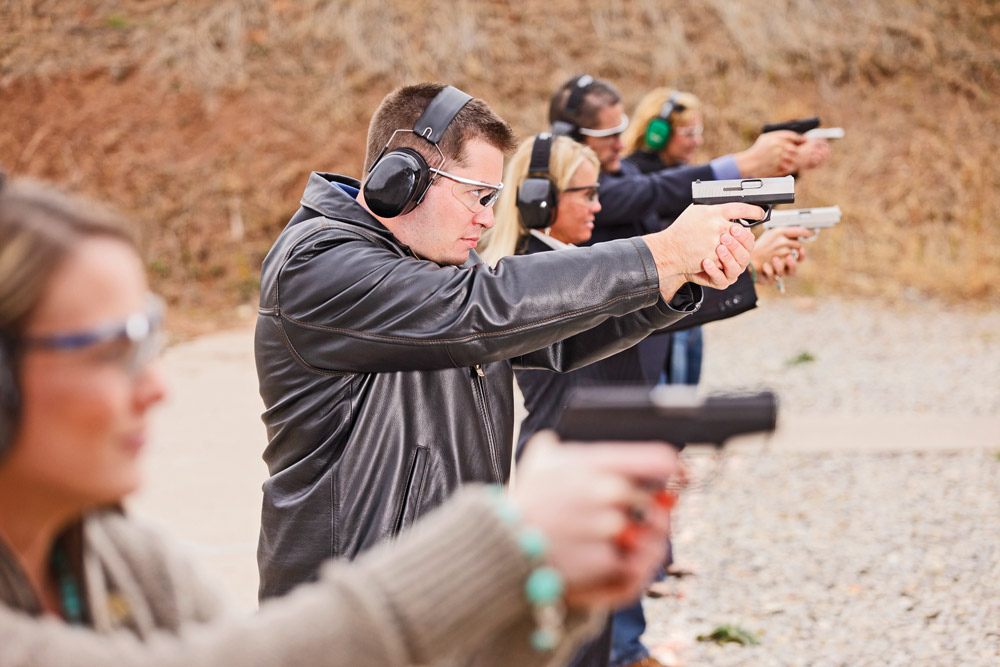
There is a common misunderstanding out there that simply having a gun somehow makes a person less vulnerable to becoming a victim. The fact is, a firearm is simply a tool, therefore its effectiveness is completely relative to the proficiency and skill of its operator. Having your own home shooting range will provide you with an easily accessible place to practice and hone your skills, but only your dedication to learning and practicing these lethal skills are going to make you a better gunfighter.
Unfortunately, there is still no secret pill or magic technique that will make you an instant badass. The only path to becoming proficient at shooting, just like anything else, requires that you first learn proper form and then follow it up with the due diligence of repetition.
LEGAL COMPLIANCE
The prerequisite zoning laws and licensing requirements for building a shooting range on your property can vary greatly. Prior to beginning range construction, or even discharging a firearm for that matter, you should consult with your local zoning authority and sheriff’s office to verify that having a range on your property is not going to break any local, state or federal laws.
“ALTHOUGH THE SPECIFIC DIMENSIONS ARE ULTIMATELY UP TO YOU, I PREFER A RANGE THAT HAS ROOM TO GROW WITH ME OR WITH OTHERS WHO I THINK MAY BE USING MY RANGE IN THE FUTURE.”
Many jurisdictions have laws requiring you to either have a natural or artificial backstop or to have written permission from the landowners adjacent to your intended location for your rounds to impact on their property.
This can be particularly important when you are planning to construct a known-distance (KD) range designed for firing high-powered hunting or sporting rifles with ranges out to the maximum effective range of whichever type of munition you plan to shoot. If the maximum range of that munition could possibly put the round on a neighbor’s property, their consent to your planned range is critical.

Often, there are also noise ordinances that may prevent you from discharging a firearm or limiting the caliber projectile or the type of weapons you are able to discharge at your location. All this information can normally be found with a simple internet search or when you contact the appropriate local authorities.
LOCATION, LOCATION, LOCATION
Every case and location is different but, as a general rule, if you are planning to construct an outdoor shooting range, then you will usually need to have the amount of property and a level of seclusion to avoid infringing on nearby neighbors.
Another factor in site selection is choosing an area that provides an obstacle-free line of sight from the point of discharge to the point of impact, and possibly beyond. In most home range scenarios, this is accomplished by using a backstop that is a physical barrier capable of stopping any projectile you plan to fire on your range.
“WHILE A NATURAL OR ARTIFICIAL BACKSTOP SUCH AS A STEEP HILL OR LARGE BERM ARE IDEAL AREAS TO SET UP A RANGE, THEY ARE NOT ALWAYS PRACTICAL, DEPENDING ON THE TYPE OF TERRAIN AVAILABLE TO YOU.”


While a natural or artificial backstop such as a steep hill or large berm are ideal areas to set up a range, they are not always practical, depending on the type of terrain available to you. You can also build targets that have a bullet catch or an absorption layer integrated into them. I don’t advise using this type of backstop unless you are in a location where a round that missed the target would have a clear path to the ground up to or beyond its maximum range.
I prefer a range site with the terrain needed for a multipurpose range because it will give you the flexibility to do all of your flat range work at the 0-25 meter range and push out to greater distances in order to practice longer range shots.
DETERMINE THE LAYOUT
The way you lay out your range is totally up you. That said, make sure all of the potential angles that a target can be engaged from are either covered by a backstop or that the entire distance your rounds can travel is clear of anyone or anything that you don’t want shot. Again, verify that the land the projectile will traverse is either your own or is covered by a land usage agreement mentioned earlier.

A good way to set up your range is to first channelize the area and establish your left and right firing boundaries. You should then start using visual markers to identify where those areas are, not only for you but for anyone you will allow to use your range. If you are building on heavily wooded terrain, use a highly visible spray paint, such as fluorescent yellow, on trees to mark the left and right limits of the range. Alternatively, you can put painted stakes or poles in the ground if trees are not available.

After you establish the left and right limits, depending on the terrain, you will need to determine the location for the backstops required for all shooting distances. Although the specific dimensions are ultimately up to you, I prefer a range that has room to grow with me or with others who I think may be using my range in the future.
Ideally, you’ll have a relatively flat area that is about 25 meters long and wide enough to offer a clear line of sight view between all of the firing positions and all targets that you set up.
MARKING YOUR RANGE
If you are constructing a multipurpose range, a good way to start is by gridding the first 25 meters from the beginning of the range area (the initial firing line) to the 25-meter point. After establishing where the initial 25-meter corridor is going to be placed, mark the 25-meter line with a brightly colored stake and then use either natural or artificial materials such as railroad ties or fence poles laid along the back edge of the 25-meter line.

Next, starting at this line, measure 25 meters back to the initial firing line (0 meters). I prefer to use stakes placed on each leading edge of the sides of the range to mark incremental lines in reverse order starting from the 25-meter line.

Starting again at the 25-meter line, measure 3 meters toward the initial firing line. Place 2 stakes marking the left and right edges of the 3-meter line. Next, move 2 more meters toward the initial firing line and mark this 5-meter line with two more stakes.
Continue in this fashion to mark off the 7-, 10-, 12- and 15-meter lines. At this point the initial flat range is gridded out. If you so desire, you can mark lanes to help prevent shooters from crossing in front of each other if you ever get to a level of proficiency where you are practicing shooting-and-moving techniques.
TARGETS
It is smart to make targets that you can move at will from one location to another. I use 2-by-4s to make simple and lightweight cross-shaped target bases. Then I attach a vertical target post to the center with either a military e-type silhouette or a piece of cardboard screwed along the edge of the top portion of the 2-by-4 and then I staple paper targets to the cardboard.
“THE FACT IS, A FIREARM IS SIMPLY A TOOL, THEREFORE ITS EFFECTIVENESS IS COMPLETELY RELATIVE TO THE PROFICIENCY AND SKILL OF ITS OPERATOR.”
Paper targets can be found everywhere guns are sold and in many styles. I prefer a simple bull’s-eye or grid-style target to get my weapon dialed in and for longer-range shots if I am not using feedback targets such as steel plates to let me know my shot was on target.

For close-in standup work firing from the 3-, 5-, 7-, 9-, 12- or 15-meter lines, I prefer to use 3-, 6- and 9-inch round black dots. I use a template I made to spray paint the dots onto white butcher block paper sheets and then staple them onto my targets. I find that using this method allows me the opportunity to tighten my shot group, and it is considerably cheaper than buying commercially made targets.

When I am doing kinetic work such as shooting and moving, or when I want to test how much my practice has paid off, I prefer the lifelike paper targets that you can buy that give options for the person on paper to be holding a gun, a badge or even offer only a partial shot because they’re behind a hostage. When it comes to targets, the sky is the limit with tin cans, balloons, steel targets and even fireworks or fruit being options.

Additionally, I like to set aside a lane for obstacles and for taking shots from covered and/or concealed positions such as a window or the corner of a hallway or building. These shots require you to practice specific techniques that would be hard to recreate without building physical training aids.

Another useful training aid to build is a small mock wall and door frame with a door attached so that you can safely practice entering a room from the doorway and engaging targets inside the “room.” It’s even more helpful if you practice from both the open in and open out sides of the door, as different movements are required for each.

Finally, whenever possible, consider either constructing a small and yet physically demanding obstacle course that is behind the initial firing line of the range and that challenges both your cardiovascular system and your upper-body strength. This will allow you to add a new element to your firearm training regimen.
It offers you the chance to identify and make adjustments for the sometimes extreme change in difficulty required to maintain accuracy when you add the element of physical stress or exhaustion, and it also helps to re-create a level of stress similar to what you may be under if you ever need to use a firearm in a real-world emergency scenario.
RANGE COMFORT
If you want to be able to shoot comfortably on your range during inclement weather, then consider constructing a firing platform with a roof. This will keep you off the wet or snow-covered ground and prevent precipitation or intense sunshine from keeping you off the range.
“I PREFER A SIMPLE BULL’S-EYE OR GRID-STYLE TARGET TO GET MY WEAPON DIALED IN AND FOR LONGER-RANGE SHOTS IF I AM NOT USING FEEDBACK TARGETS SUCH AS STEEL PLATES TO LET ME KNOW MY SHOT WAS ON TARGET.”

Some other amenities you can add to your range are tables for loading that offer a backstop and side rails to keep rounds from rolling off the table and a shooting table that is built from heavy and stable materials and will offer a good place to zero a weapon when precision accuracy is essential.
BE SAFE, TRAIN HARD AND HAVE FUN!
Having your own range to shoot on can offer you the ability to train with your firearms and others in your group when and how you want. You can construct it to be as inexpensive or as extravagant as you choose to make it. The only limitations are your imagination and your wallet.
A range like this is not only an outstanding training aid, but it can also be an extremely fun and entertaining experience that the entire family can enjoy. Just keep in mind that as fun as it may be, you should never forget that you are dealing with deadly weapons, so it is imperative that you always practice safety and use extreme caution.
Editor’s note: A version of this article first appeared in the October, 2019 print issue of American Survival Guide.