

Not many things compare to the feelings you get from sitting around a nice warm fire. The crackling of the wood, the smell of the smoke and the sight of the flames tickling the air have the ability to make time seemingly stand still. Possessing the abilities to start and maintain a fire is a critical skill to know for everyone spending time in the outdoors. Whether it’s for a social gathering around a campfire, cooking a meal, a deterrent for animals, signaling for rescue or for keeping warm, having a fire truly is a game- changer.
There are many “rules of 3” in outdoor survival. One of them states that the body can only survive roughly three hours without warmth. Fire itself has rules of 3 to follow. In order to ignite and maintain a fire you need three elements; Heat-Fuel-Oxygen. This is known as the fire pyramid. Remove any of these three and the fire will either not ignite or will extinguish itself once lit. In addition, you will need to understand the Tinder-Kindling-Fuel rule of three. Let me put these rules into a real-life situation and expand upon each rule.
On a recent camping trip, I was the last to show up to the campground. It was around 9 p.m. when I arrived, only to find everyone sitting around the fire pit staring at the scorched, unlit logs. Apparently nobody could understand why the eight-inch diameter logs wouldn’t ignite, even when using a MAPP gas torch. Obviously there was plenty of heat from the torch, plenty of fuel available and no shortage of oxygen.
Still no fire. I laughed to myself and started to properly prepare the fire site. About 10 minutes after I arrived, the fire was roaring and my fellow campers were amazed at the ease with which I was able to do so.
The only thing I did differently was to gather tinder and process some of the logs into smaller kindling sizes to get the fire started. Simply by following the rules, it was as easy as 1-2-3.

There are many styles of fires you can make. Some are designed for maximum heat output, while a different log configuration may better for signaling. There are also many different types of fire configurations for cooking and smoking food. Educate yourself and learn as many of these as you can. For the purpose of this article, I’ve chosen to highlight various methods of how to start a fire and the types of tinder available, so let’s look at a few of them.
There are dozens, if not hundreds, of methods to get the spark or heat needed to ignite a fire. Each method will fall into one of the following categories.

FRICTION – There’s nothing more manly than starting a fire by friction. Bow drills, hand drills, fire plough and pump drill, to name a few.
SUN – Using the sun’s rays and heat —using methods like magnifying glasses, camera lenses, reflectors and even ice can ignite tinder into flame.
ELECTRICAL – Batteries of all sizes can be used to short circuit and create a powerful, high heat spark. A 9V battery and steel wool work really well to demonstrate this method.
CHEMICAL – Properly mixing Potassium Permanganate and Glycerin will cause a thermal reaction guaranteed to light almost any dry tinder. Other mixtures like Chlorine Tablets and Brake Fluid have proven effective as well. These methods, however, are some of the more dangerous and not recommended as your primary means.
COMPRESSED AIR – Rapidly compressing air generates enough heat to ignite char cloth. Want to challenge yourself? Try getting char cloth to ignite using a fire piston. Take it to the next level and try to make a fire piston that works.
STEEL STRIKERS – Flint and Steel, Magnesium, Ferrocerium and Misch metal rods all utilize high heat sparks thrown into a tinder bundle to ignite a flame. Even the flint wheel from an empty Zippo or Bic lighter throws sparks to ignite tinder.
MAN-MADE COMMERCIAL – Lighters and matches. With so many ways to start a fire, why do so many fail to get one lit? The problem may be that you are not following the second rule of three, tinder-kindling-fuel.
Gather all of your materials first before attempting to start your fire. There’s nothing worse than finally getting a flame only to have it go out because of poor preparation. You build a fire in layers. Different than building a house with the foundation being rock solid, with fire you start with the smallest, weakest structure. Tinder is your foundation to start with. Tinder is the materials to catch your spark or ember so it needs to be dry and as small in diameter as possible. Tinder can be from natural materials or from one of the many man-made forms available. An ideal tinder will take a spark or ember easily, burst into a hot flame and burn long enough for you to start adding larger kindling to it.
Many man-made tinders will burn longer in a smaller form, while you may create a larger tinder bundle of natural resources, such as dry grasses. Once the tinder bundle has burst into flames, start adding slightly larger tinder/small kindling. Imagine adding toothpicks, then pencils, then to something the thickness of a broom handle. A good rule when gathering your wood is think of Rice Krispies; Snap-Crackle-Pop.
“With so many ways to start a fire, why do so many fail to get one lit? The problem may be that you are not following the second rule of three, tinder-kindling-fuel.”
When you bend the twigs you should hear them crackle and pop and then snap in half. If the wood continues to bend over on itself, it is too wet or green to be used for starting a fire. Only after you have a nice, hot fire going should you start adding the fuel. Medium-sized logs or larger pieces split down are ideal. If your fuel logs are too big they will not burn as well and it also requires more energy from you to process such large pieces. As you continue to build up in size make sure to keep the oxygen moving between the layers.

Stockpile the fuel needed for the remainder of the night and always have three times more than you think you’ll need. A helpful tip is to gather the fuel wood away from the campsite, so if you didn’t ration correctly and need to gather more during the night it will be the materials closest to your camp.
Carrying a small fire kit greatly increases your chances of starting a fire quickly. Everyone’s fire kits will be slightly different based on what preferred methods that individual feels comfortable with. These kits can be store bought, but are best built custom to your preferences.
My personal tin kit shown contains four extra-large cotton balls coated with Vaseline, A hank of jute twine, a BSA Hot Spark with striker, S.O.L. Fire Lite™ sparker and mini BIC lighter. 
My fire kit is carried in my belt pouch and is always on me when I’m in the woods. In addition to the small tin fire kit I also have a backup BSA Hot Spark and S.O.L. Tinder-Quik in my neck knife, my primary belt knife has a ferro rod and my small pocket sheath carries a ferro rod.
PUTTING IT ALL TOGETHER
Now that you have a good understanding of the makings of a fire let’s put it all together.
STEP 1 – LOCATION: Find a good place for your fire and clear it of any loose debris.
STEP 2 – PREPARATION: Gather all the necessary materials needed. Remember tinder, various sizes of kindling and fuel.
STEP 3 – IGNITION: Take your time to better your chances of success. Allow the fire to breath and work with it, not against it.
STEP 4 – FEED THE BEAST: Gradually add larger material to the fire and always allow for proper air flow to keep it burning.
STEP 5 – EXTINGUISHING: Make sure that your fire is properly extinguished before leaving your site.
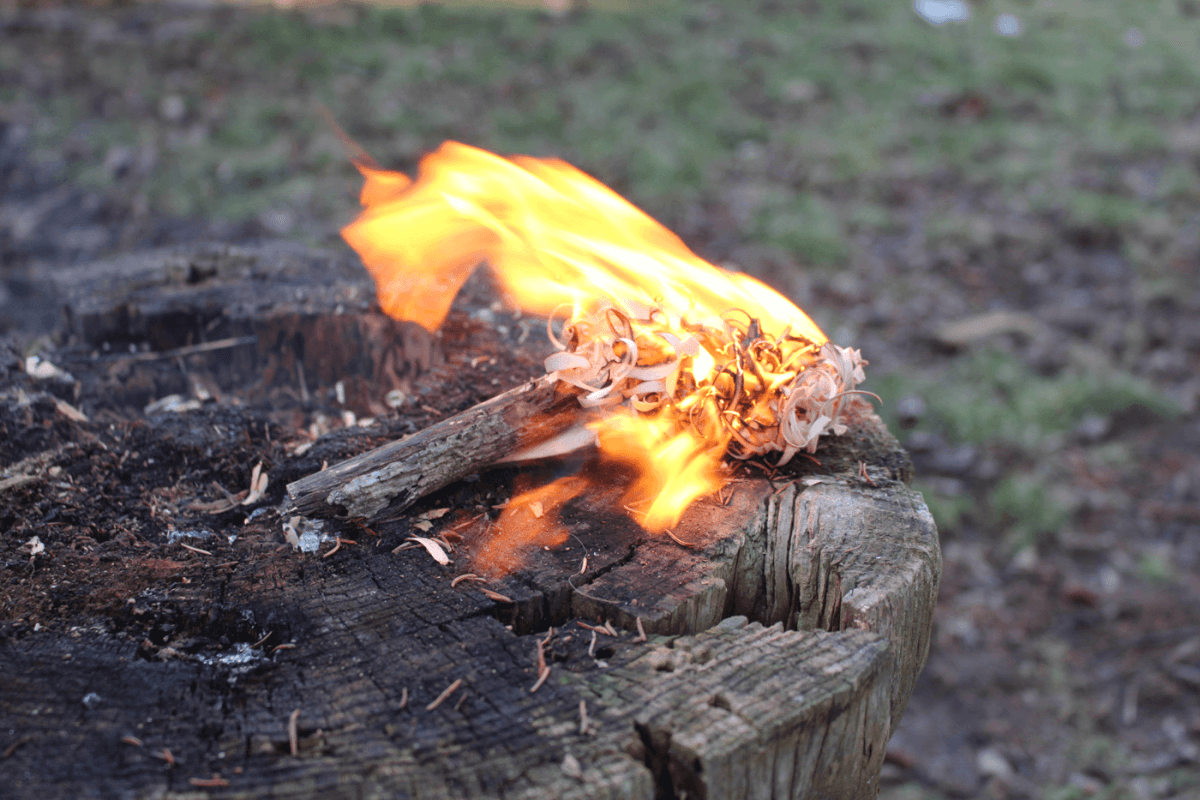
Tinder is critical to getting a fire started. Natural tinder can be found everywhere and even wet wood can be cut into to create a feather stick capable of taking a spark. Carrying a few Vaseline-coated cotton balls assure that you have tinder always ready.
Even if it gets wet you can squeeze out the water and it will take a spark and burn for a while. Shown here are a few examples including S.O.L. Tinder-Quik, Vaseline-cotton balls, shredded jute twine, feather stick and natural dried grasses. 
Experiment with various methods to find out what gives you the best success rate and always have it with you when you venture out.
LET’S BE PRACTICAL
I have started many fires from all of the various methods and have challenged myself to find as many ways possible to continue to expand my fire-making resume. I am also very practical when it comes to starting a fire.
I think everyone should know how to start a fire by friction, just for chance that you’re out and have no other sources on you to start a fire, but it is the most practical? With all the fire-starting methods I mentioned earlier you might be wondering what is the preferred method I use. What tried-and-true method would I trust my life to in an emergency? What method can I count on to quickly and repeatedly give me fire?

What happens if I lose the function of one arm? Do I want to take up pack space and add weight by carrying a lot of commercial-made tinder? What if the wood is too saturated to even consider a friction fire? What can I carry on my person, at all times, to assure success? Personally I never venture out without at least three fire sources (another rule of three). I am proficient and rely primarily on my ferro rods. I keep one on my belt knife, one in my pocket sheath and another in my pack. In addition, I’ve added one BSA Hot Spark in both by neck knife and in my fire kit. I also carry a petroleum-based lip balm and a cotton ball to use as quick tinder on the rare chance that I cannot find try natural tinder to take the spark. Ferro Rods shower sparks upwards to 5,000-degrees Fahrenheit. They work in all conditions and are good for thousands of strikes.

ratio, making spark-based fire starting easier.
I believe that you should become proficient with one method and carry multiple items that utilize that method to assure you are never left in the cold. At the end of the day I always carry with me the trusty BIC lighter. After all, it’s much easier to light my pipe or cigars with a BIC.

Editor’s note: A version of this article first appeared in the How-To print issue of American Survival Guide.